How to: Datsun Roadster Brake Upgrade using Volvo Calipers
In our last tech article for the Roadster, I showed you how to rebuild the stock front calipers. Unfortunately, for some reason, the brakes STILL didn’t function properly. I couldn’t get a good bleed on them, and despite a lack of obvious leaks, it seemed I couldn’t get any good pedal pressure. I’m pretty sure the cylinders were pitted worse than what I could repair.
SO, back to the drawing board. After considering a lot of options, I decided that the best way to address this problem was to completely replace the entire braking system, from the master cylinder to the calipers.
Now, the price of new new pistons for each caliper (four in total) is cost-prohibitive in my opinion. There had to be a swap that would work.
First, I went to some of the other cars we have here… 300ZX calipers? Awesome, but too big. 240sx calipers? Also a nice option, but would require spacing out the front wheels too much. Back to the internet, where I found a swap that had been done by several other Roadster owners, and seemed to work well.
Now is a good time to say, I did NOT pioneer this swap. My good friends over at 311s.org actually documented it first, but it’s likely that it was developed by some guy with access to a junkyard, lots of tools, and lots of time… Someone who doesn’t use a computer…
Anyhow, the decision was made to convert from the old-style two-piston Datsun Roadster calipers to a more modern four-piston design.
This would serve multiple purposes:
1) Easier maintenance.
2) Increased braking performance.
3) Longer brake life.
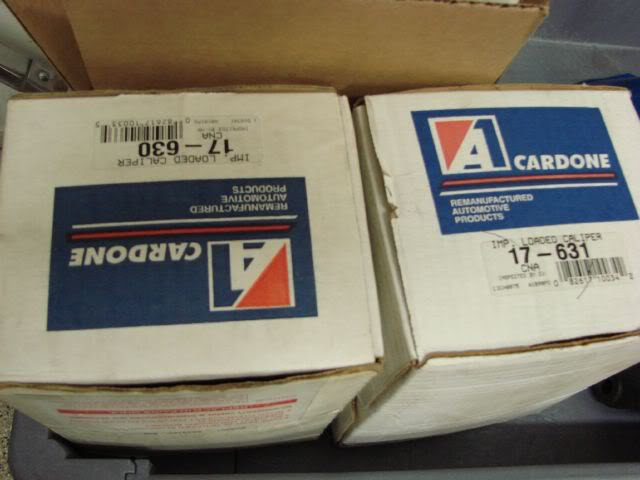
The calipers from a 1975 Volvo 240 happen to fit without too much modification, and will be the centerpieces of our conversion. I purchased mine from RockAuto.com, selecting A-1 Cardone Part #17-630 (left) and Part #17-631 (right). You want the Girling style, for a non-vented (solid) rotor. I believe the pair cost me $130.
Next up, I replaced the master cylinder. The one on the car had been rebuilt by me during the front caliper rehabilitation, but I’m not convinced it wasn’t part of the problem, so out with the old, and in with the new. Besides, the new 4-piston calipers would need a bigger master cylinder, so a unit from a Datsun 510 was sourced – our local AutoZone had one with no reservoirs for $38. Since we’d have to use the Roadster reservoirs anyway (to keep the height low enough to clear the hood), we grabbed up that deal.
Now, the new master cylinder has metric ports, but the Roadster has SAE brake lines. However, adapters are easy to find. You’ll want something to transition 10 mm X 1.0 male threads on one end and SAE 3/16-24 female threads on the other. Your local NAPA may have them listed as Weather Head part number 1443. Pegasus Racing also has these.
You’re going to need a longer set of caliper mounting bolts. I went to Ace Hardware and bought some Grade 8 1/2″ -20 x 1-1/2″ bolts. You can take one of your caliper mount bolts as an example, and just purchase four that are 1/2″ longer.
While I was at it, I also purchased new brake hoses and a big bottle of brake fluid.
OK, let’s get started! I recommend you have a good supply of latex gloves handy, as well as lots of brake cleaner and paper towels. Clean EVERYTHING before you reassemble it. Also, I keep a wire brush handy to clean bolt threads, and a tube of anti-seize for the threads.
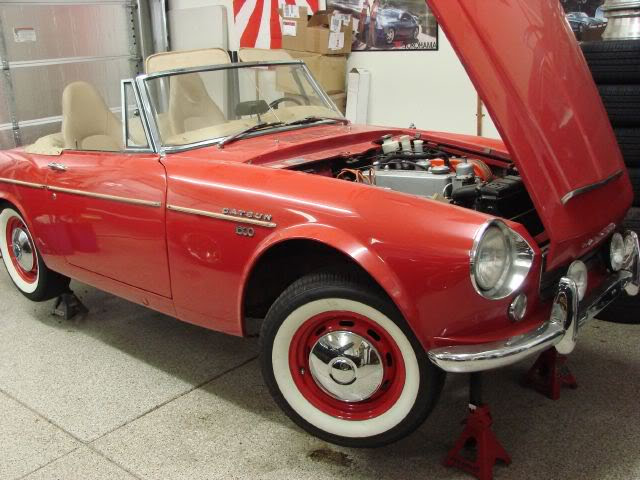
I like to work in an area with lots of light, and the Nissan / Datsun theme kinda keeps me motivated (and makes for good article pictures).
Get your Roadster up off the ground on some good sturdy jackstands. Even a light car like the 311 can maim or kill you if it falls. Don’t be sloppy, do it right.
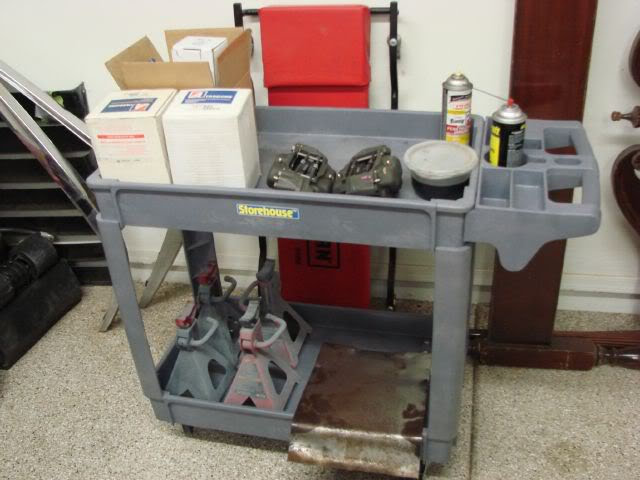
My wife picked this up for us to use in the garage, and I have to say , it makes ALL the difference! Everything is handy and you can wheel it around as you progress through the project. When you’re done, you wheel it back to the toolbox, replace your tools, throw away any garbage, and clean it off with some Simple Green and the hose. Keeps your garage much neater.
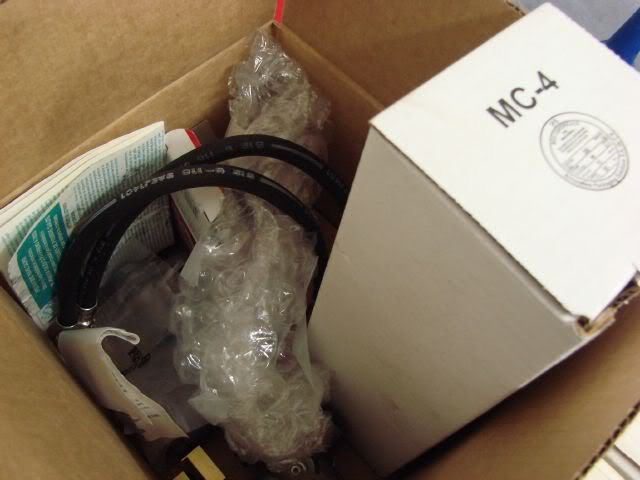
Parts, ready to go:
And it never hurts to have a manual!
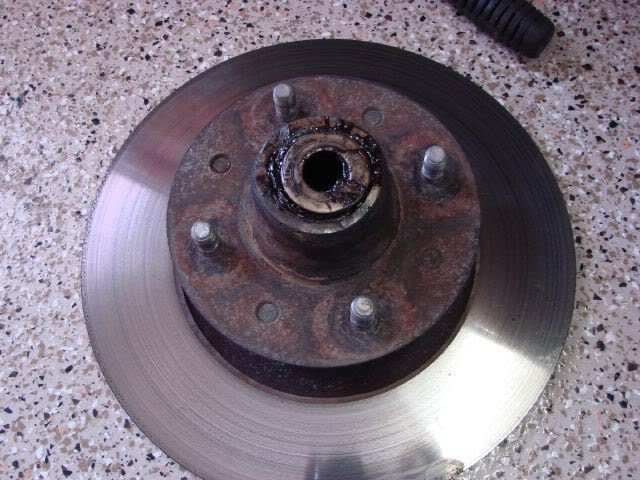
Start by removing the hubcap and wheel, as well as the center dust cap from the hub. Then, remove the cotter pin from the spindle nut and remove that nut. Pull the entire hub / rotor assembly off, being careful not to drop the outer bearing and washer. Here’s what it looks like off the car:
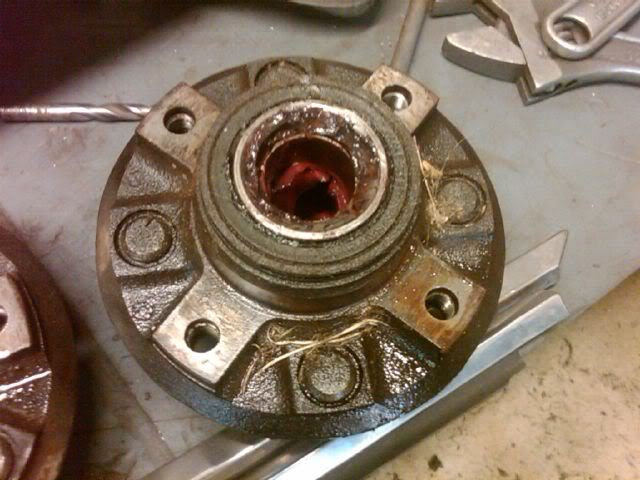
Remove the hub from the rotor. This will take some time, but be patient. The 4 bolts that hold them together are easily removed with an impact wrench, but the hub and rotor assembly are an interference fit, and may be snug. Use lots of penetrating oil, place the hub in a vice, and gently tap the rotor away until you get some seperation. Then you can start going all around it with a small wedge-shaped tool and a hammer to split the two apart. Work all the way around, so you don’t get the parts crooked – You want it to come straight off.
Now, clean it thoroughly! A parts washer works great, or you can submerge the whole assembly in Purple Power (my preference), or use gasoline… Whatever you prefer. Just get ALL the old grease and gunk out. While you’re working on those parts, you can clean up the spindle, too. Make sure you take a scotchbrite pad to the hub / rotor interface, since it’s likely got some corrosion. You want the two surfaces to be shiny before reassembly.
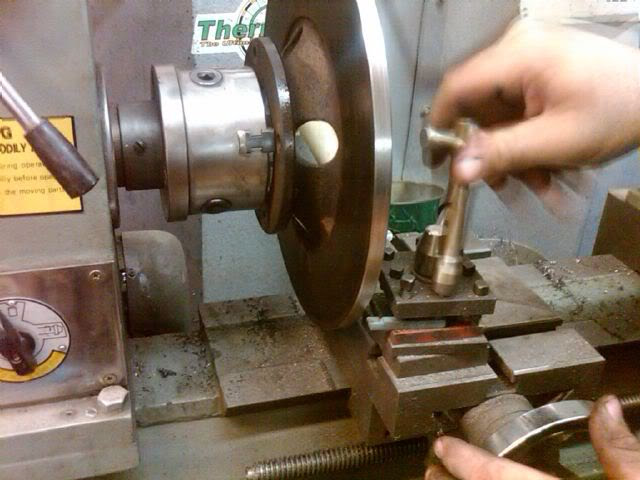
Now, we need to make sure the rotor will fit. The Volvo caliper will not clear the Roadster rotor in its stock configuration. However, it’s not enough of an interference to warrant making a caliper spacer, either.
We’re going to actually machine the rotor DOWN to a smaller overall diameter. I used a measurement of 11″, which means taking 0.18″ off the diameter. Remember, 0.18″ means 0.09″ off the edge. Just tell your machinist you want the rotor to be 11″ in diameter. Fortunately, Jason (rotorimp) has a lathe, and we could do it at his house. Here’s the rotor on a lathe getting cut down:
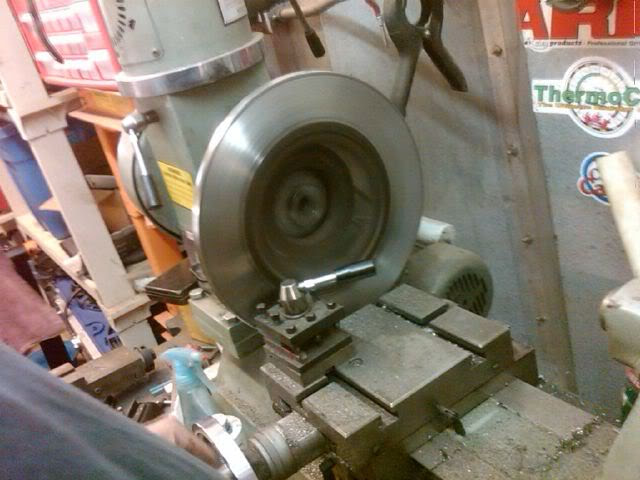
Now would be a good time to resurface the rotor as well, which is an easy task for the machinist. Once the rotors are done, we need to reassemble the hub and rotor.
Lay on a thin coat of grease at the interface, and reassemble, being sure to line up the bolt holes perfectly, and tightening the bolts ONE TURN AT A TIME. This will draw the parts together without getting them crooked.
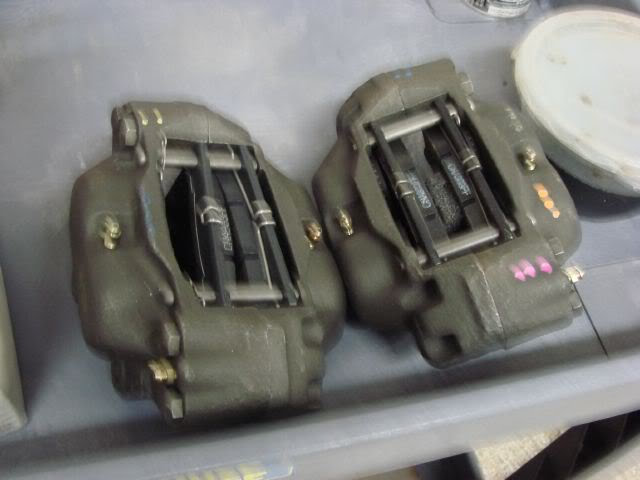
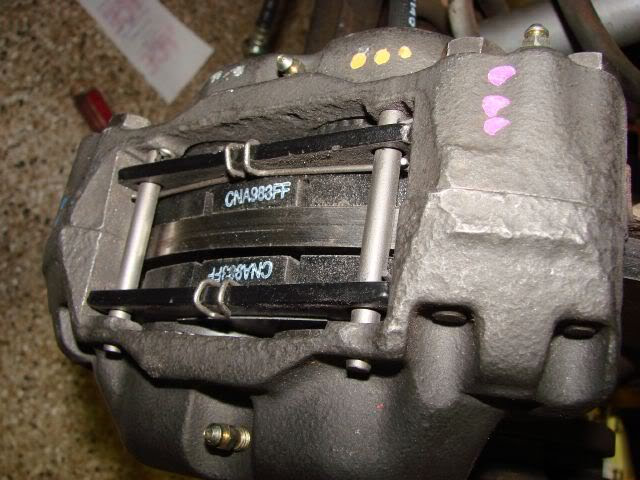
Let’s move on to the good stuff – Pull out your new calipers. They should look like this:
Look familiar? There’s not much difference between these and the 90-96 300ZX calipers we all love so much.
The original caliper mounting bolts won’t fit through the Volvo caliper holes.
However, they don’t require much modification – Open them up with a 1/2″ drill bit, or use a carbide grinder bit like I did. Be sure to clean up the caliper of any metal shavings.
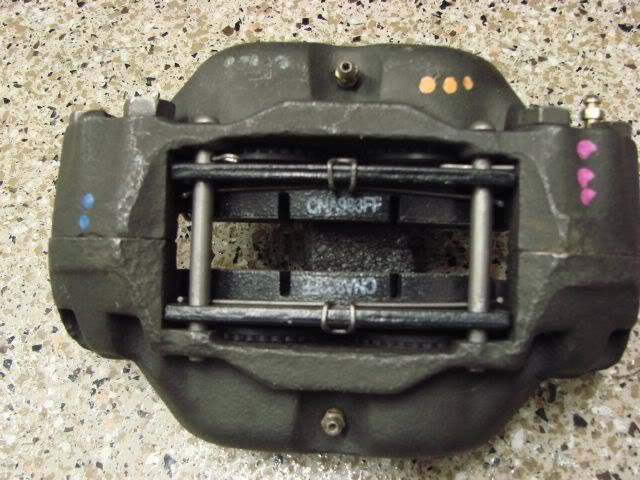
Now, let’s look at how we’re going to make the hydraulic connections. Take a close look at the caliper:
See the dual ports? Well, we don’t have two brake lines to go into those ports, we only have one! Now, some guys have bent their own brake lines, using a splitter, but there’s an easier way.
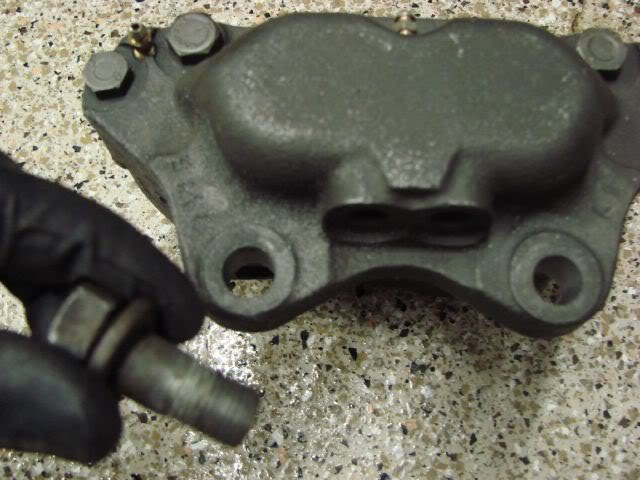
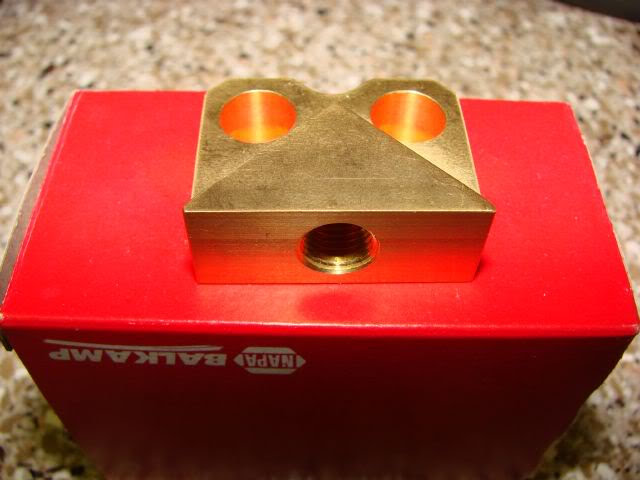
I chose to plumb the brake line to the caliper with a manifold that bolts to the caliper. The manifold bolts directly to the caliper with 10mm x 1.0 banjo bolts and 10mm crush washers on the top and bottom of the manifold.
You can purchase the manifolds directly from Breck Meyer. Currently he sells them for $50.00 a set including shipping. His email address is breck1969@yahoo.com and he accepts PayPal.
Here’s a couple pictures of the hardware needed:
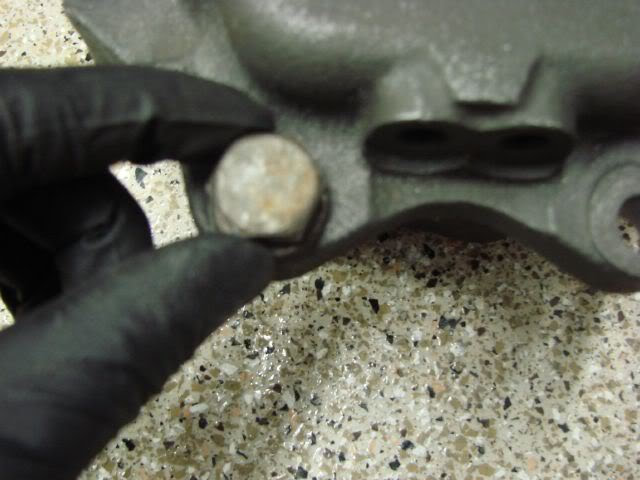
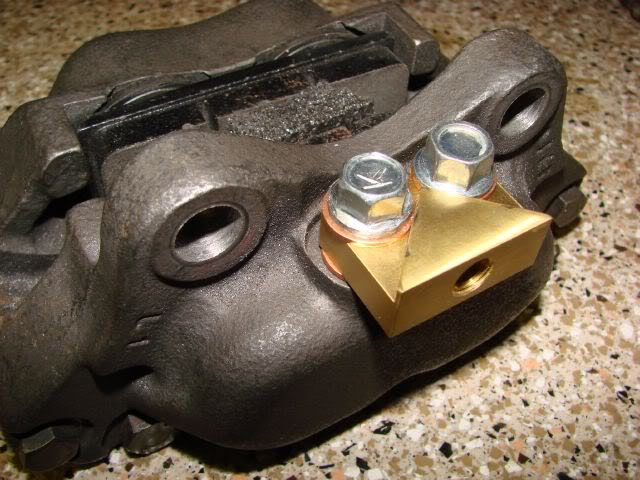
I recommend securing the caliper to something sturdy to torque the banjo bolts in place. Don’t forget to use a copper washer between the manifold and caliper, and one for each banjo bolt. I used a lug wrench between the caliper channel to hold it steady while I torqued the banjo bolts. Hard to describe here, but if you grasp the lug wrench, and your torque wrench and squeeze them parallel to each other, you can really get some good tightening going. Once they line up, ratchet back a couple clicks and squeeze again. Simple and effective.
Here’s what it looks like all assembled:
Now, attach your brake line. I used TWO 10mm copper gaskets to ensure a good seal, as the OEM line fitting bottoms out in the brass manifold before giving a good tight seal.
Re-grease your hub and bearings. I use Mobil 1 full-synthetic grease. A butter knife is helpful for packing grease into the hub. Make sure it’s full, with no air pockets, and just enough of an opening for the spindle to fit through. Reassemble the hub and rotor assembly onto the spindle and tighten the castle nut, and finish it off with a new cotter pin. Clean up your dust cap and reinstall it as well.
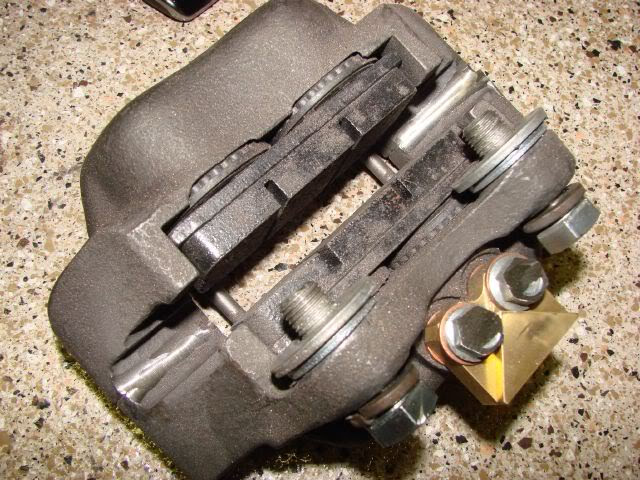
Time to bolt up your new calipers to the spindle. Do a quick test-fit to see how the pads (fully retracted) are centered on the rotor. You want the rotor directly in the center. This may require a couple washers (shims) between the caliper and spindle, where the caliper bolts up. I used two fairly thick washers for each bolt to get it centered like this:
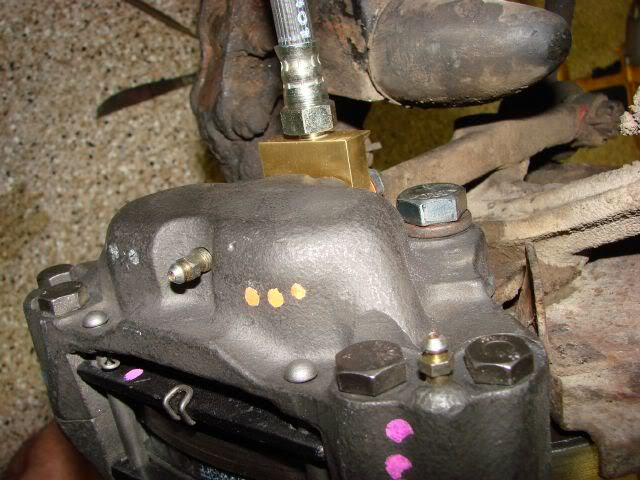
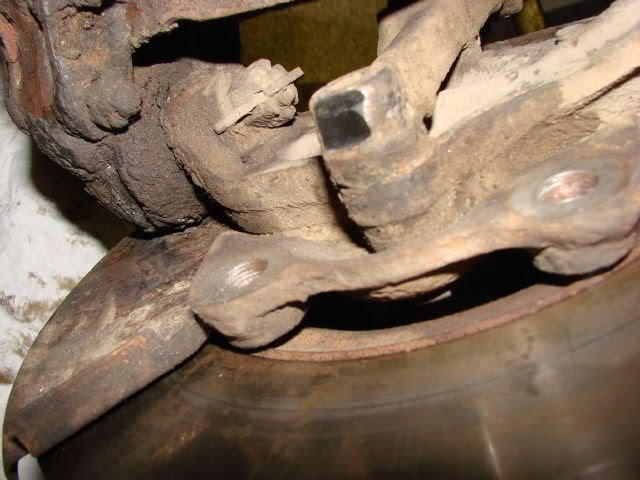
Now, you’ll want to take a look at the back of your assembly. My banjo bolts were hitting the steering knuckle, and yours will too. Not to worry – I ground down the tops of the banjo bolts with a grinder (they’re plenty tall) and I also ground a little off the back of the steering knuckle where the banjo bolts were hitting. Here’s what it looks like:
You can see the shiny area where I took the grinder to it. A close fit is OK, but you don’t want your banjo bolts touching the knuckle, or your calipers won’t bolt up straight. I took a little off at a time until I could slide a sheet of paper between the banjo bolt heads and the steering knuckle. This will take several tries, installing and removing and grinding and re-installing. Be patient and get it right.
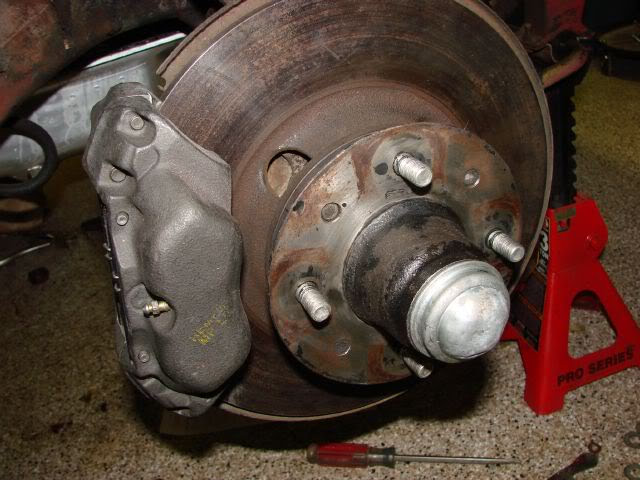
There you can see the new Volvo calipers all bolted up and ready to rock. Re-connect your hard brake line to your new brake hoses and get ready to bleed those brakes.
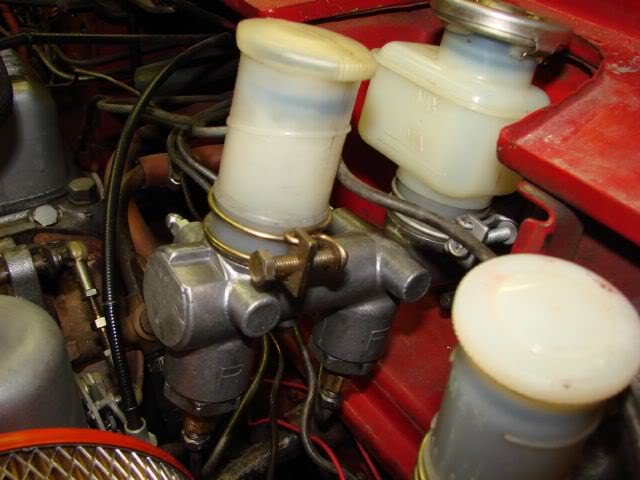
Here’s the brake master cylinder installed. I swapped the Roadster brake reservoirs onto the 510 master and bench-bled it on the car before connecting the adapters and reattaching the hard brake lines.
NOTE: The actuator rod for the 510 master cylinder is shorter, and wouldn’t give me a full pedal stroke. I remedied this by marking where the clevis pin SHOULD be attached to the pedal assembly, removing the brake pedal and drilling a new hole. After reassembly, the brake pedal lays even with the clutch and throttle pedals almost perfectly, and we still have full pedal stroke.
Fill your reservoirs and bleed your brakes. The Volvo calipers have 3 bleeders per caliper, and are simply to get the air out of the cylinders. Finish off with the bleeder at the top of the caliper.
This is a good time to check for leaks. I had to re-torque one banjo bolt connection, and once you have bled the brakes, check for good pad-to-rotor alignment. If you did everything right, put the wheels on and test out your new brakes. Be careful, as you’ll probably need to re-bleed them after a short drive.
You now have a modern brake system that’s easy to maintain and should increase your little Roadster’s braking performance.
Total cost: Less than $250.
Total time: Seven hours.
Happy motoring!
NICOclub is back again with Carlisle Events to host our 18th annual NICOFest Carlisle AutoX…
Kraft Auctions Offers Fans a Chance to Own a Piece of Datsun Racing History
We built Datsun Ranch in 2014, and it was the culmination of a lot of…
Since it's not just Datsuns that are vintage anymore ("classic Nissan" still sounds weird, right?),…
Let's talk about big brake kits for a bit. For the purposes of this article,…
What do these terms mean? Pulsed Secondary Air Injection (PAIR) Valve: The PAIR valve sends…