Cooling panels redirect airflow that would normally escape into the engine bay through the radiator fins thereby increasing cooling efficiency noticeably. This piece of metal/plastic/fiberglass can cost up to $100 online, but why pay that when you can build your own?
NOTE: This project was done on an S13, but any cars that needs cooling improvement would benefit from this modification!
Difficulty: ***
Time: 2.5+ hours
Cost: maybe free
Materials:
Template
.032 gauge sheet aluminum, fiberglass, carbon fiber whatever you want
2×4 pieces of wood in appropriate length
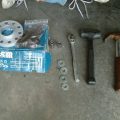
Tools:
Saw suitable for cutting the pattern out of aluminum
Mallet for helping you bend the aluminum
Power drill and metal bits
Files
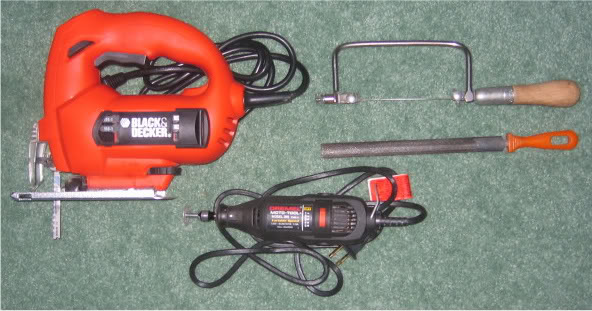
That huge file is from the 99 cent store. I used it to file down any major imperfections. Then I used my dad’s diamond embedded file to do the fine details to get it just right.
Procedure:
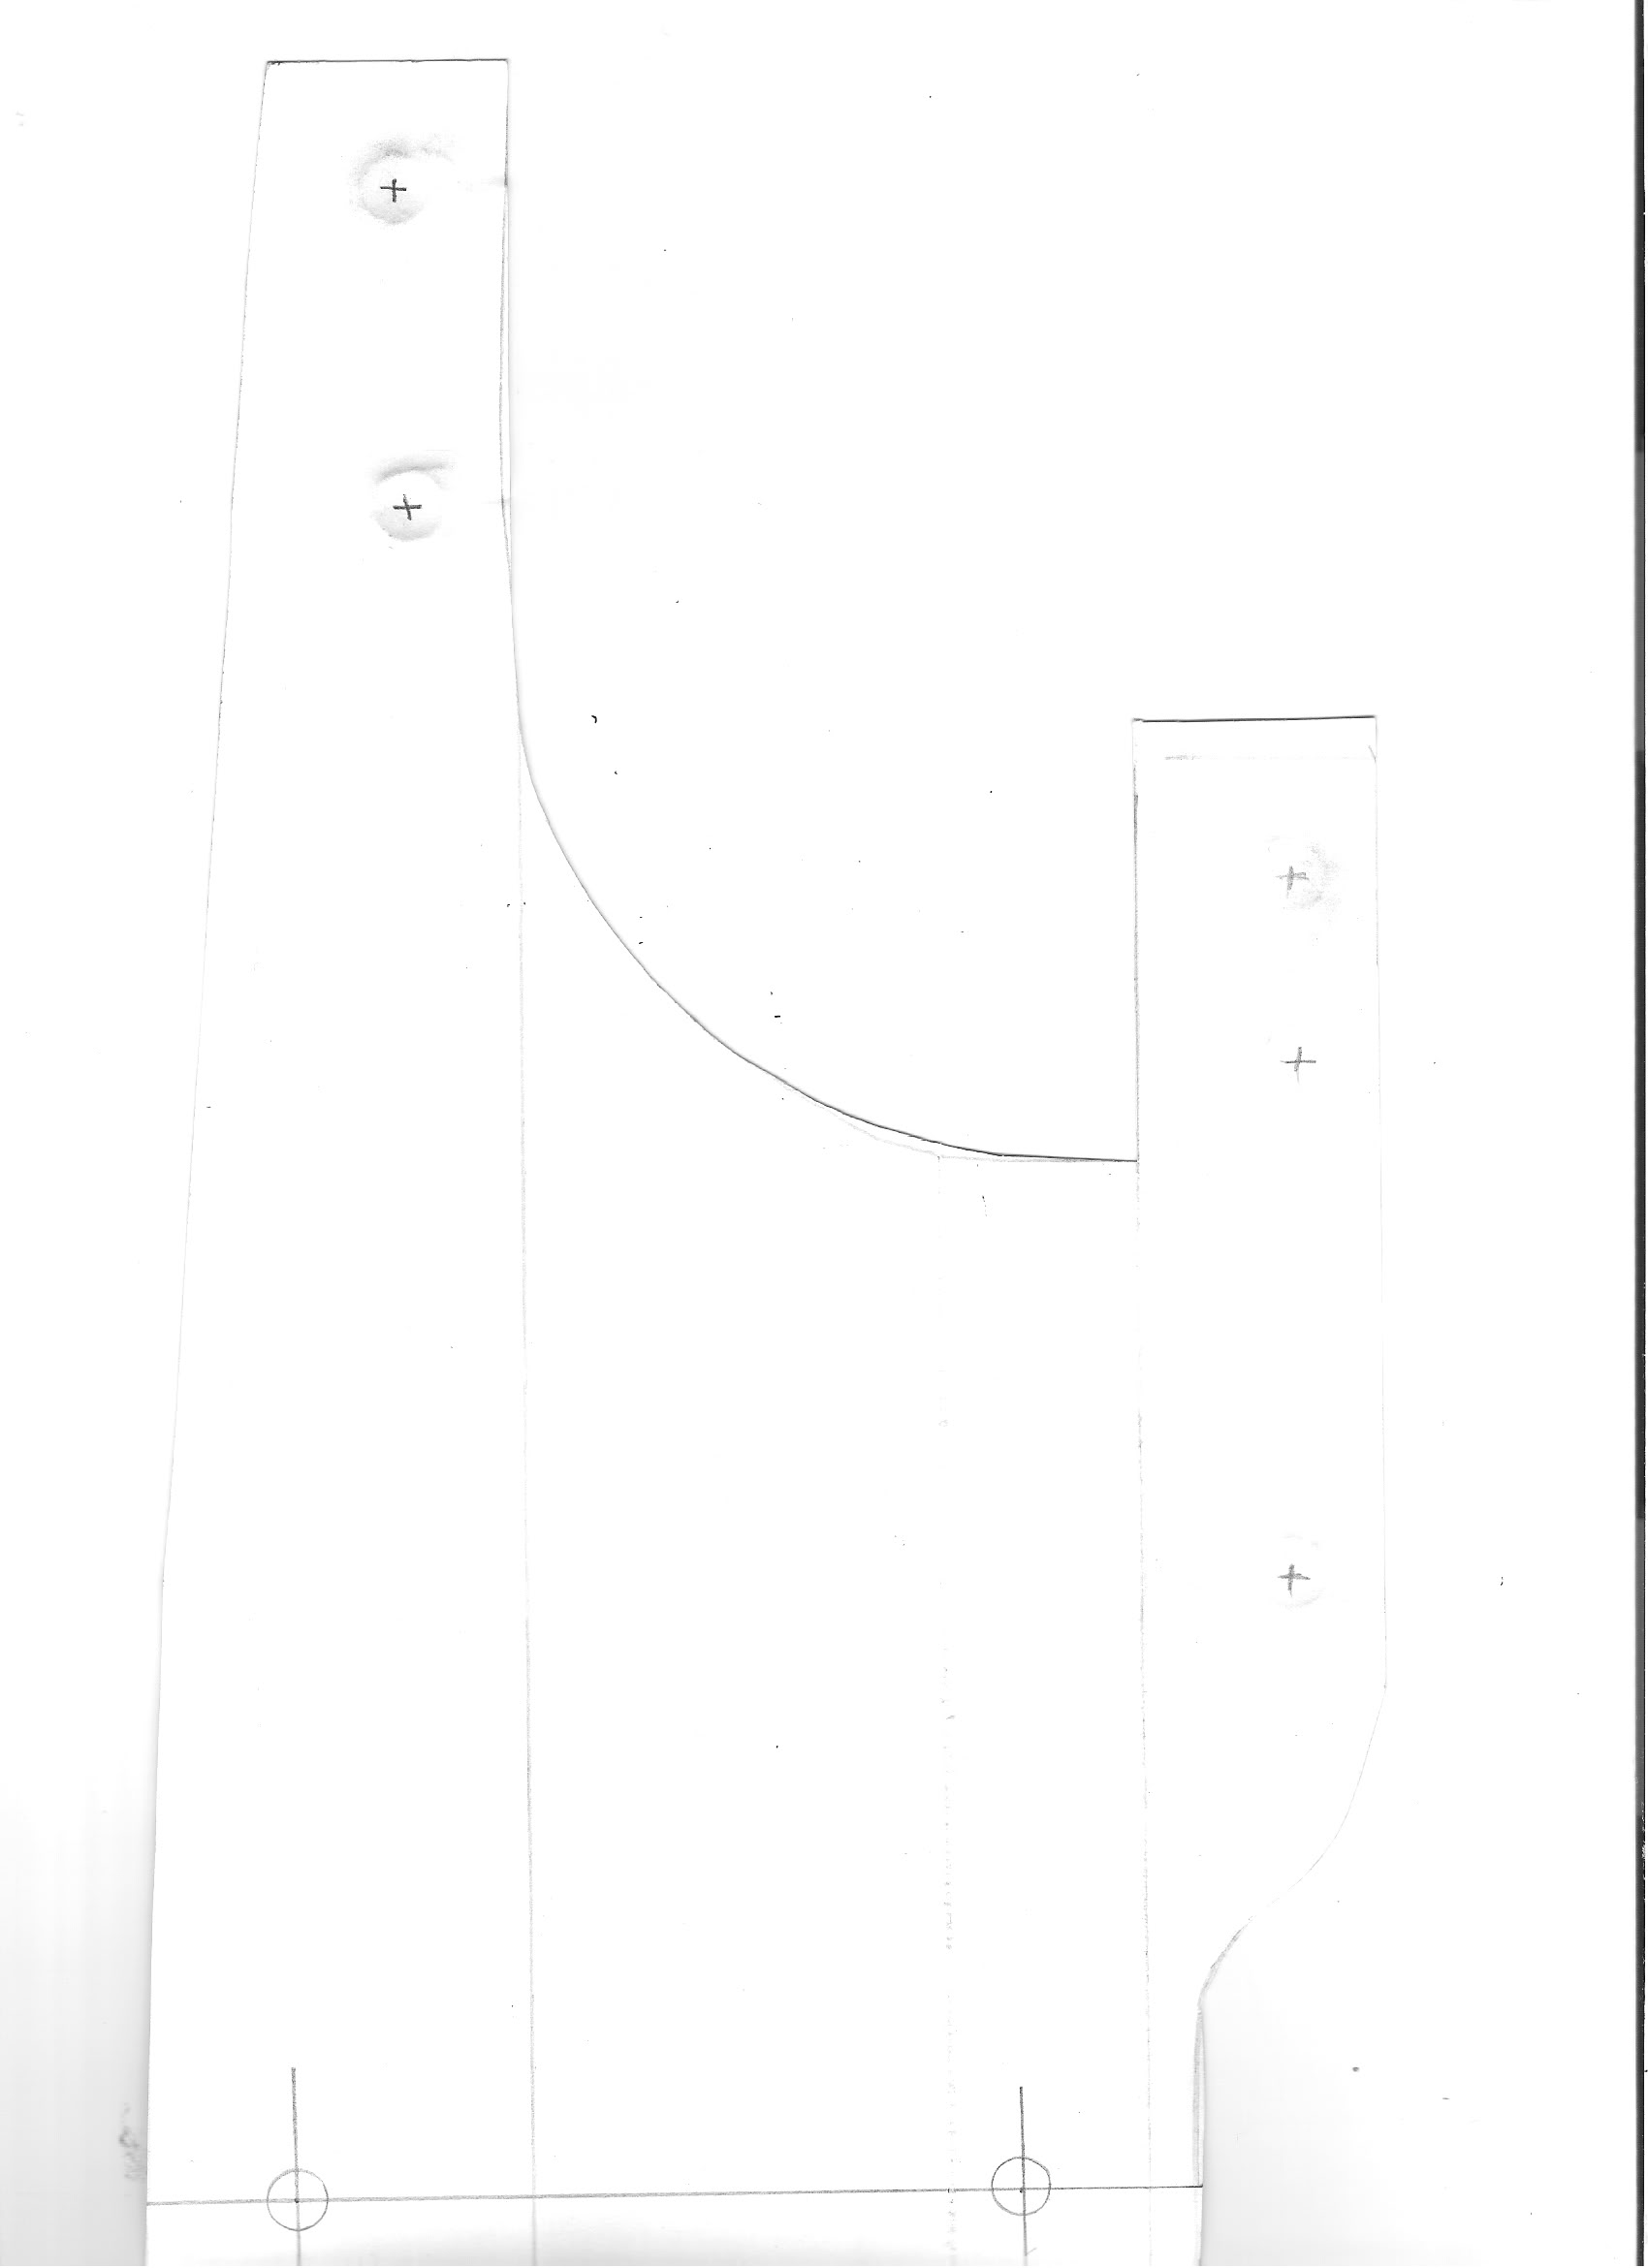
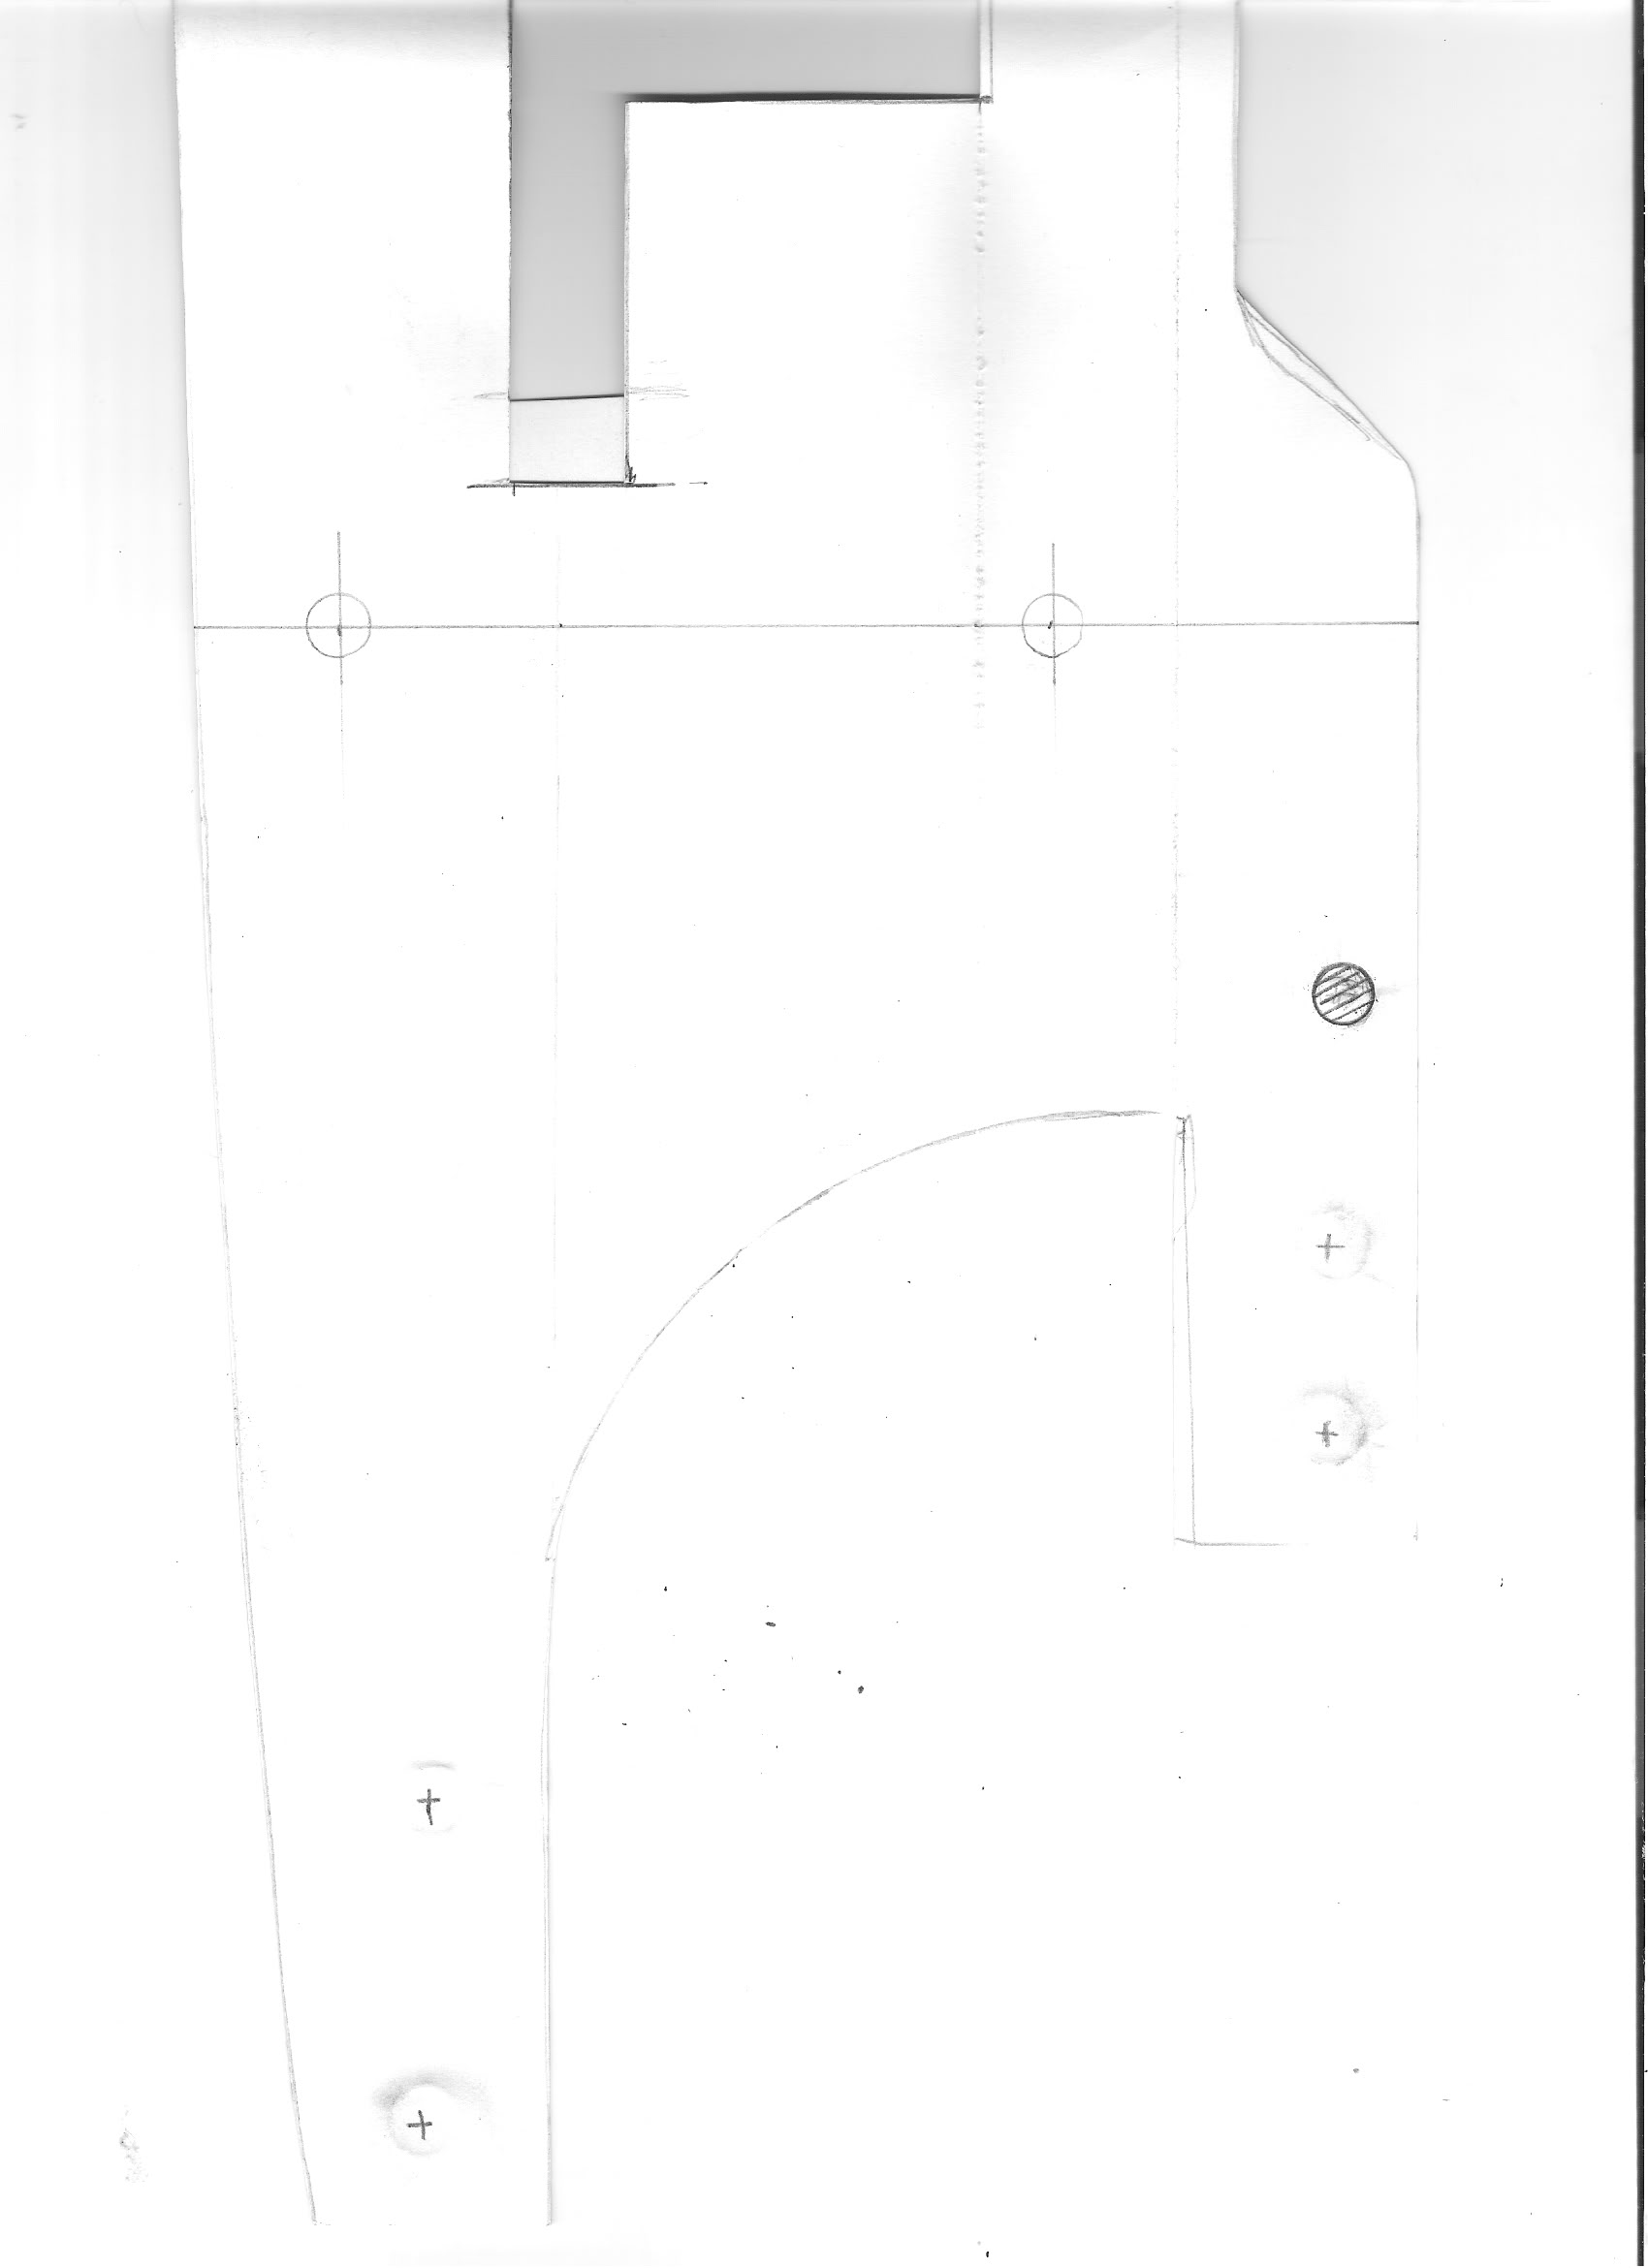
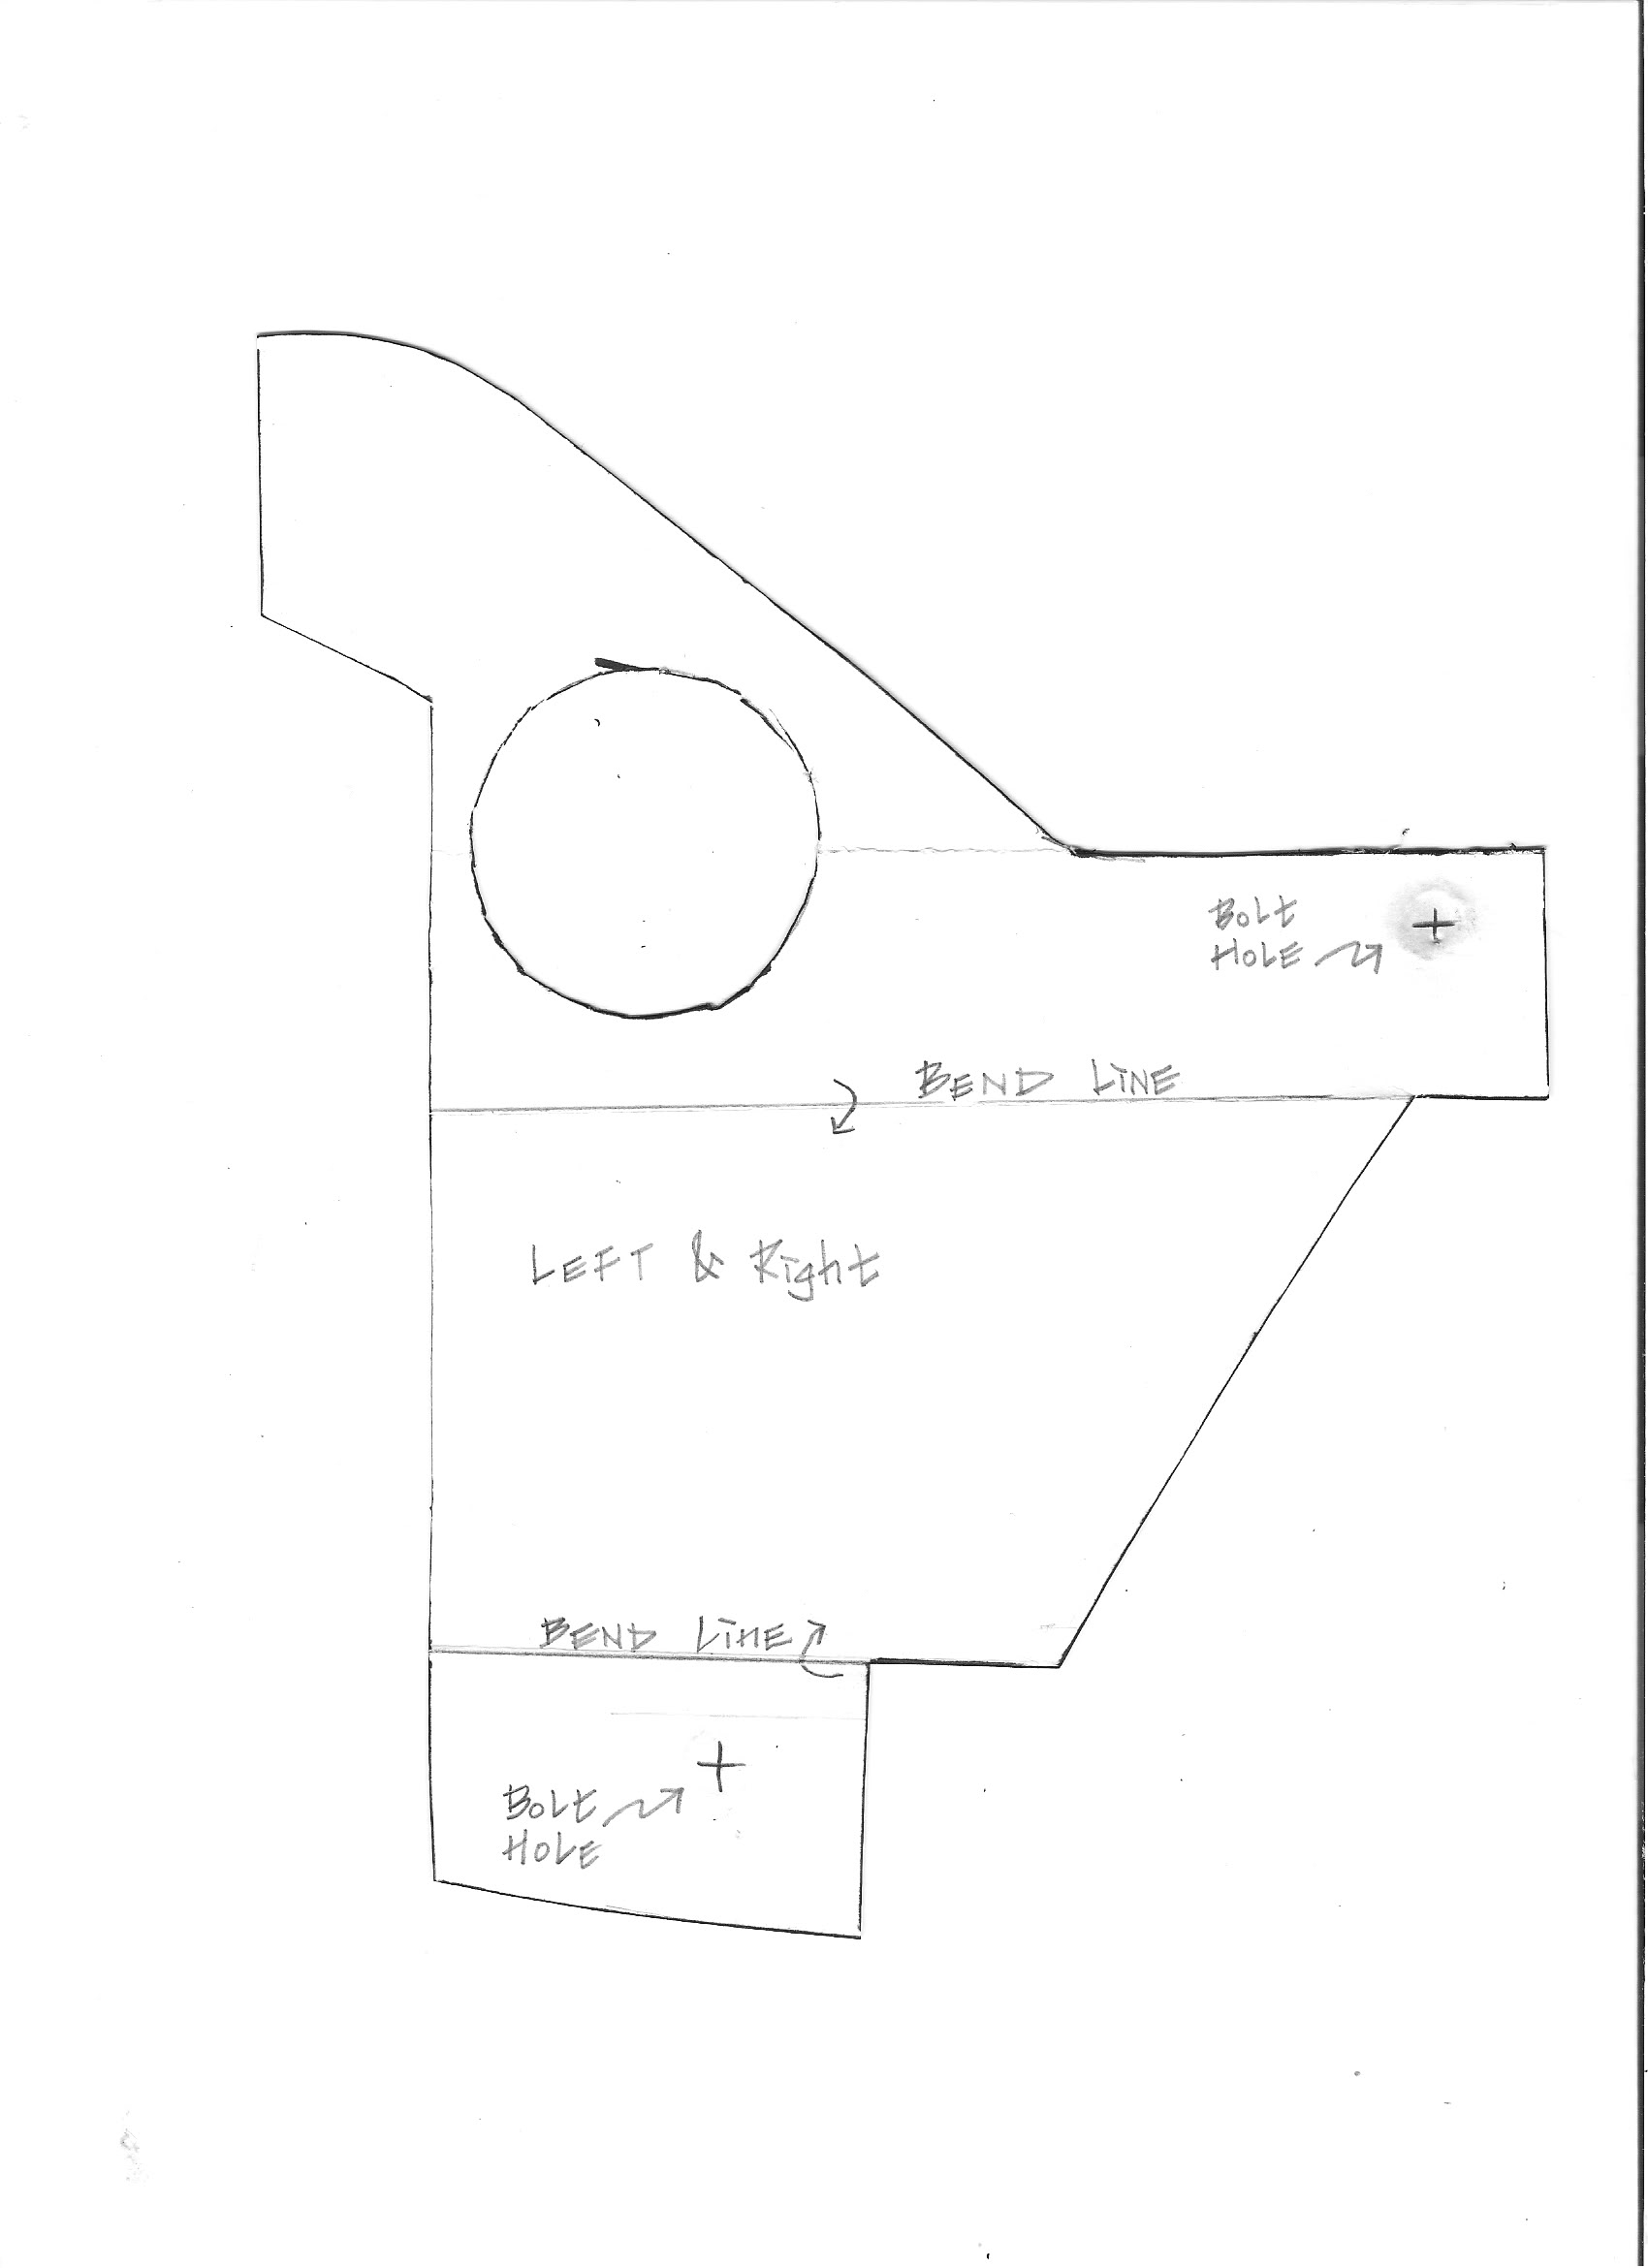
The template.
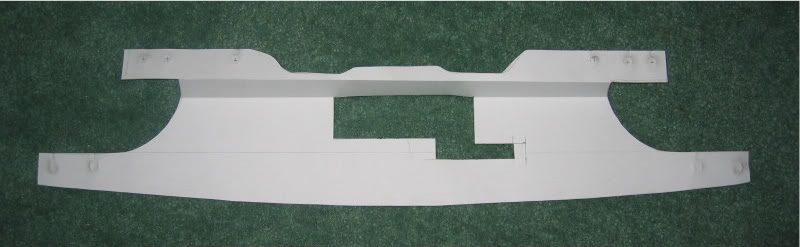
Just need to lay this flat on a sheet of aluminum and trace and bend it.
I already scanned it so if you guys want, just go to these links and download the images to your computer. Then print, cut, measure and tape, then trace it onto a sheet of aluminum. Or if you’re good with fiberglass and laying down carbon fiber you can do that as well.
Pic1
Pic2
Pic3
Pic4
(Flip Pic4 horizontally to make the side piece for the other side) Print the sheets as default letter size or else it will be too big or too small
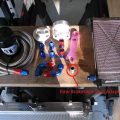
How it all comes together.
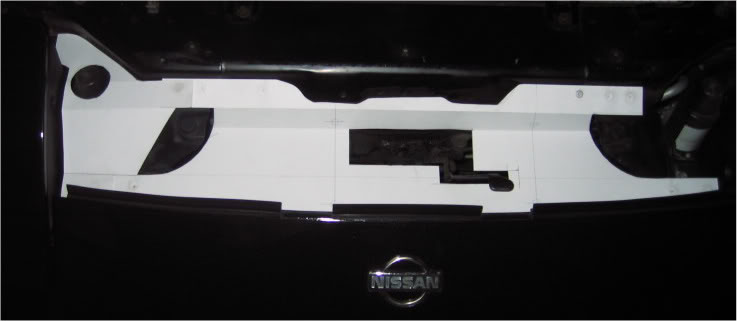
All those with a steady hand and some time can make a nice cooling panel. Bending is the hard part, I sandwiched the panel in between two exactly squared pieces of wood, no round edges.Squeeze the wood planks together with long screws and slowly bend the flap down against another piece of wood. Pain in the butt! See if any local shops can bend it for you cheap.
I recommend staying around what I chose, .032 gauge aluminum. If it was any thicker it would’ve taken longer to cut and bend.
All done and mocked up.

I hope you enjoyed this article – Feel free to share it via Facebook or elsewhere!
-Razi


