by Debonair
Before you get started, you’ll want to decide how to paint the new mirror housing. I painted the mirror at home using various guides found online and on YouTube.
Click on any image to view the full-size version.
Supplies:
Courage
Soldering iron or electrical connectors
Heat shrink tubing or electrical tape
Philips screwdriver
Small flathead screwdriver X2
10MM nut driver or socket with extension
TORX driver
Drill and drill bit
Wire cutters
Razor blade
Car jack, jack stands, tire iron
Panel popper tools
Wiring and wire loom
Wiring “zip” ties
Ziploc bags for removed hardware
Painters tape
Part 1 – Get the mirror off the car
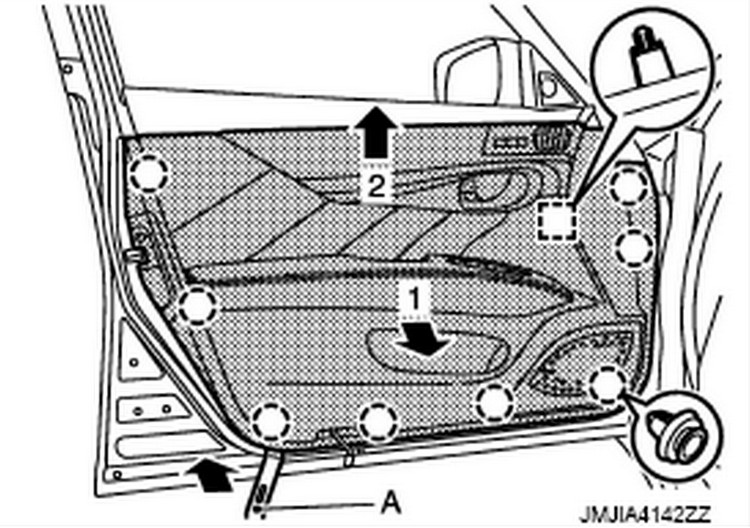
Remove the door panel.
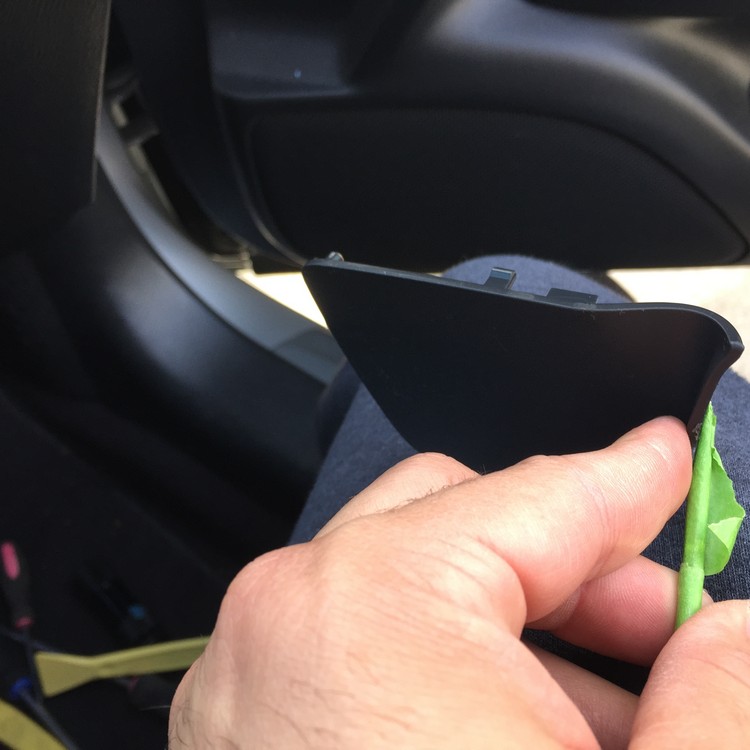
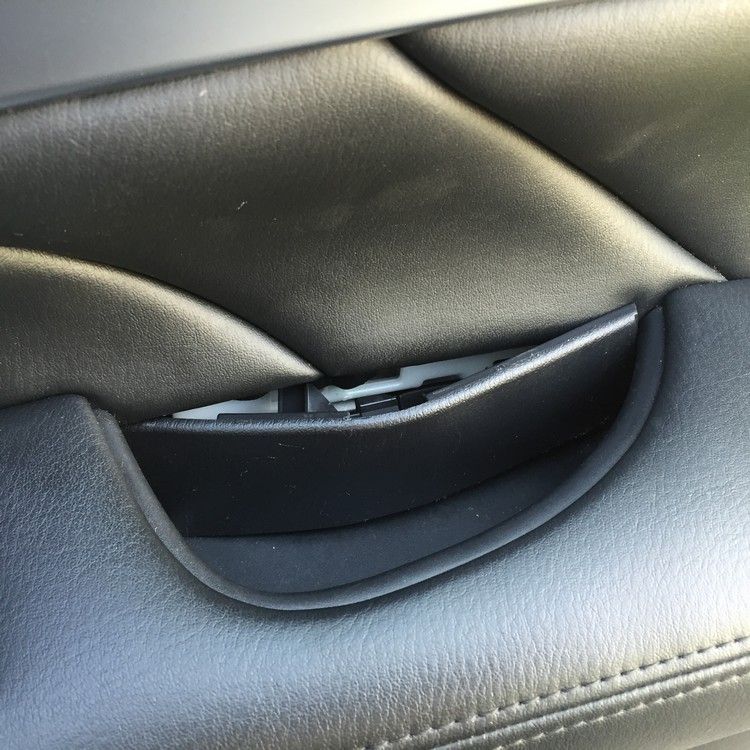
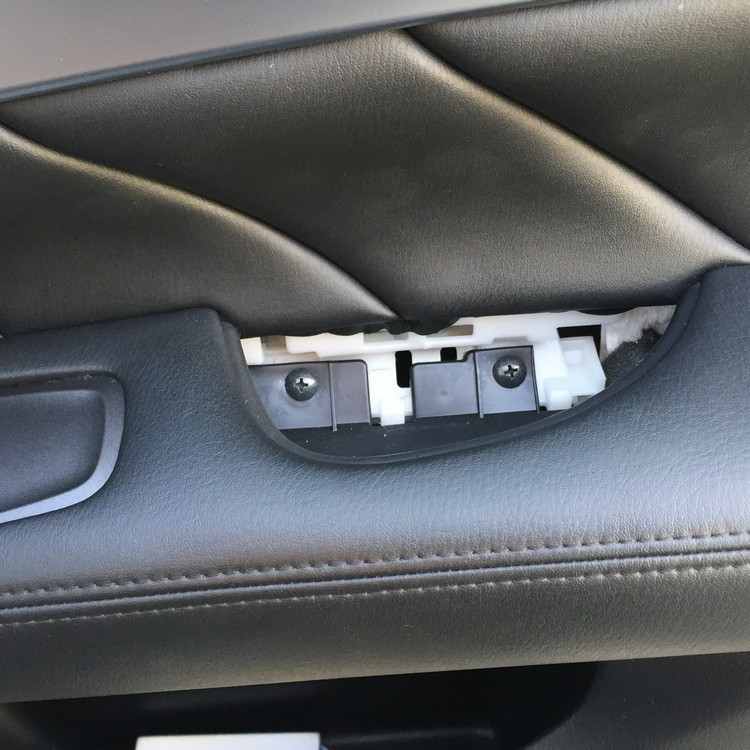
a. Remove the inside handle escutcheon (fancy name for the cover)
b. Remove the screw located behind this cover. 10mm Nut driver or scocket with extension.
c. Remove the armrest cap (another cover)
d. Remove the two Philips screws located behind this cover
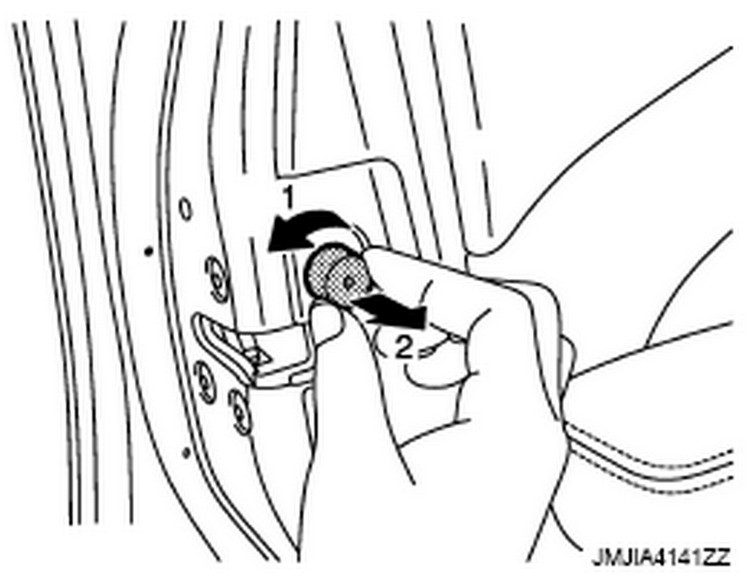
e. Remove the bumper – turn left and pull out
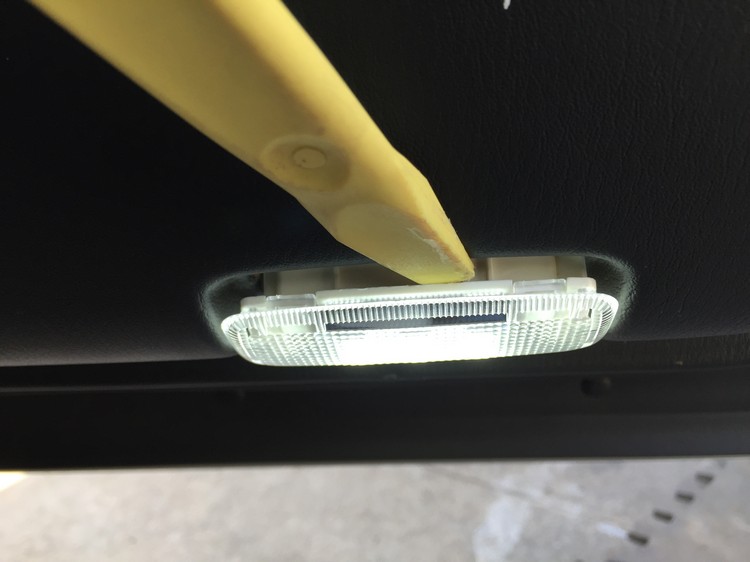
f. Remove the puddle/courtesy light housing and unplug its harness
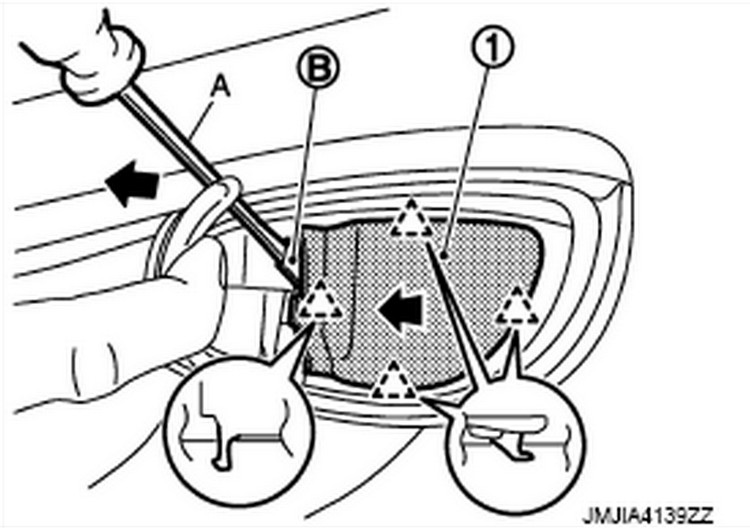
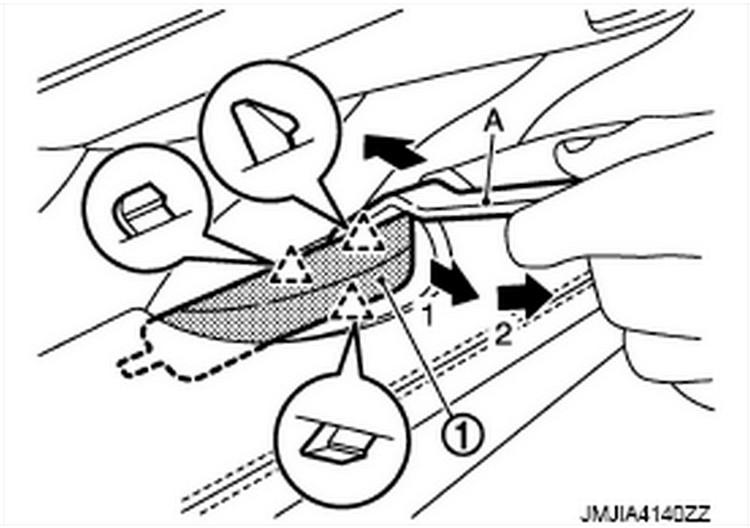
g. Use a panel tool to pop the panel off at each of the clip locations.
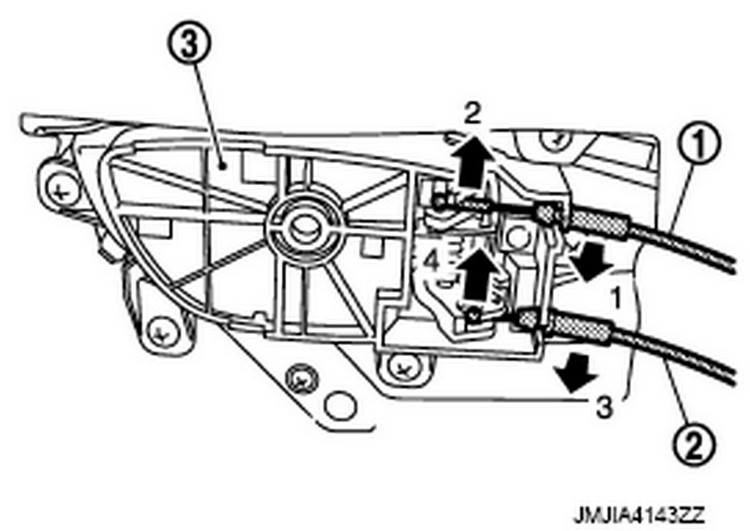
h. Disconnect the door lock and handle cables
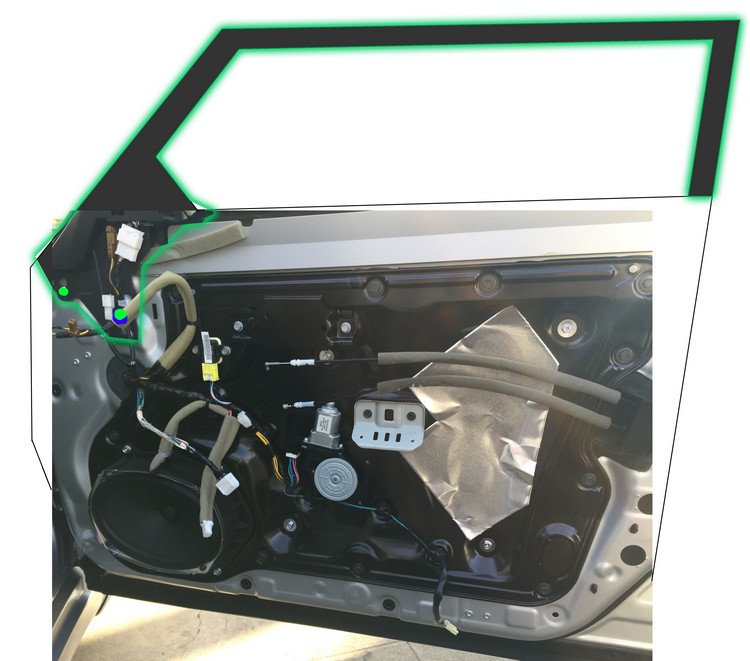
i. Disconnect all the wiring harnesses attached to the door.
j. Put the door panel in a safe place where neanderthals (google it) or disgruntled spouses/kids/pets cannot step on or damage it.
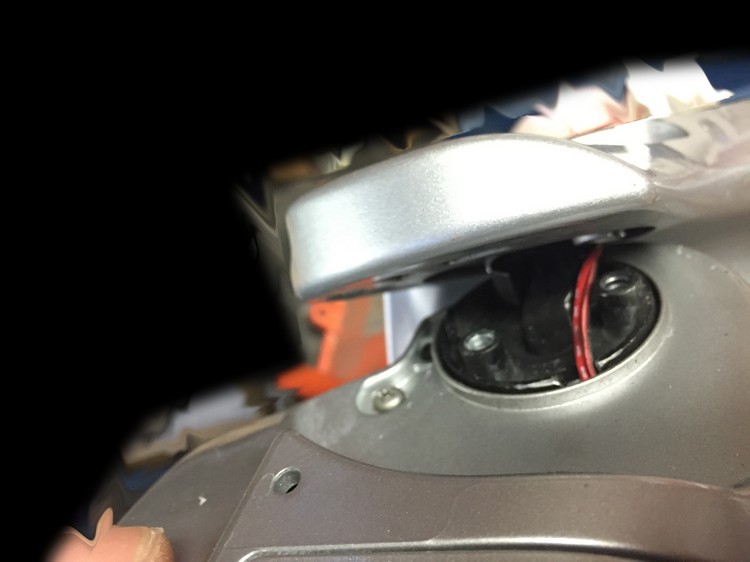
Remove the mirror from the door.
a. Disconnect the large white mirror harness.
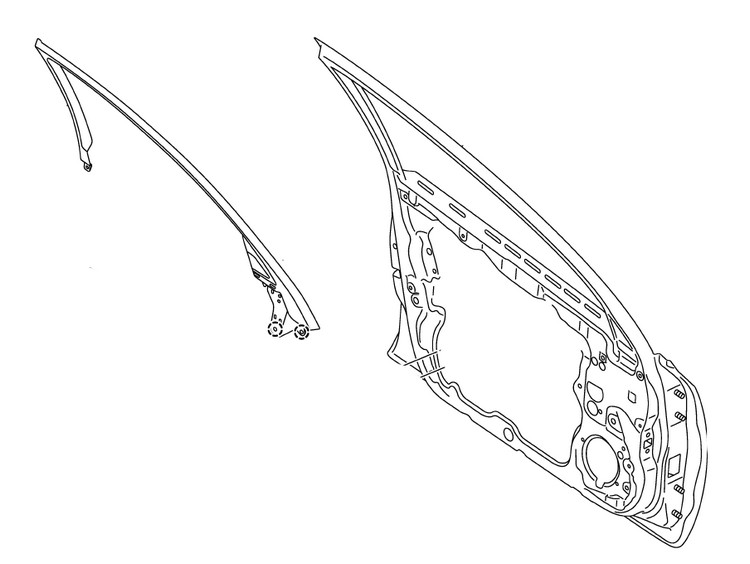
b. Move the front door sash inner cover, AKA the black trim that runs along the top of the door frame, out of the way. There are two body clips near the mirror and tweeter. The sash simply pulls away from the window frame and then slides off the body clips. It can then can be moved out of the way without fully removing it.
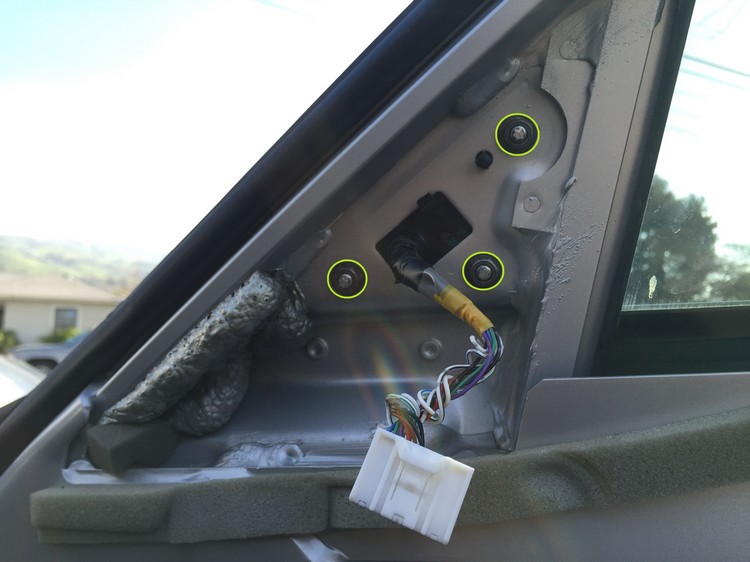
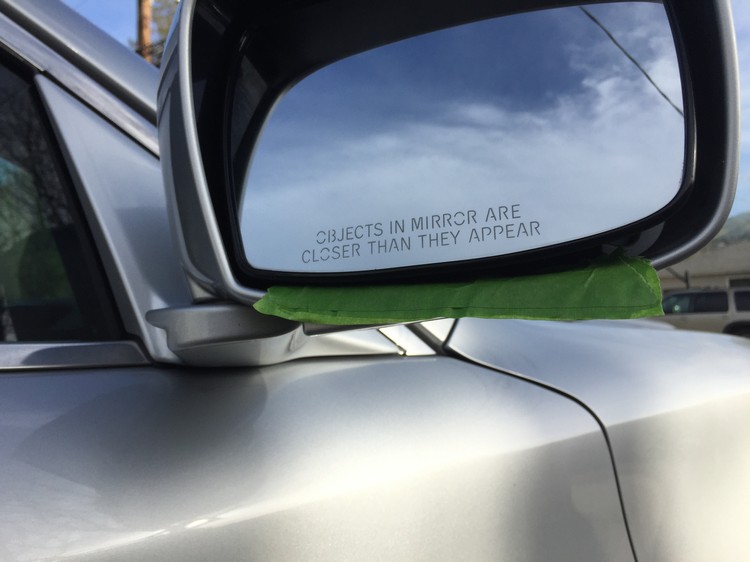
c. Remove the three mirror nuts. HOLD THE MIRROR WHILE REMOVING THE LAST NUT SO IT DOES NOT FALL AND DAMAGE ITSELF OR THE CAR.
d. Take it to your workbench/table/etc.
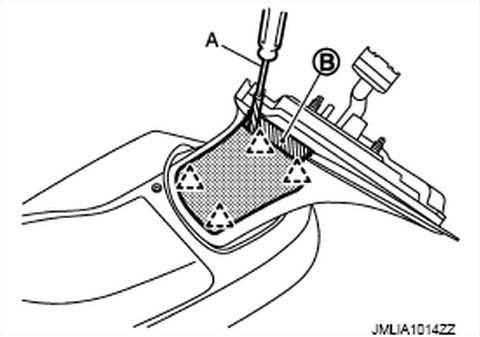
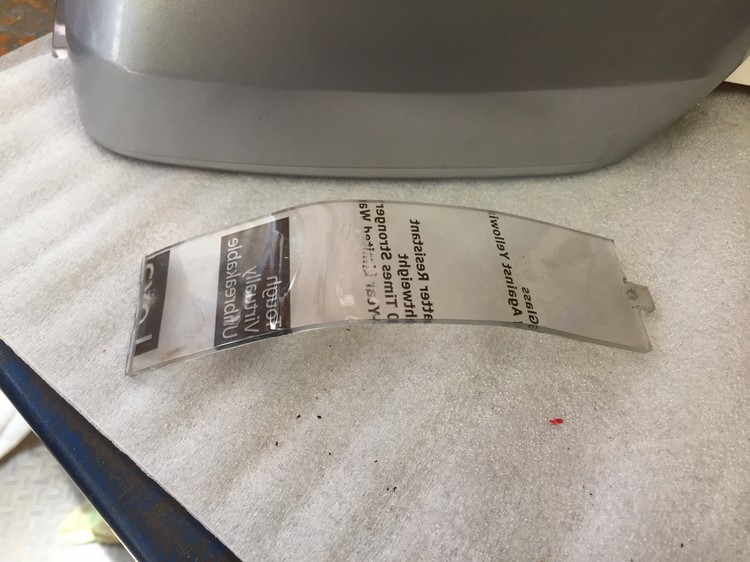
Remove the mirror glass (This can be done on OR off the car)
a. Position the mirror so it tilted up as far as possible
b. Put painters tape or some other protective cover on the inside bottom of the mirror.
c. Use two screw drivers in the two “paws” and push up and rotate to release the glass
d. Unplug the mirror heater wires
e. Put the mirror glass in a safe place.
Part 2 – Swap the internals into the new housing
Remove the actuator
a. Remove inner cover screw
b. Slide toward opposite side of mirror to remove
c. Unplug harness(es) behind the cover
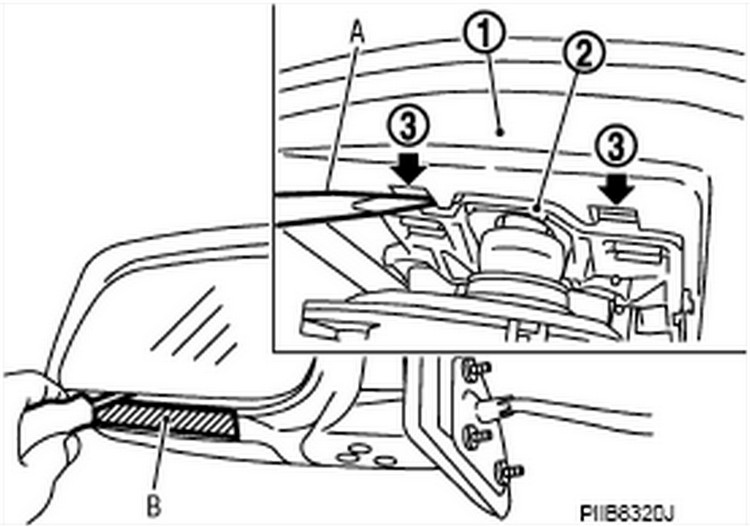
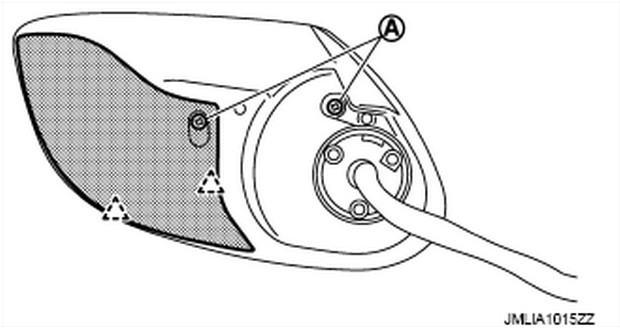
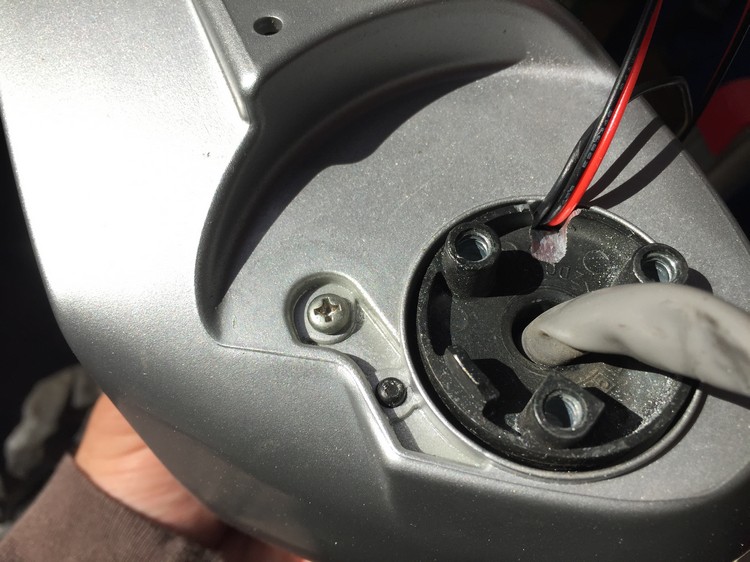
Remove the base
a. Remove the base cover with a standard screwdriver
b. Remove the three Philips bolts
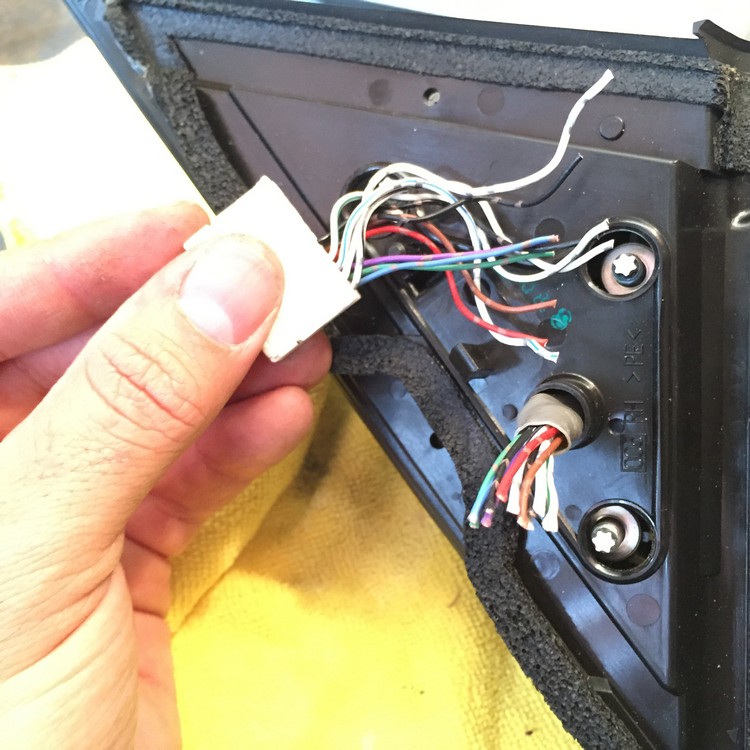
c. Remove tape from wiring harness at black plastic mount cover (near three bolts that go into the door)
The Factory Service Manual recommends these steps to get to remove the plug which allows the mirror housing to come off the base:
I instead chose to…
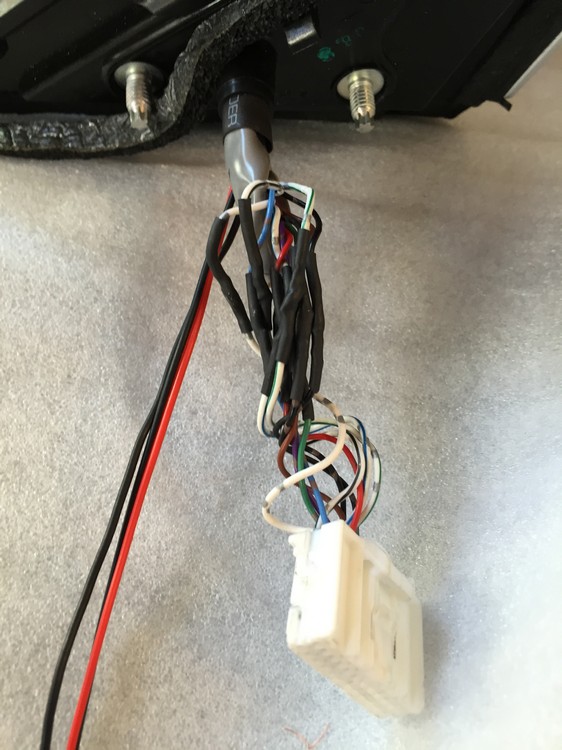
d. Cut the wiring harness off – sounds bad but they are just wires
e. Slide the black plastic mount cover and mirror base off the harness
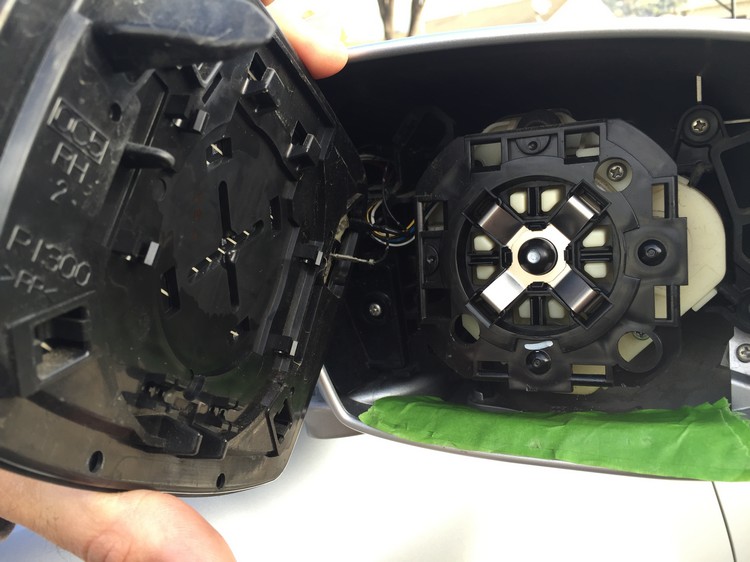
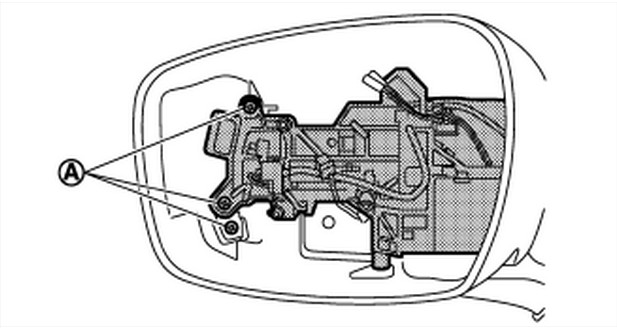
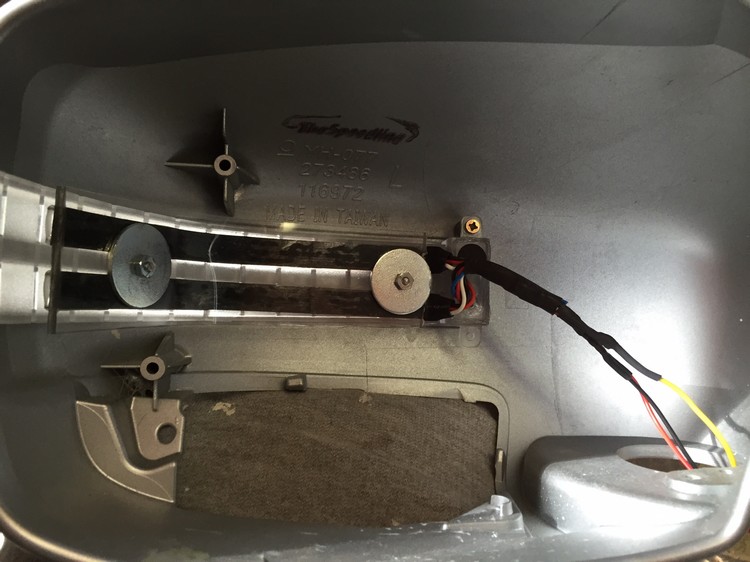
Remove actuator bracket / power fold unit
a. Remove cover screw and lower actuator screw near base
b. Remove two inner actuator screws
c. Remove actuator and bracket from the mirror housing
d. Remove cover from the mirror housing
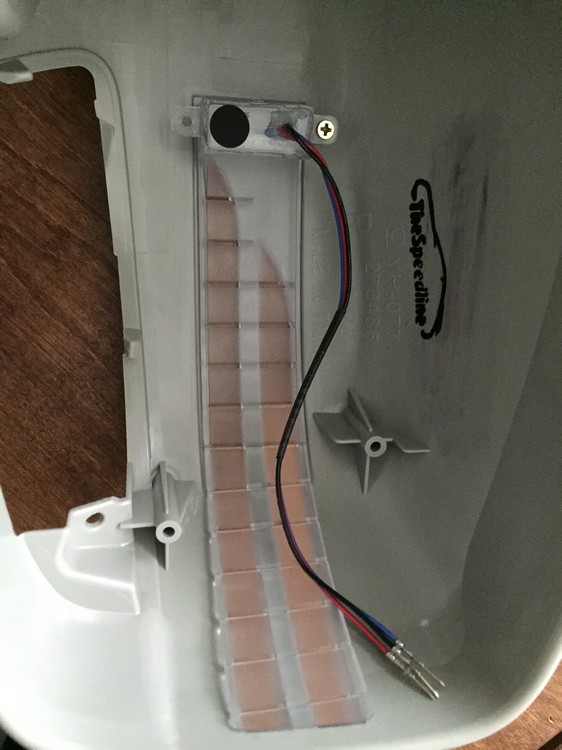
Install the LED signal
a. If you leave it as it comes it will look like this. The wire extensions will need to be plugged in or soldered on.
b. I chose to install LED strips behind the clear signal plastic. I traced its curve onto a piece of wood, cut it out, and used it as form to shape acrylic to match the shape. The LED strips was applied to this acrylic piece with 3M automotive double sided tape. I then drilled and countersunk the screws in the center section where it will be completely invisible once installed into the mirror. It was secured on the back using nuts and washers. I soldered on wire extensions as well so they could be run into the car’s door.
5. There is no room to run the wires from the mirror housing into the car door so I used a Dremel to remove some material from the large folding motor. I notched out enough room for the two wires to fit through without there being any risk of them being pinched or chafed.
6. Feed the turn signal wires through the mirror base along with the factory harness
7. Secure the turn signal wires to the harness using small piece of heat shrink tubing. Not too much since the harness wires still need to be soldered back on.
8. Reinstall the black plastic mount cover
9. Solder the harness back on covering each solder joint with heat shrink tubing
10. Reassemble the mirror putting all the pieces back together using their original screws. I had to add a single washer to each of the three base-to-housing Philips screws to eliminate a very small amount of free play.
11. Reinstall the mirror onto the car
Wiring the new mirror signals
Wires will need to be run from a turn signal source to the door so it can be connected to the mirror turn signal wiring. The wires can theoretically be connected anywhere along the turn signal’s wiring. I chose to tap the wiring at the front signal since I already had a connection there for the LED bulb resistors.
Now you need to decide how to get the wires into the door. The commonly accepted correct way to do this is to get them into the cabin of the car and then run through the rubber wiring boot into the door. I chose to run them in the fenders. I used rubber loom to get them from the fender end cap (you’ll know it when you see it) into the rubber boot. Because of the way these doors work it is completely invisible unless you know what you are looking for.
1. Jack up car and remove wheel well liner – all held up by plastic fasteners
2. Connect new wires to turn signal wiring
3. Run new wires along the inner fender securing it at various points
4. Drill a hole in the rubber fender end cap – be very careful with the drill bit not to do any damage other than making a hole.
5. Run the new wires in a wire loom through the hole
6. Make a small hole in the underside of the door rubber boot – Again, be very careful not to damage the wires in the boot or anything else. I used a Philips screwdriver to poke the hole.
7. Run the new loom and wires into the rubber boot. The hole will fit very snugly around the loom
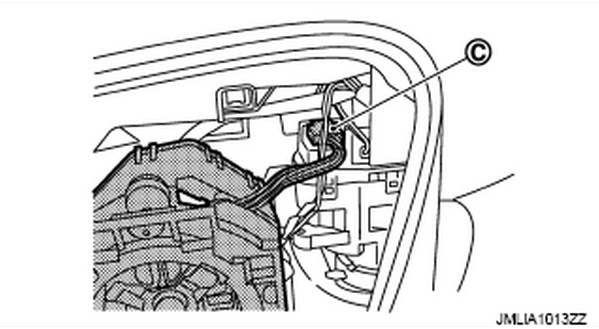
8. Remove the door speaker so you have access to the inner door
9. Run the new wire from in the door to the outside near the mirror using an existing hole – ensure they will not interfere with the window operation. There is almost no change on this unless you try to take the wire out of the door at the other end
10. Verify positive and ground with a Multimeter while the hazards are on
11. Connect to mirror wiring – I used solder and hear shrink tubing
12. Test functionality
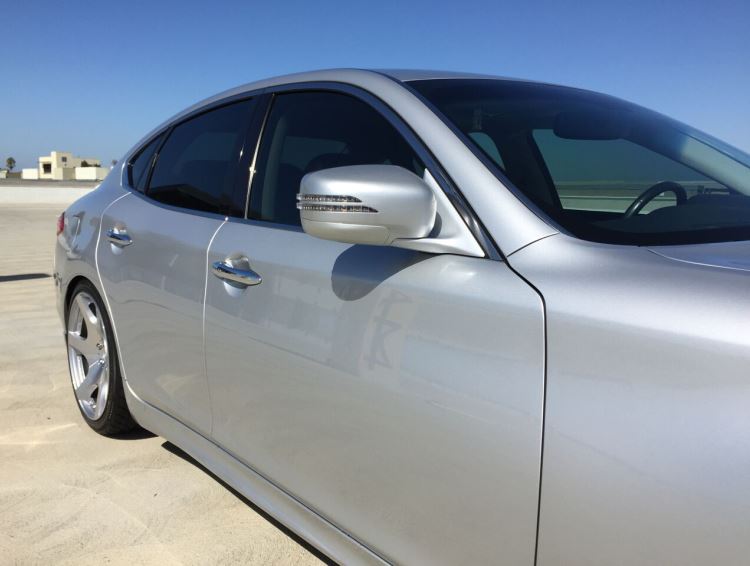
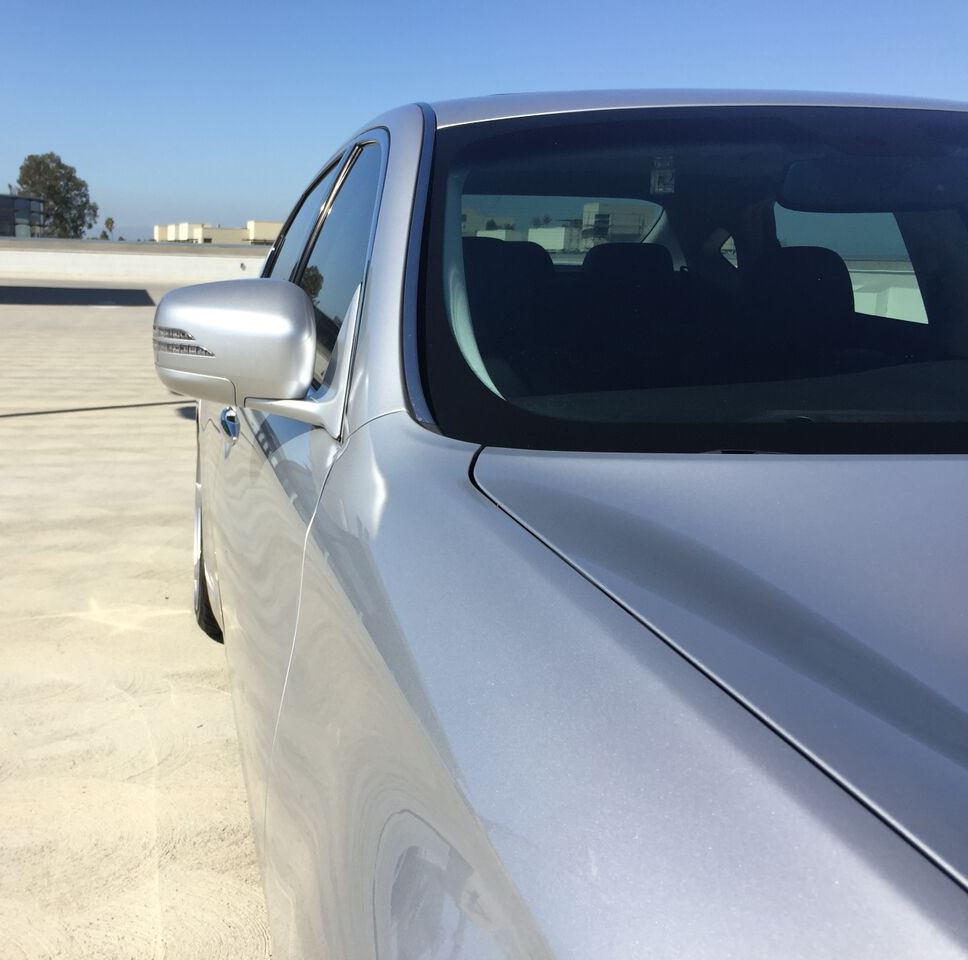
13. Put everything back together, and enjoy your awesome new signal mirrors!
Here’s the finished product – I think you’ll agree, they look great, function well, and add a much-needed bit of classy flair to an already gorgeous design!
Comments? Questions? Here’s a discussion of this modification, with some of the details and additional information:
Infiniti M-series LED turn signal mirror installation DIY
NICOclub is back again with Carlisle Events to host our 18th annual NICOFest Carlisle AutoX…
Kraft Auctions Offers Fans a Chance to Own a Piece of Datsun Racing History
We built Datsun Ranch in 2014, and it was the culmination of a lot of…
Since it's not just Datsuns that are vintage anymore ("classic Nissan" still sounds weird, right?),…
Let's talk about big brake kits for a bit. For the purposes of this article,…
What do these terms mean? Pulsed Secondary Air Injection (PAIR) Valve: The PAIR valve sends…