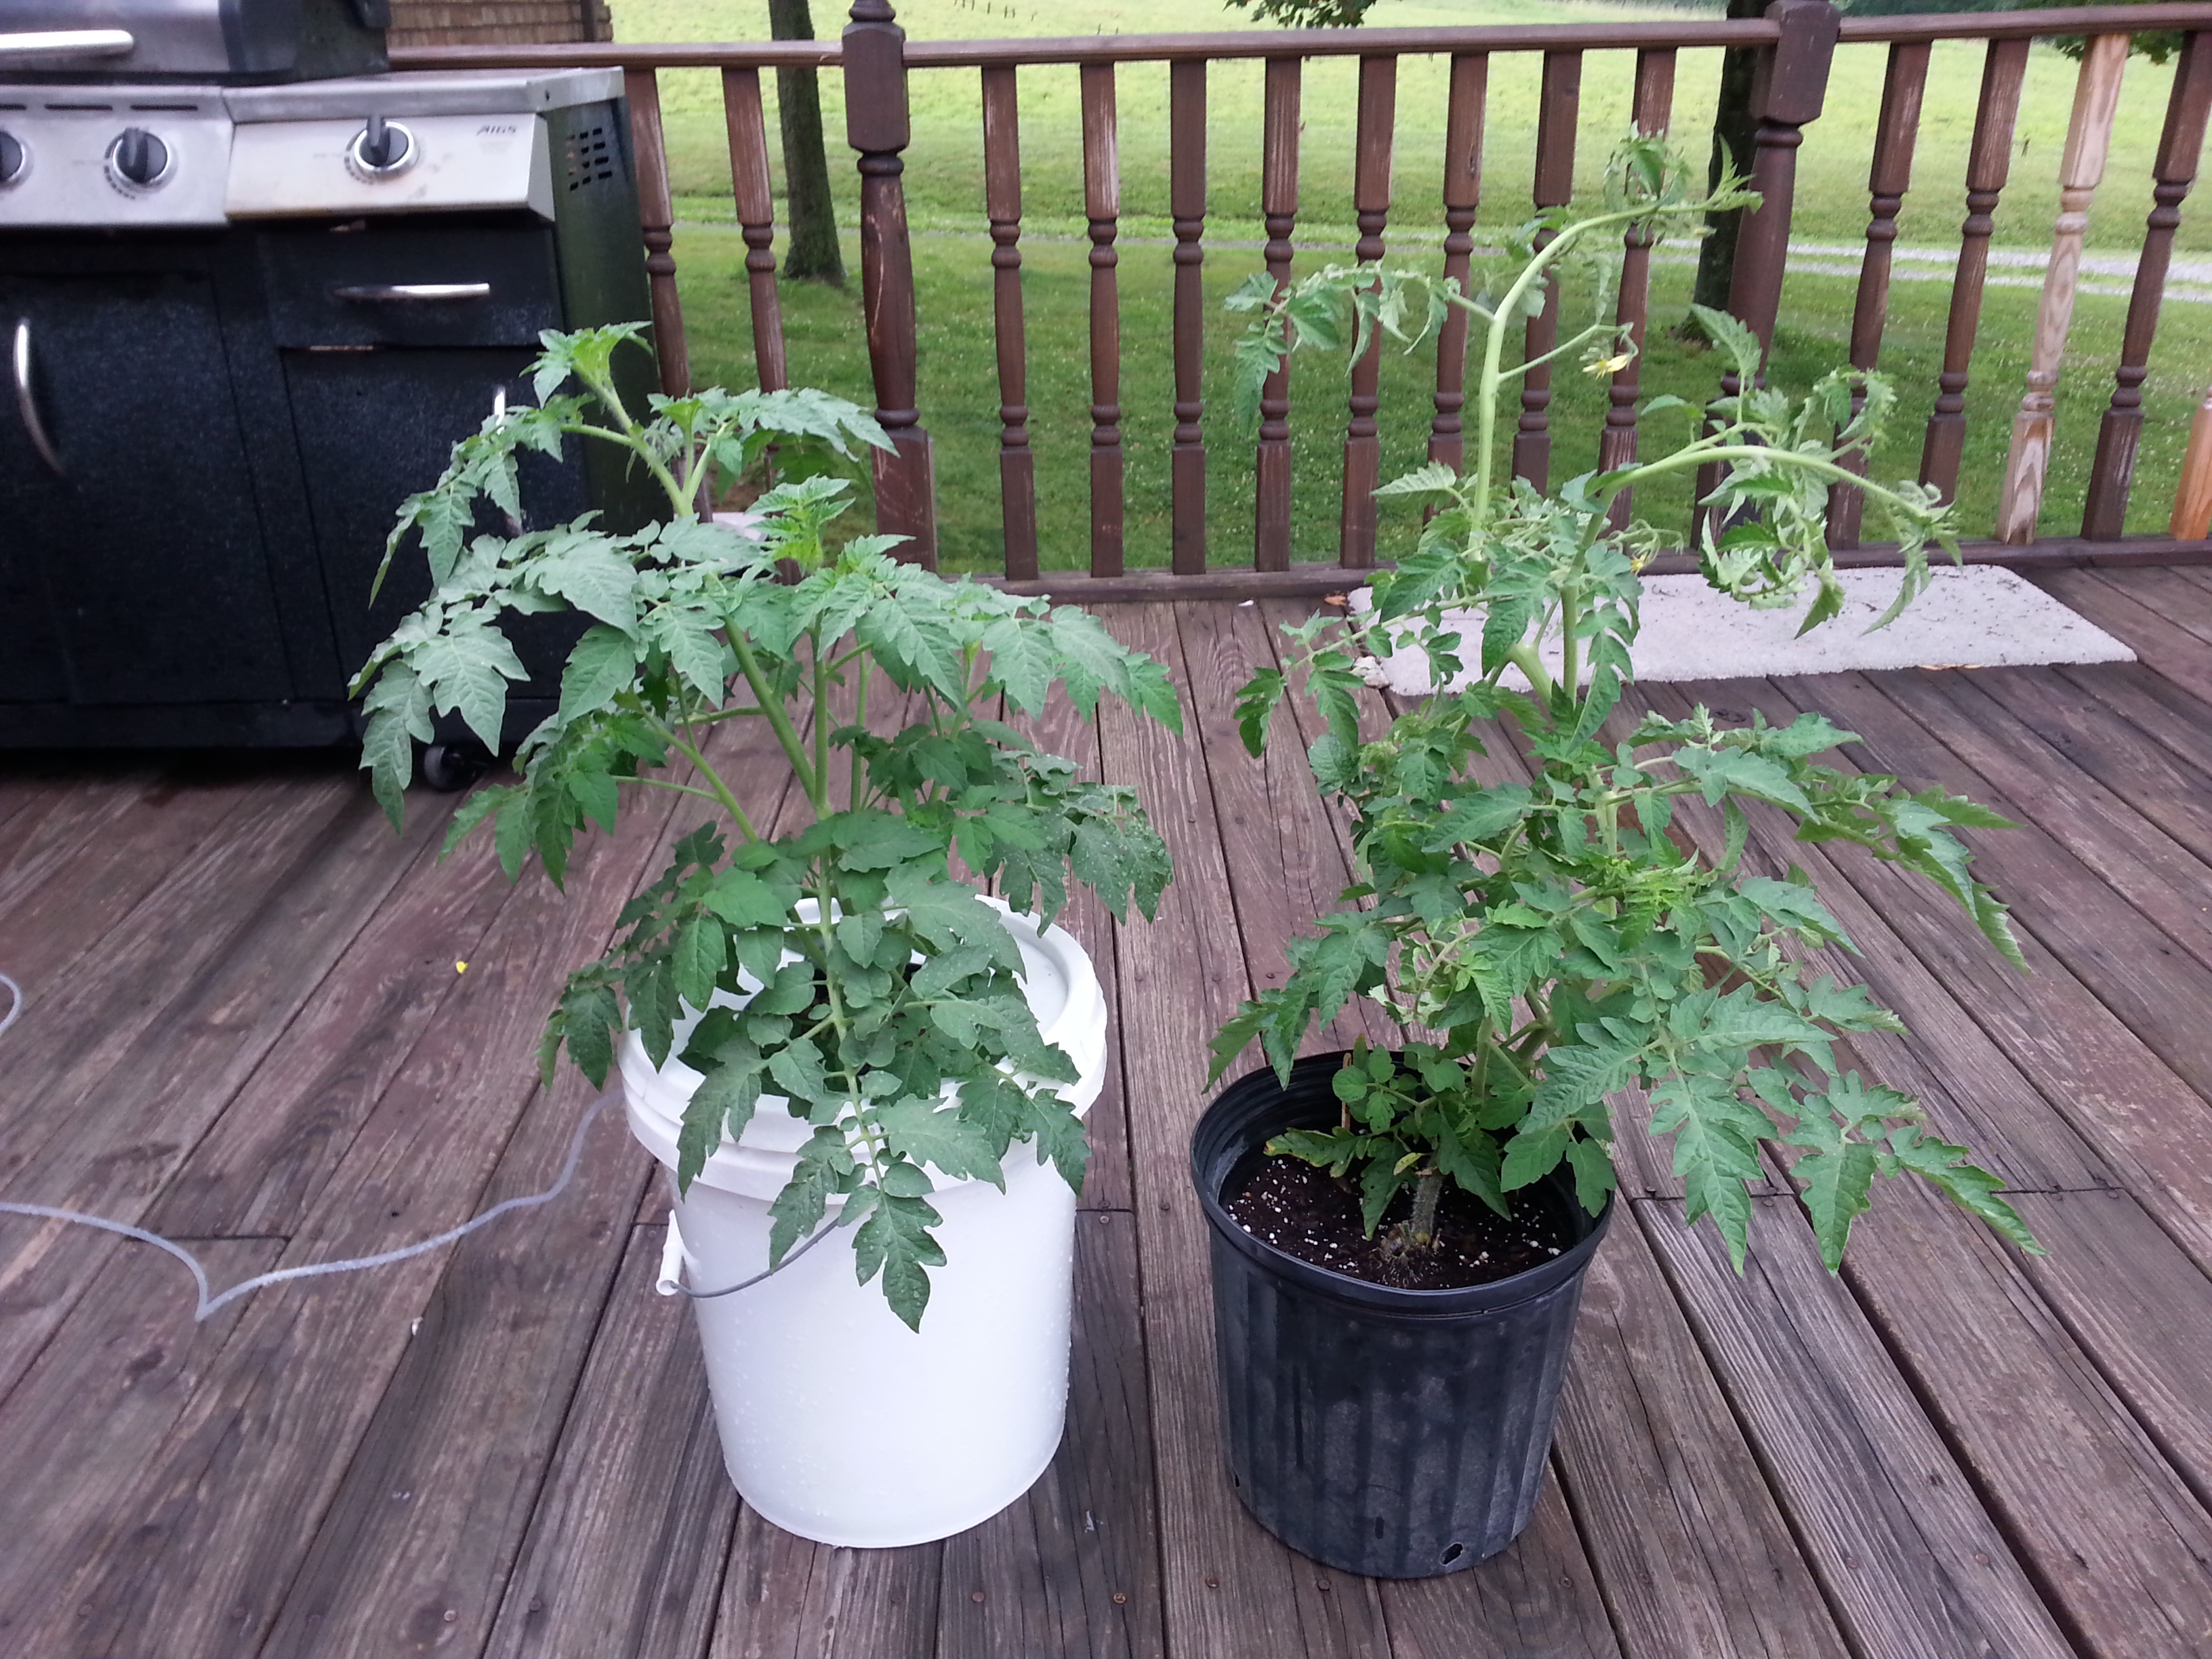
I wanted to put together a quick article on hydroponics to show and explain how easy it is to grow just about anything in a bucket of water. There isn’t a bunch of science involved and there is very little daily maintenance required depending on the type of system you decide to go with. Since we’re going with the “easy” method I’m only going to talk about bubble buckets. There are several other methods but they are a bit more involved and could possibly dissuade you from attempting this. My objective is to get everyone into growing. But why hydroponics when a pot and soil will work just fine? Check out this image.
Those are tomato plants. The one on the right is the “mother” of the one on the left. What? Mother? What does that even mean? It means that when the plant on the right was about 1.5 months old I took a clipping from it and made a clone. A clone will be exactly the same as the mother plant. The thing I really want you to notice is the size comparison and the overall health of the plants. The cloned plant on the left is almost as big as the mother plant that is a full 1.5 months older. 1.5 months of growing time in a plants life is a ton. Clearly growing things in water yields faster growth and very healthy plants.
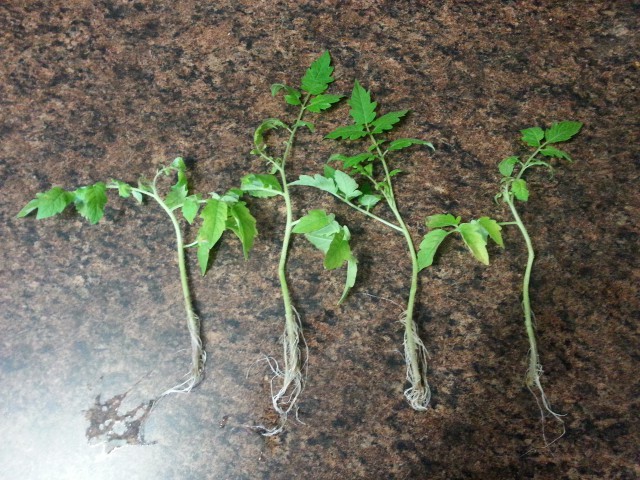
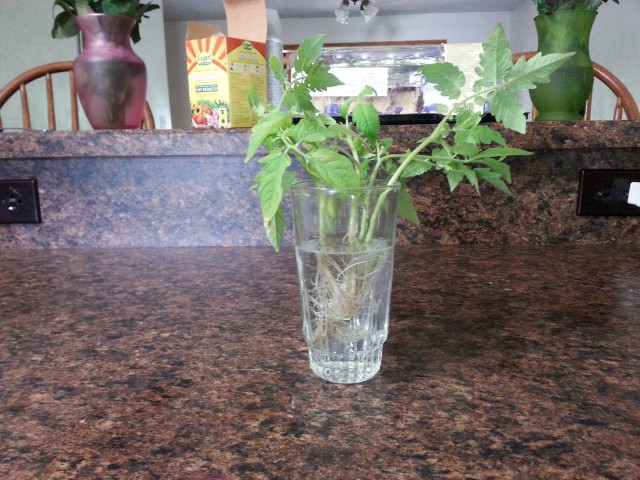
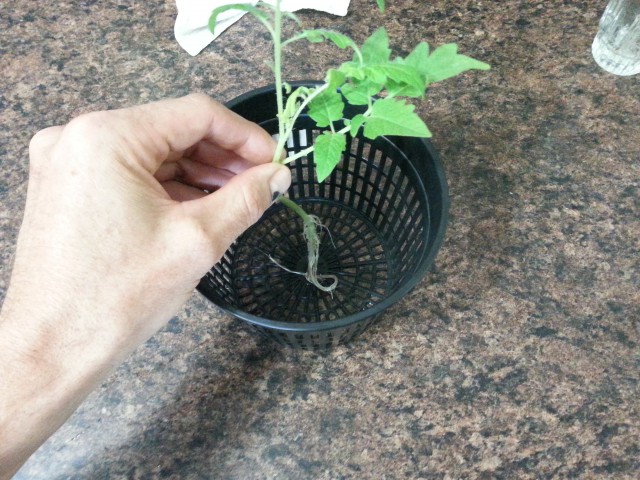
Yeah but what’s a clone? That has to be the hard part right? Nope. Don’t let the word clone scare you. Just find a branch that has a couple of smaller branches already growing on it and cut it as close to the main stem as possible then stick it in a glass of water. Here are some clippings that I took a couple weeks ago. They only took about 7 days to root. I haven’t placed them into a bucket just yet so they’re just chilling out in some tap water.
When you clone a plant you don’t need to have it in direct sunlight. In fact you don’t want too much sun. The plant needs to concentrate all of it’s energy on making new roots, not growing as it normally would. Those clones above have been sitting on my kitchen table which gets no direct sun at all. All I do is dump out the water and refill it with fresh tap water every other day or so. This just helps me avoid algae from growing inside the glass. The plant doesn’t care as long as it has water. Cloning allows you to grow an infinite amount of plants from one successful seed. If you decide to grow indoors as well as outdoors, like I do, you can have fresh vegetables year round.
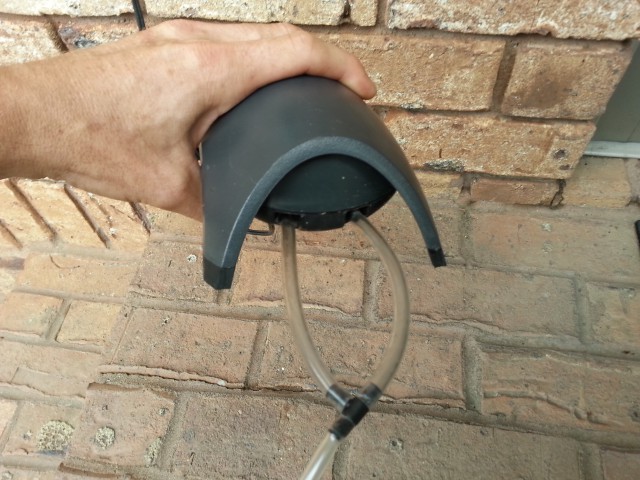
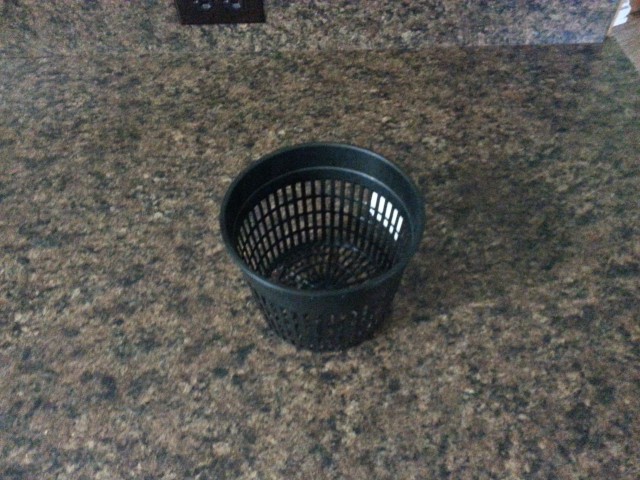
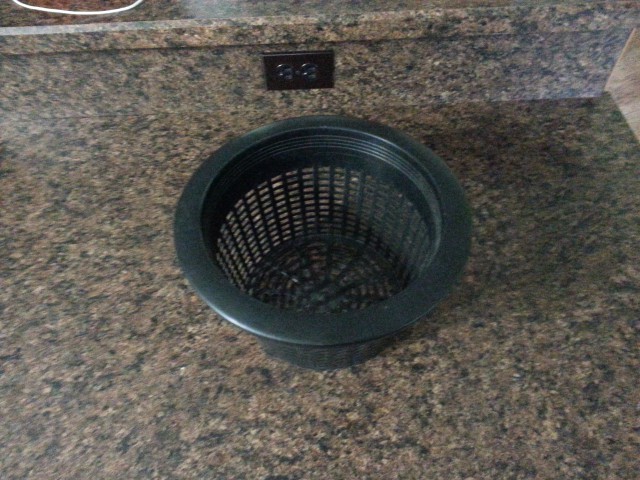
When using the bubble bucket system you only need 6 things; a 5 gallon bucket, a net pot, growing media to fill the net pot with, an air pump, a bubble stone and some vinyl tubing to connect the air pump to the bubble stone. I bought all of this at Walmart except for the net pots, I ordered those online from Amazon. They have them at Home Depot and probably your local nursery if you don’t want to order them. You can use 3″ or 6″ net pots. I prefer the 6″ ones myself as I find they are less prone to tipping over when growing larger plants like tomatoes.
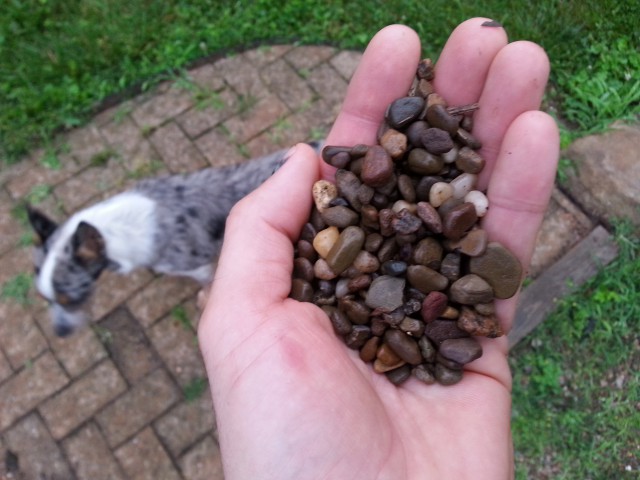
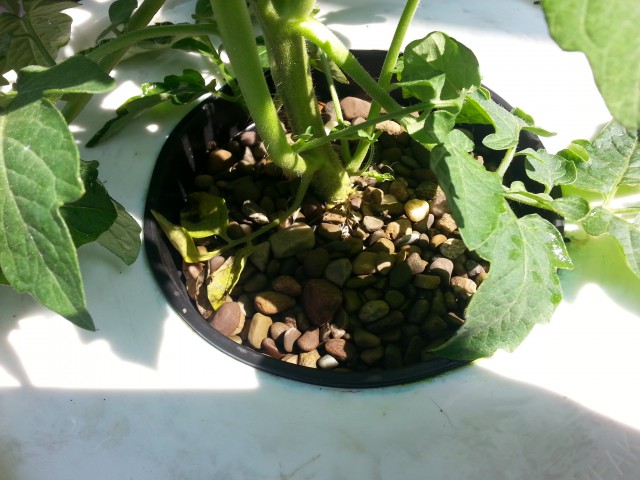
The pump I went with is Tetra Whisper and costs $21.82. It’s rated at 30-60 gallons and has rubber “feet” on the bottom that make it very quiet when operating. It’s a double output pump so you can use it to supply air to two separate buckets. There are cheaper options available that have the same output rating. Aqua Culture makes a double output pump that only costs $10.87. The airstone in the picture above was only $2.77 and the vinyl tubing is only $3.12 for 25 feet. The Tetra Whisper pump comes with two “T” fittings and a shutoff valve. Since I only have the one bucket I used a “T” fitting to connect both outputs to a single line. The growing media is just something to fill the net pot with so the plant will stand up straight. It can be almost anything as long as it doesn’t fall through the holes in the net pot and it’s not water soluble. The stuff in the image above is just pea gravel from my driveway. You can use clay pellets, marbles or anything really. The plant doesn’t care as long as it has something to support it.
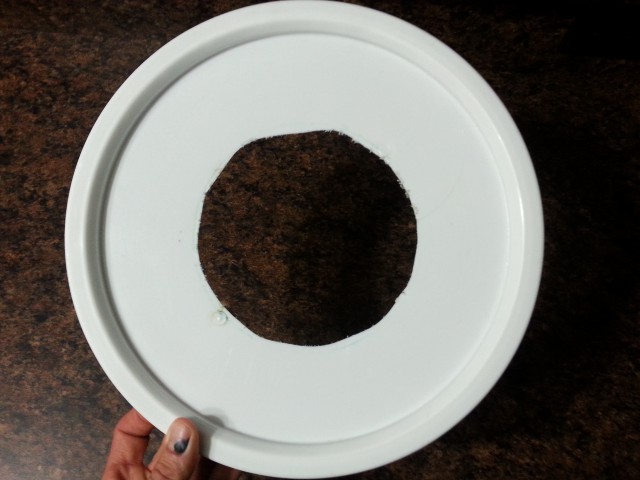
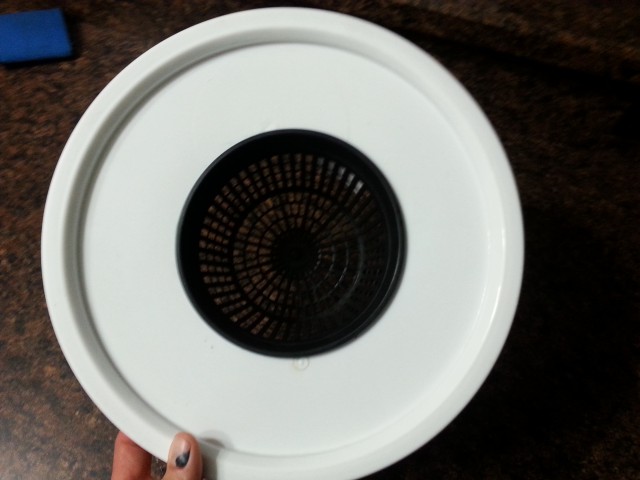
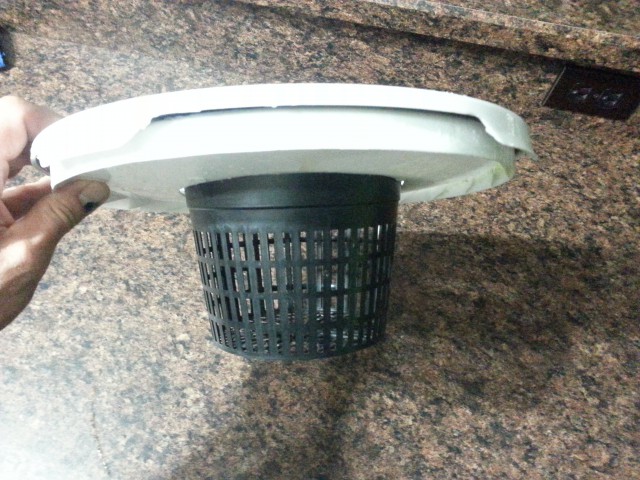
Ok so what’s the process for all this? The hardest part is going to be cutting a hole into the lid of the bucket. I turned the net pot upside down and traced out a circle in the middle of the lid. Then I poked a starter hole on the inside of the circle just big enough to allow the blade from my jigsaw to fit in. Then I went about cutting a circle. You have to make the hole slightly smaller than the one you traced or the net pot will just fall right through. I have never done anything other than eyeball it and haven’t had any issues yet. Start small if you’re nervous and increase the size until the net pot fits securely in place. You can buy a new lid for about a buck if you mess it up.
There is an alternative if you don’t want to be cutting holes or don’t have the proper stuff to cut with. You can just buy one of these.
That’s a full size net pot for a 5 gallon bucket which makes it plug and play, no cutting required. You will need to source more growing medium with a net pot that large though and the water evaporation rate will increase.
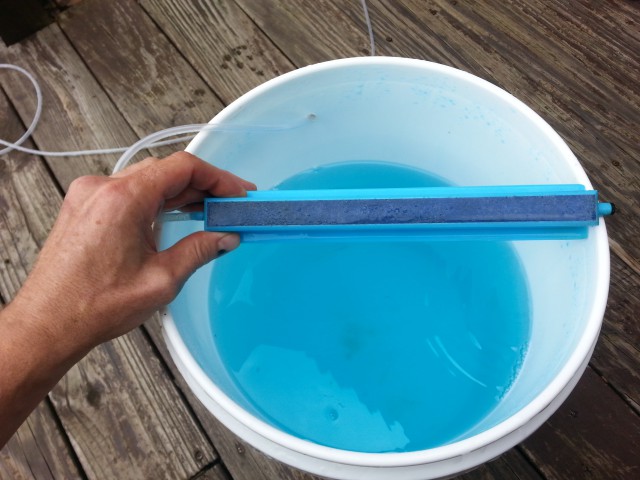
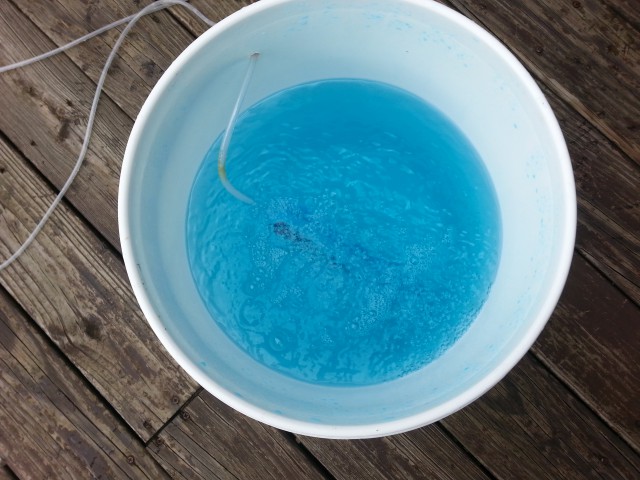
OK, so you have a 5 gallon bucket with a net pot stuck in it’s lid. You’ll have to make a small hole near the top of the bucket for the air tube to come through so you can connect it to the bubble stone. I made mine just below the rim about 2 inches down. I used a drill but you can use anything to make a hole that small, even scissors. Once the hole is made insert the air tube and connect it to the bubble stone. Connect the other end of the air tube to the air pump. Now fill the bucket with water. You’re going to want the water level to be high enough to cover the bottom of the net pot. To make sure the water is high enough just place the lid and net pot on top of the bucket and make sure you can see about a half inch of water inside the net pot. Some people get all sorts of anal and suggest using distilled water. I’ve only ever used tap water and I’ve had lots of success. You don’t see farmers using distilled water do ya? Nope. No sense in complicating this. KISS (keep it simple stupid) principles should apply whenever possible.
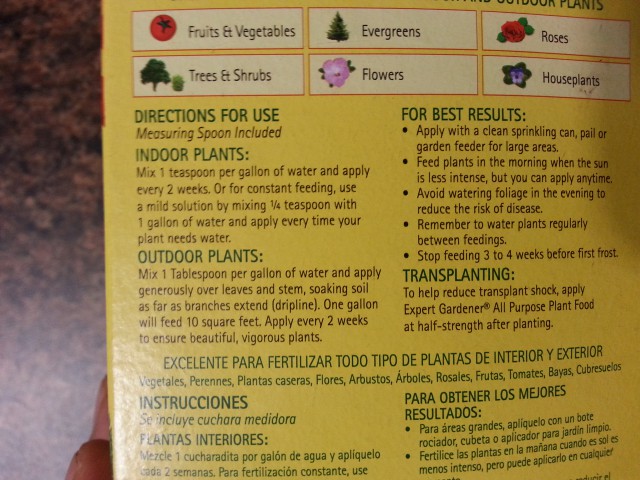
It’s now time to add some nutrients to the water. There are a whole slew of options when it comes to fertilizer. I’ve used some specifically designed for hydroponics in the past. I’d say Fox Farms would be my go-to if I wanted to spend some coin and get the best. But this article is about easy and for me easy means not having to go online and buy fertilizer that is expensive. So I tried some all purpose made by Expert for this particular grow. I’m pretty sure I bought it at Walmart. Miracle Grow also makes a good all purpose fertilizer that is available everywhere. I probably should have used something designed for tomatoes but I wanted to see if regular all purpose fertilizer would work well. As you can see from the images it is working just fine. That doesn’t mean other stuff won’t work better mind you. I’m just saying that you don’t have to go out and find some exotic fertilizer in order to have a good grow. How much fertilizer you add will depend on the amount of water in your bucket. There is a measurement on every box of fertilizer that suggests how much you should use per gallon of water. Most fertilizers I’ve used recommend 1/4 teaspoon per gallon of water. This is where I usually start.
See where it says “for constant feeding”? That’s the measurement we want to start with. So for our five gallon bucket you’ll want 2.5 teaspoons of fertilizer. This will give the plants a nice mild dose of nutrients. Starting off slow is a good thing. If you crank up the ratio to much you can risk causing nutrient burn, especially when the plants are young. Once the plants get some good growth going and you can see a good amount of roots coming out of the net pot you can increase the ratio if you choose to. I just started using 1 teaspoon per gallon of water last week. But the plants were very developed already and there wasn’t really a need for me to increase the dosage. I just like to experiment. If you notice the plant start to wilt or show weird markings on the leaves you can just dump the water out and start over with fresh tap water again. I have instruments that measure the parts per million of water as well as the PH level. So if I want to I can really control the nutrient solution. This would allow me to crank up the nutrients if I wanted very fast growth with huge blooms. But there isn’t any real need for that stuff. Just follow the directions on the box for a mild solution and you can use that measurement from start to finish with great results just like you see in the first image.
Alright, now you have the bucket filled with nutrients, the pump is connected to the air stone and the water is “boiling” with bubbles. All that’s left is to place the rooted plant into the net pot and surround it with whatever growing medium you chose. You do this by placing the plant into the center of the net pot and slowly filling it with the medium, in my case it’s just pea gravel. I suggest having the net pot sitting on a table or something for this part not sitting in the bucket. I only have before and after images…sorry bout that.
After about a week you’ll be able to lift up the lid and see roots protruding from the net pot and down into the water. It’s good to remove the lid every few days to check the level of the water. As the plant grows it will start drinking more and more water so you will need to check the level every few days. I use a separate 5 gallon bucket and mix 5 gallons of nutrients at a time. This allows me to make sure I keep a consistent fertilizer solution on hand and avoid any guess work.
As you’re checking the water level make sure to inspect the inside of the bucket for algae growth. You don’t want algae to start building up as it will mess with the PH of the water, eat your fertilizer and eventually cause your plant to become sick. If you notice some algae don’t freak out. Just pick up the lid, plant and all, and place the lid onto another bucket. The other bucket doesn’t even have to have water in it. The plant is just going to chill out while you clean it’s usual home with soap and water. Then just refill it with fertilizer and water again. Easy really. Some people put algaecide in their water but I prefer not to do that. Too easy just to keep it cleaned.
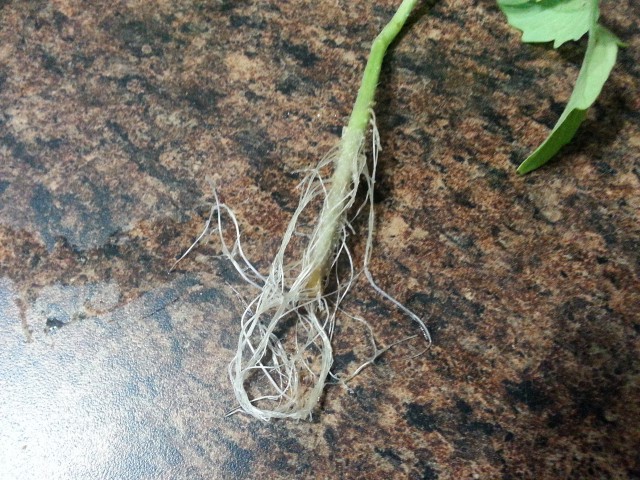
This is what a set of healthy roots look like.
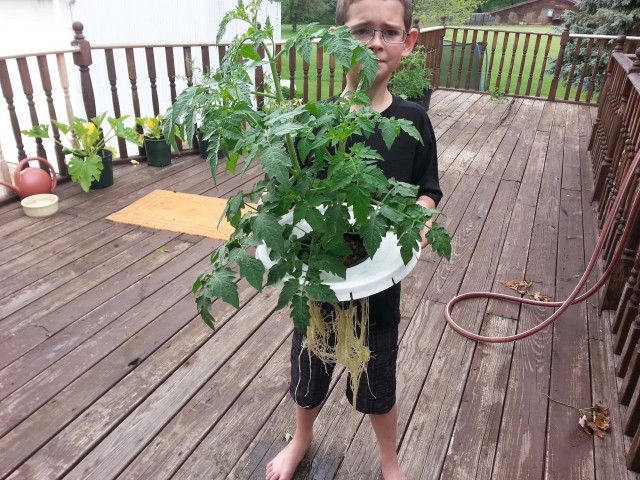
The tomato plant in this article has been outside on my deck for it’s entire life. It has been out in the open and fully exposed to the sun and rain. There have been times when it rained so hard the water overflowed out of the top of the bucket. I purposely took very little care of this plant to see how well it would hold up. It sat in mostly water for a long time as the solution became very diluted with all of the rain. Yet as you can see it is still growing faster than its mother plant.
Growing plants in water is only as hard as you make it. Hopefully this persuades some of you guys to give it a try. It’s fairly addicting once you start, and you can grow stuff like strawberries and whatnot all year round if you have some spare room inside your house or garage. I’ll be doing another article on indoor growing soon where I’ll talk about lighting and such. Until then I hope you guys enjoy whatever you’re growing however you’re growing it!
In our 18 years of hosting this event, this was some of the worst weather…
Are you tired of the traditional headaches associated with selling your car? From navigating dealership…
First NameLast NameYearMakeModelCar #TimeJohnZabriski2013TJZ13BM10:53.16RomanMarmalyukov2014FordFiesta380:54.34JacobFrey2000MazdaMiata580:54.74TylerSteck2007ThunderRoadster1030:55ZaneBarber2002HondaCivic20:56KevinDoss1991Nissan240SX210:56JaredWeidman2023ToyotaCorolla490:56EthanDeMoura1990Nissan240SX180:57MarkRogers2023Porsche911440:57AleksanderDusanic2011MitsubishiEvo480:57MitchellSimpkins2023ToyotaGR86520:57JoshSheets2009Nissan370Z340:58ChrisBruce2000HondaCivic400:58HankLint2006BMW330i3300:58BrianBromiley1995BMW318ti7240:58CodyShreffler1993MazdaMiata40:59JoeSpilis2024SubaruBRZ160:59KyleBortle2007SubaruForester190:59BenjaminStanzione1986Nissan200SX200:59JamesSisson2017ChrevroletCorvette350:59DennisMarmalyukov2021ToyotaCorolla410:59LathemRetz1990Volvo240500:59CameronMacSwain2003MitusbishiEvo560:59GordonMacSwain1970Datsun240Z570:59ErickWalters2000MazdaMiata131:00CodyAllen2001HondaS2000281:00NicholasCuevas2016MazdaMiata551:00AddisonLifrak2021BMWM240i361:01MicahelMainieri1980Volvo240691:01AndySimmons2003HondaAccord741:01BryantDixon2000ToyotaCelica771:01AliciaSmith2007SubaruForester1191:01CharlesWilkinson1983BMW320i3201:01DuncanWilkinson1980Porsche91111:02JesusOvalle1992MazdaMiata31:02CoryJones1998BMW323i41:03FaythBetke2019VolkswagenGolf81:03ClementMiller2020VolkswagenJetta241:03DesireeErickson2004Nissan350Z261:03JosephHellard1992Nissan240SX391:03SunyaTerry2016VolkswagenGolf541:03WilliamWhittaker2012VolkswagenGolf51:05RebeccaJohnson2019HondaCivic91:06DualtonSeibert1991Nissan240SX121:06WarrenRowlett1992Volvo240271:06LeviLa Tourette2003VolkswagenGolf511:06CateRandazzo2017Mazda6311:08AndrewPopovich1992FordMustang251:10BillWhittaker2012VolkswagenGolf151:12WilliamNorton1958BerkleyRenault531:12JeremyMelton2004PontiacGTO001:15JosephWalsh1992BMW325i221:18JonathanWaters1990MazdaMiata61:25 Drift Limbo 1st Place - Jake Moul 1994 BMW 318i…
NICOclub is back again with Carlisle Events to host our 18th annual NICOFest Carlisle AutoX…
Kraft Auctions Offers Fans a Chance to Own a Piece of Datsun Racing History
We built Datsun Ranch in 2014, and it was the culmination of a lot of…