“I thought you said you were going to put wheels on it?”
Now, my wife had already relegated herself to the fact that this car was going to get new wheels, and it seemed everywhere we went, she pointed out wheels she thought would look good on it. Our tastes differ somewhat, and 18″ chrome wheels with no lip just weren’t going to cut it on this car.
The stock 205/60/15 tires (convertibles had a 10mm larger OEM tire than the coupe or hatch) were wearing down, and I suspected the car would look much better with some old-school mesh wheels, maybe 16″, with a polished lip.
Of course, there’s the nightmare: 4-lug mesh staggered wheels with proper offset in reasonable widths? Not so simple. Fortunately, a local 240 owner had rescued a bedraggled set of Racing Sparco 16×7, 16×8 wheels from a JDM parts importer and decided he didn’t have the patience to restore them.
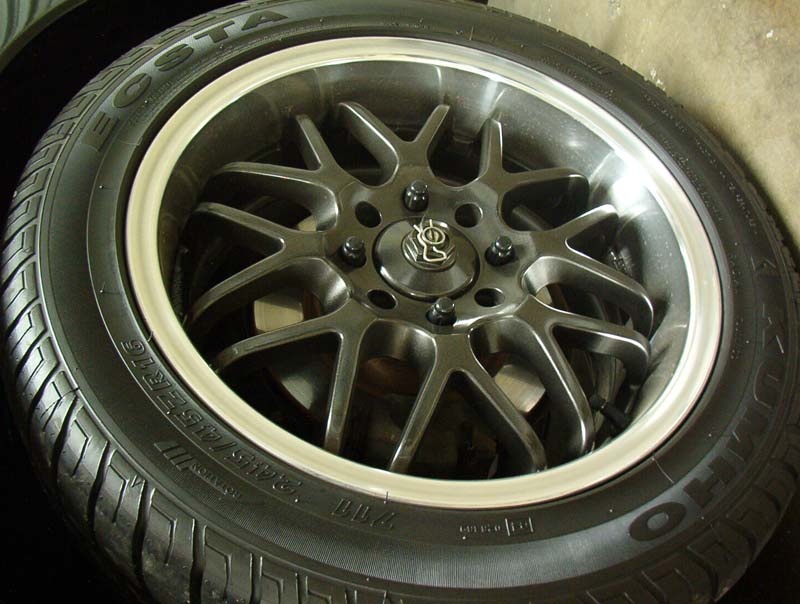
Naturally, in the pursuit of saving some cash, I had gotten in over my head. Everyone that saw the “new wheels” in the garage turned up their nose. “Yuck. Those are UGLY!” They had obviously been sitting outside, in a moist climate, for years. The aluminum had actually corroded to the point it was white and bumpy, like cauliflower. The painted mesh centers had faded to a light grey color, and the red anodized center caps had turned pink.
Another trip to NICO and Google to learn how to restore aluminum wheels.
Lacking any professional equipment, the easiest way to refinish the polished lip was to mount a wheel on the rear, jack up the car, and run it at idle in gear. Brilliant move, right? Well, until you catch your fingers in the mesh spokes while trying to sand down the aluminum lip…. Kids, don’t try this at home.
Three weekends of wheel restoration passed before they were presentable. 180 grit, 220 grit, 400 grit, 600 grit, 800 grit, 1000 grit, then 2 economy-size containers of Mother’s Aluminum Polish. Countless rags, gloves and paper towels (and a tank of gas) were sacrificed for the good of these wheels, and halfway through the job, it really felt as if it was a waste of time. Once the lips were all polished, it was time to mask off the centers and refinish them. I searched for the perfect color, finally settling on a dark metallic gray epoxy paint. Fortunately, it turned out perfect, and the wheels were ready for tires.
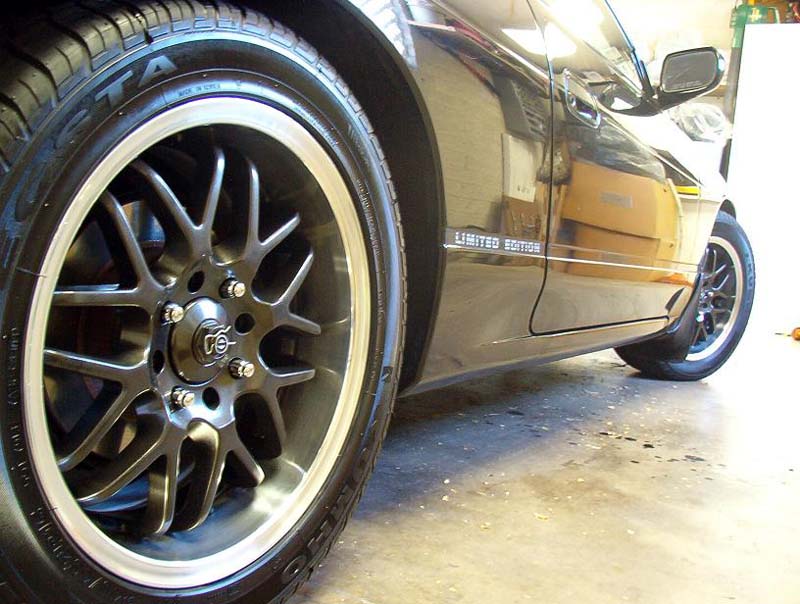
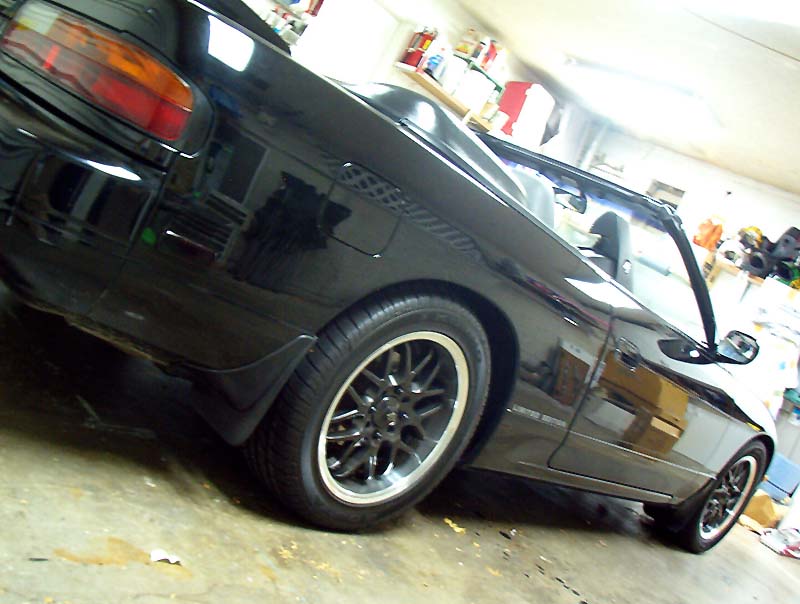
I settled on 245/45 and 225/50’s Kumho tires, which were within my budget and looked great. The wheels had miraculously maintained a good balance, and required only a couple small wheel weights to be in perfect balance. A set of black Kyokugen spline-drive lug nuts set off the look perfectly.
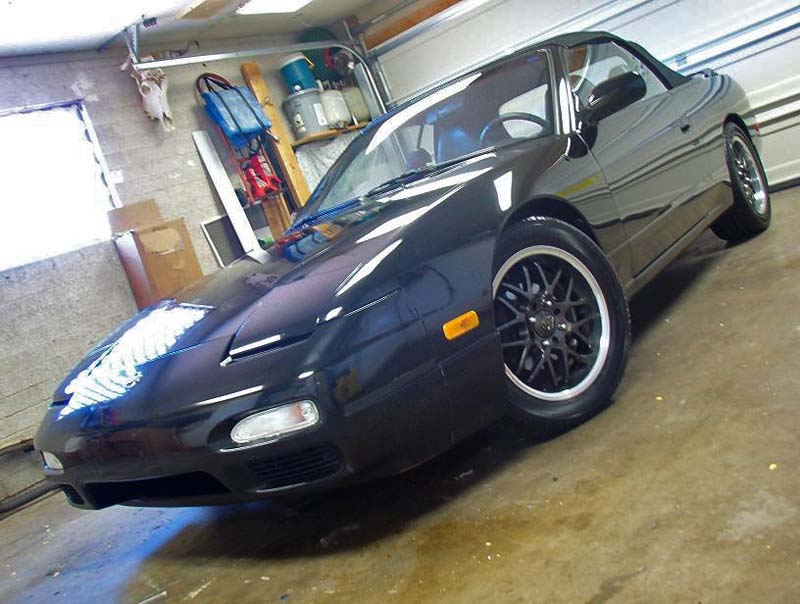
Before I ever left the tire shop, a couple onlookers commented on how good the car looked. No longer the golf-bag-lugging vehicle of a retiree, my excitement for the car was growing… Until one of them said, “Dude, it needs to be lowered – Badly.”
Before the night was through, I had scoured NICO’s Advertiser Directory for springs and struts, settling on a set of Tein S-Techs and KYB GR-2’s. An inexpensive solution, but one that came recommended by lots of members as a good “entry-level” suspension setup. More reading ensued, and by the time the parts arrived, I was confident I could tackle the job.
Little did I know that using a spring compressor on a small import car was MUCH different than the procedure on a 60’s-era domestic musclecar, and I’ll tattle on myself and leave you with this image: A set of spring compressors, compressing the spring nicely, but hopelessly wedged into and unwilling to come out of the wheelwell.
Lesson learned. Those Japanese just HAD to make things easier than I ever thought…
What a difference in the ride – This car handles great! With the additional contact patch, lower center of gravity and increased dampening, it seemed as if it was “on rails”. There simply wasn’t enough power to outperform the suspension, and cornering was crisp and precise. Why in the world was this car ever marketed to secretaries?
It’s hard to drive a 240sx without repping my own company, so a BRM exhaust found its way onto the ‘vert… 2.5″ aluminized steel, 22″ resonator, dual tips. Best-sounding catback on the market, and all of a sudden, the car started getting some attention on the road – Some of it unwanted. Every schmuck in a modded Honda or Eclipse had to rev their ricewagons at me, and I knew deep inside that this wasn’t a car I wanted to do the “Stoplight Tango” in.
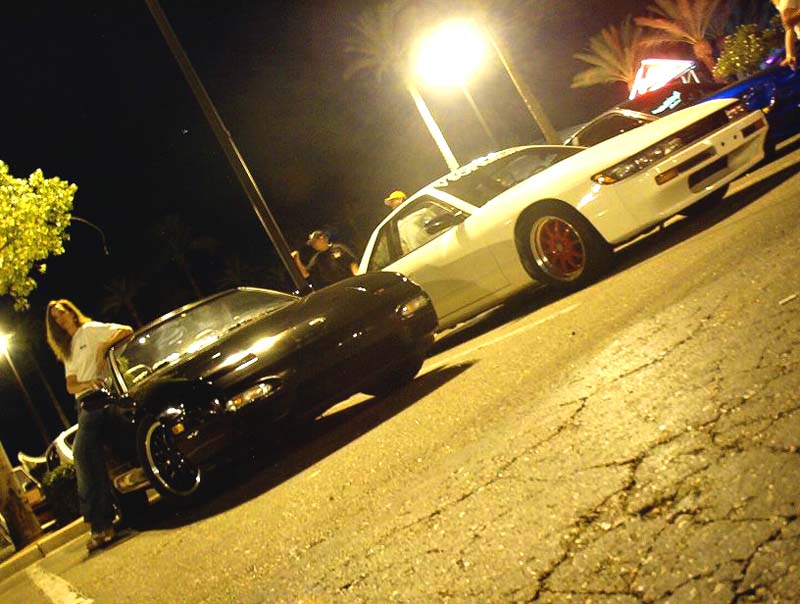
By now, I felt good enough about the car to attend a night at the Pavilions with NICOmom riding shotgun.
View other segments:
NICOclub is back again with Carlisle Events to host our 18th annual NICOFest Carlisle AutoX…
Kraft Auctions Offers Fans a Chance to Own a Piece of Datsun Racing History
We built Datsun Ranch in 2014, and it was the culmination of a lot of…
Since it's not just Datsuns that are vintage anymore ("classic Nissan" still sounds weird, right?),…
Let's talk about big brake kits for a bit. For the purposes of this article,…
What do these terms mean? Pulsed Secondary Air Injection (PAIR) Valve: The PAIR valve sends…