Car repairs can be intimidating at times, especially on front wheel drive vehicles. One of the jobs i’ve dreaded doing the most on my vehicle is a spark plug change, due to the stories I had always heard about how bad changing the rear plugs was on a FWD vehicle. So the time finally came and I decided to tackle it myself. First of all it wasn’t nearly as bad on the I30/Maxima as I anticipated and with the proper tools I believe that the job can be done in around an hour. This article will give you detailed instructions on how to do them yourself and save yourself a little money in the process. Who doesn’t like saving money anyways? Let’s get started!
*Note – Make sure you replace your spark plugs with OEM equivalent plugs. In this case I used NGK Iridium IX plugs. Also, if you’re replacing the coils it is HIGHLY recommended that you use OEM Ignition Coils, because most aftermarket replacements aren’t within proper operating specification to preform properly, which will likely continue to trigger your Check Engine Light with a misfire code.
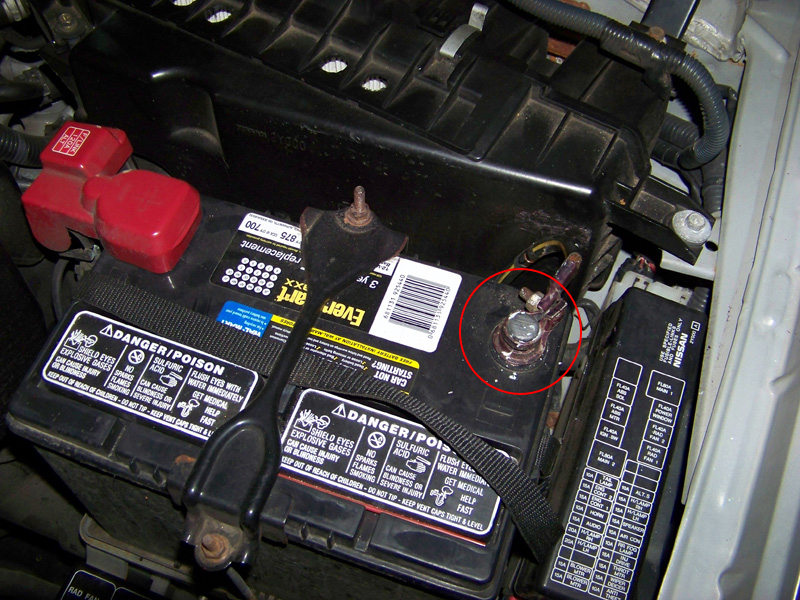
First of all, you want to disconnect your negative battery cable(just for safety reasons):
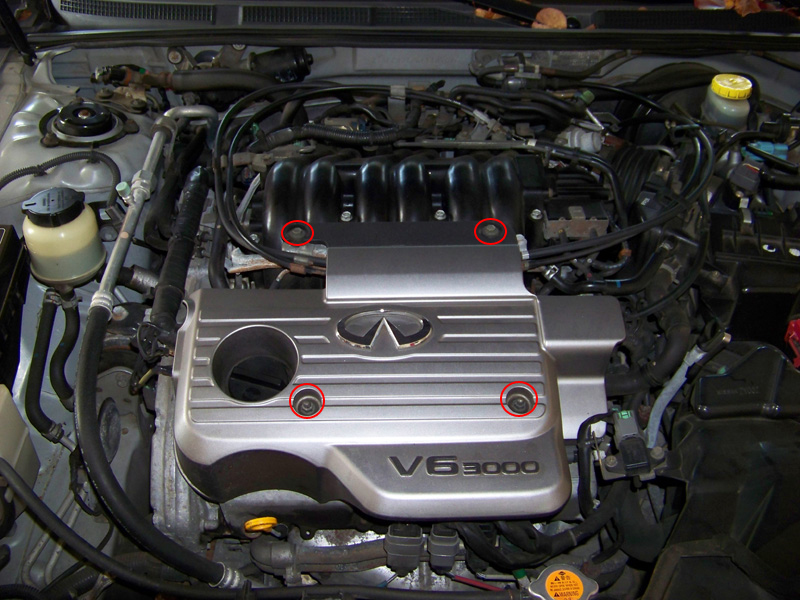
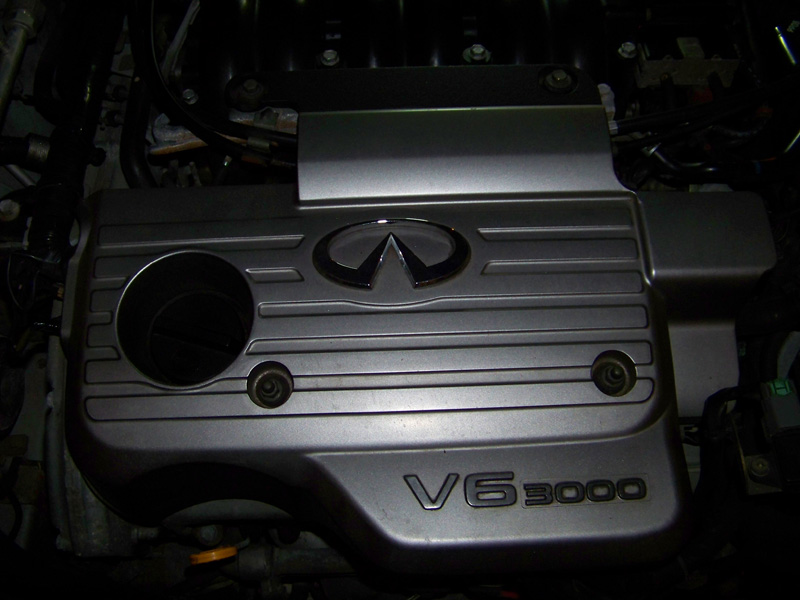
Next you will locate the four nuts on the plastic engine cover and remove them, which are highlighted in red:
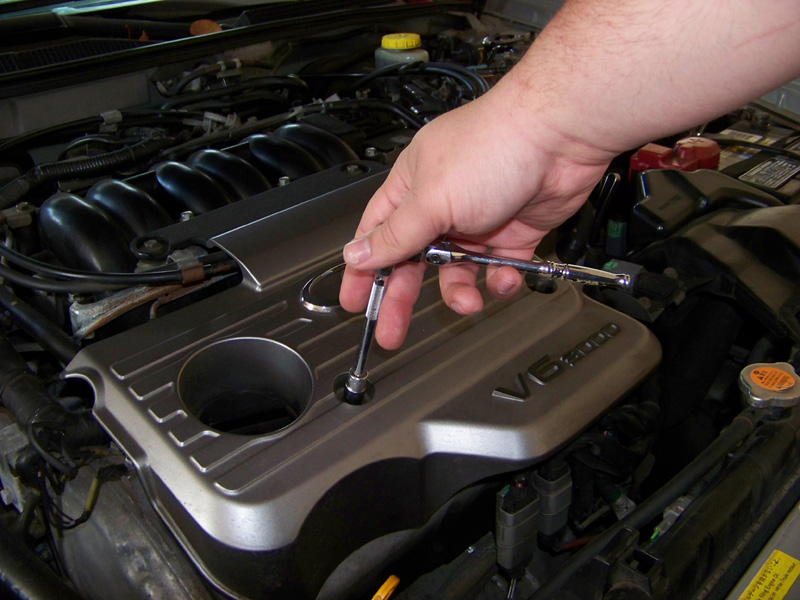
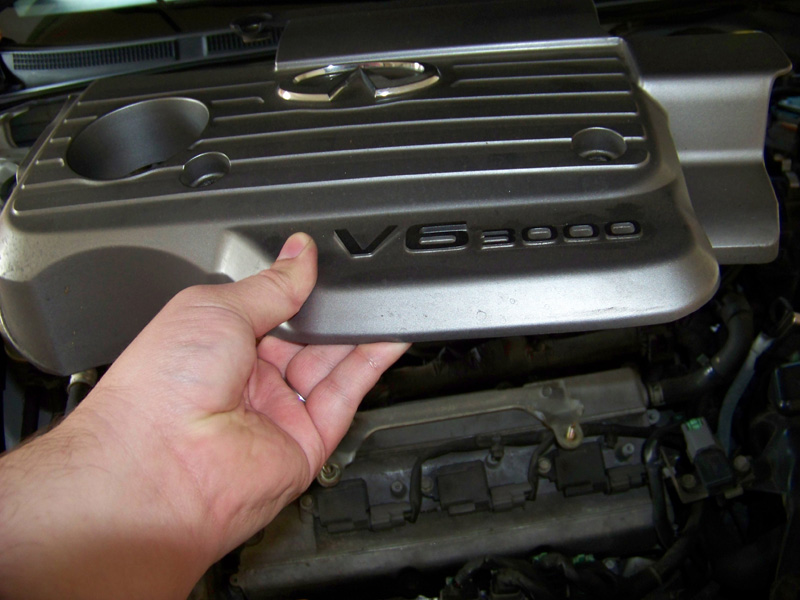
Now you will remove the engine cover and set it aside:
First we will tackle the front spark plugs. As you see below, there is one bolt per coil pack that secures them. I highly recommend doing one at a time, just to keep from getting parts confused or losing them. Also, highlighted in blue are the connectors. I didn’t have to disconnect the coil packs on the front side, but I will outline below how to remove the plugs from them in case you feel the need to.
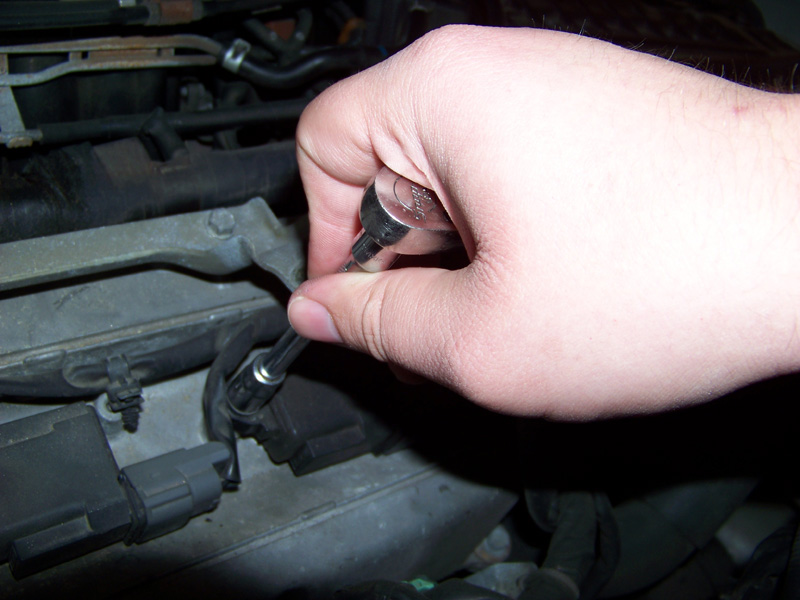
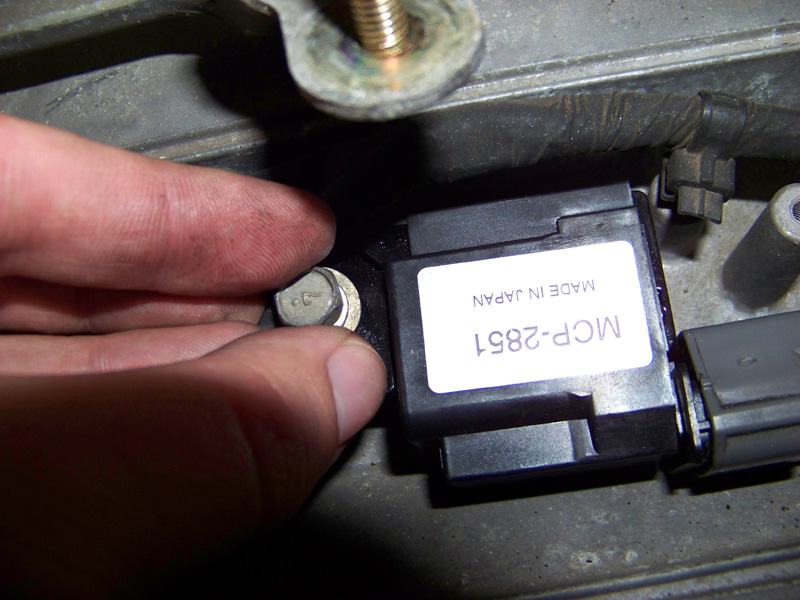
First you will remove the bolt from the coil pack:
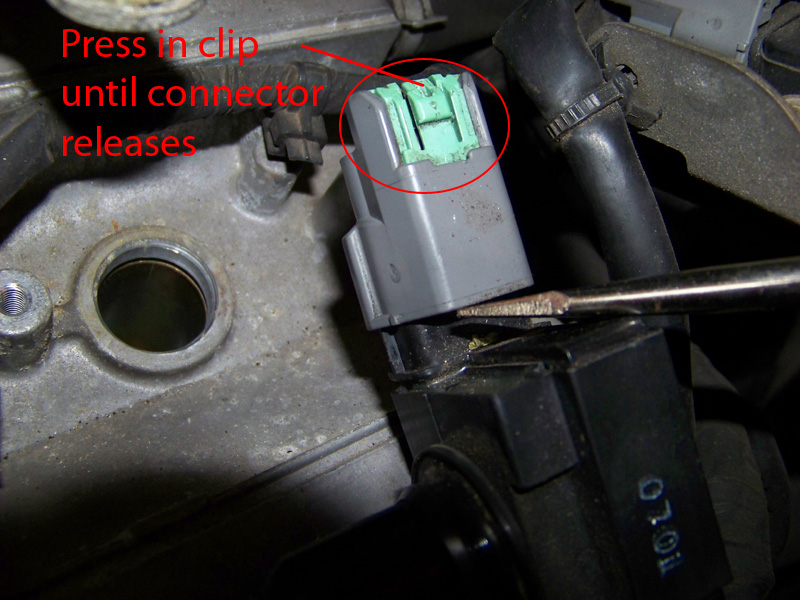
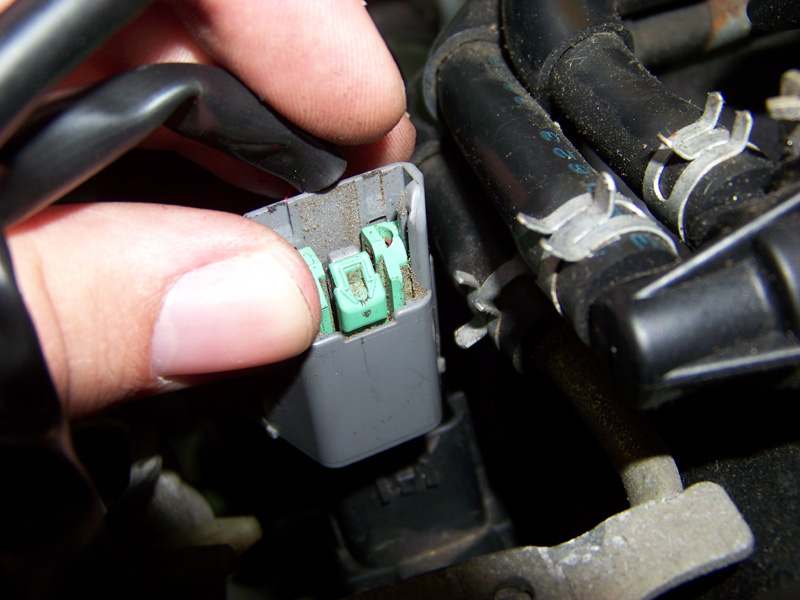
Then remove the connector if necessary by pressing down the green clip until the connector releases. You may have to press it down with a small screwdriver, since it was a bit difficult to do with my fingers. Ignore the screwdriver position in the photo, it was not needed:
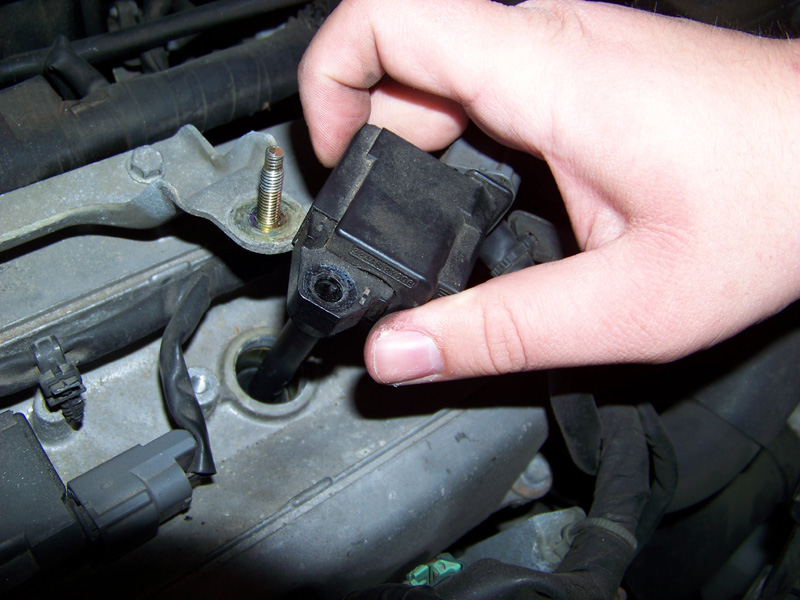
Next you will gently lift up on the coil pack until it comes off of the spark plug and pull it out of the cylinder head.
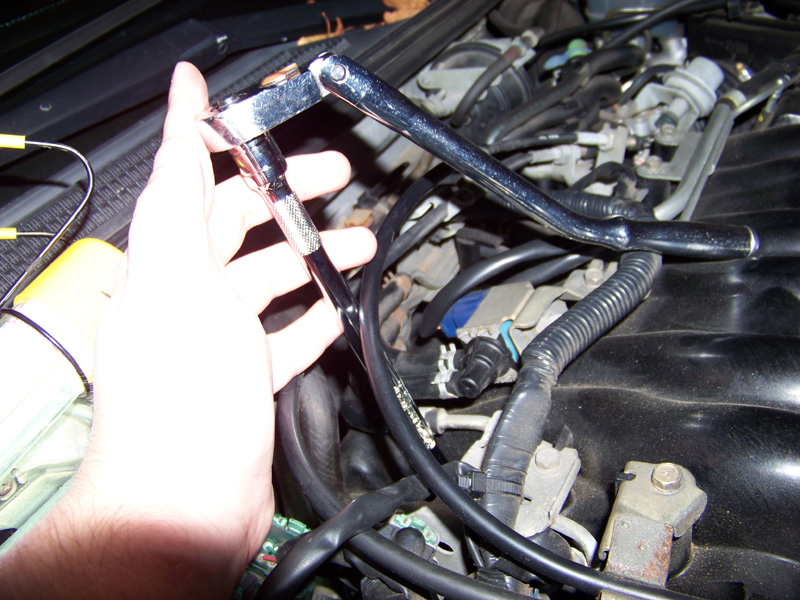
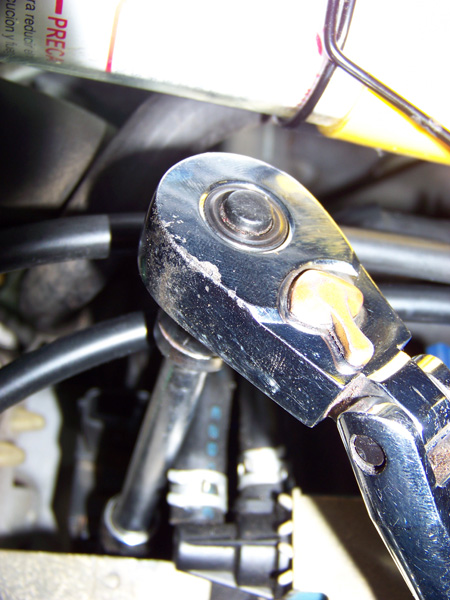
Next, using your 10″ extension and 5/8″ spark plug socket, remove the spark plug. If the socket doesn’t slide over the spark plug on the first try, slowly spin it until it slides over it and doesn’t spin freely anymore:
Remove the spark plug with the ratchet and lift it out of the cylinder head:
Now, place the new spark plug in the end of the socket and use the extension to put it back into the cylinder head. Spin the extension by hand to get it started into the cylinder head, until it’s hand tight. Then use the ratchet to tighten it back town carefully. I typically only tighten it until it’s snugged up, but I would recommend looking up the proper torque specifications if you feel uncomfortable with that, because you can damage something if you over-tighten them:
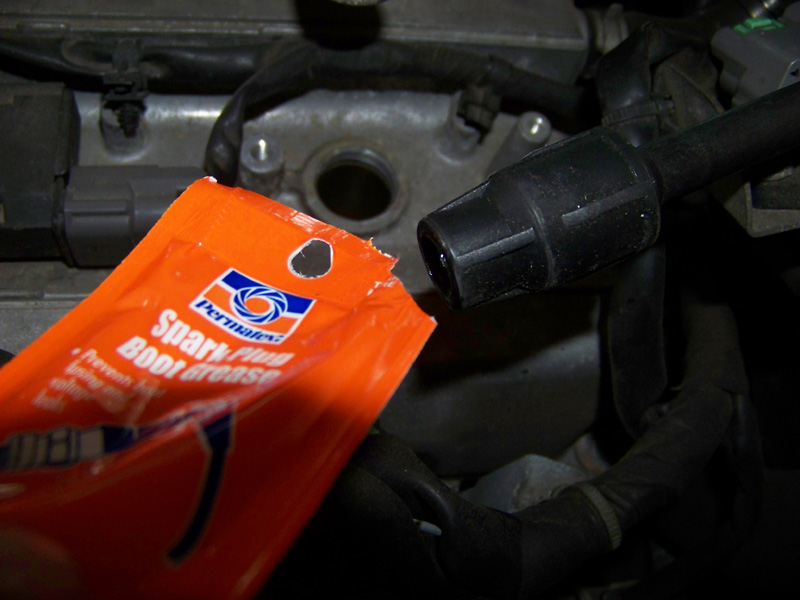
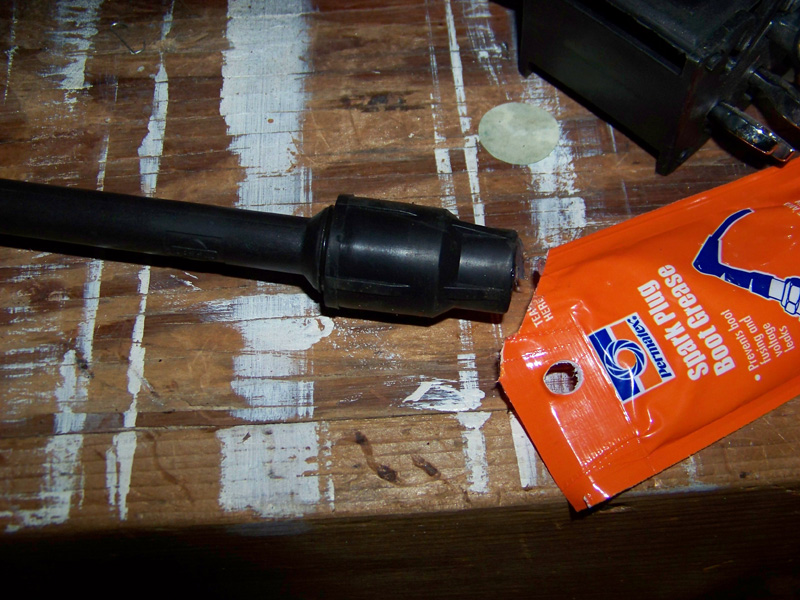
Now you will need to re-install the coil pack. First re-connect the connector, pressing it until you hear it click. Also before re-installing the coil pack, make sure to put spark plug boot grease on the end of the boot. Then put the coil pack back into the cylinder head and press it down until you feel it slip over the spark plug:
Now after re-installing the coil pack, you will put the bolt back into it and re-secure it. Make sure not to over-tighten the bolt, so you don’t crack the coil pack:
Repeat this process for the other two coils on the front side.
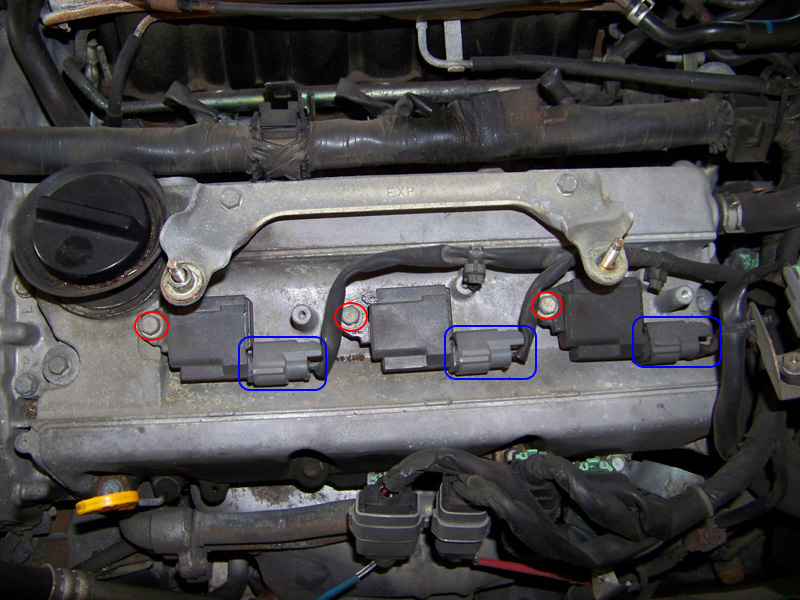
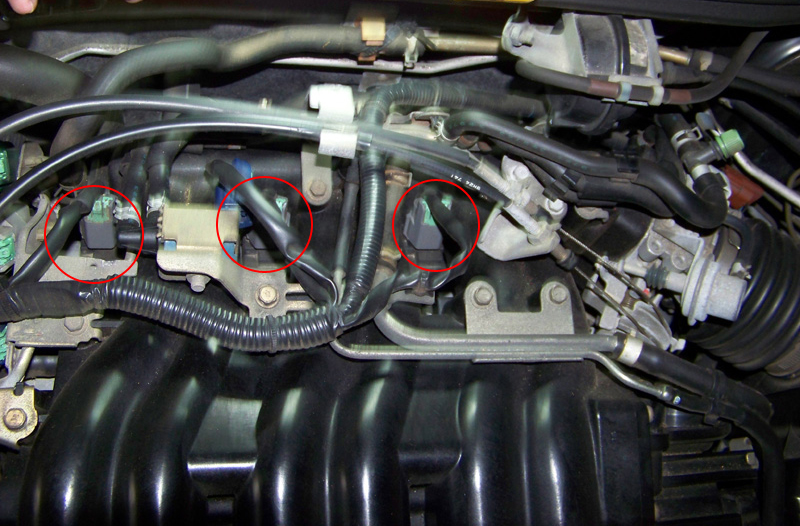
Next we will move on to the rear plugs, which will be a little more difficult
As you can see, the areas are marked in red where you will find each coil pack(forgive the picture quality):
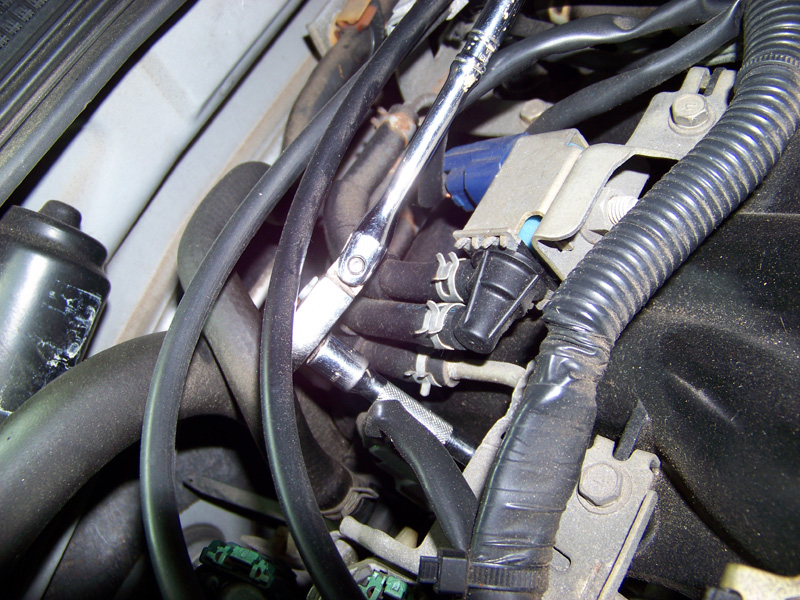
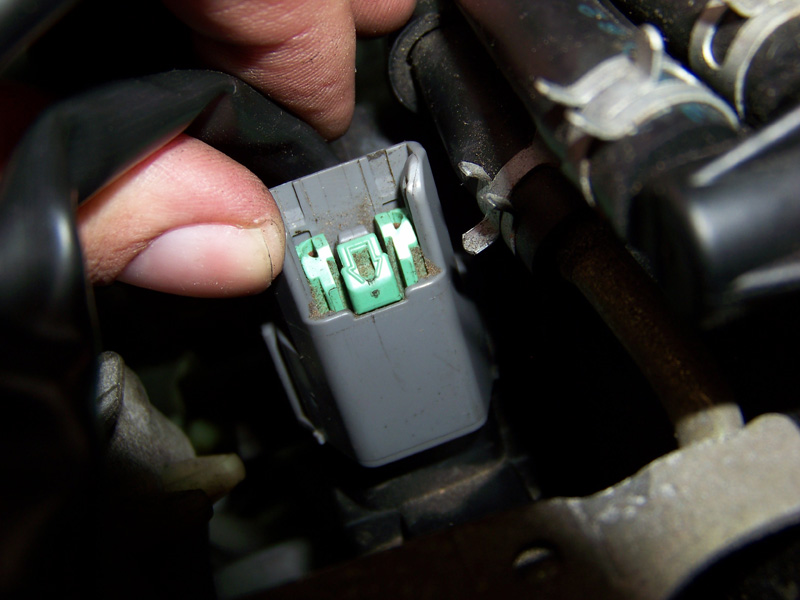
Next you will remove each bolt securing the coil pack, then remove the connector by pressing in the green clip until the connector pops off:
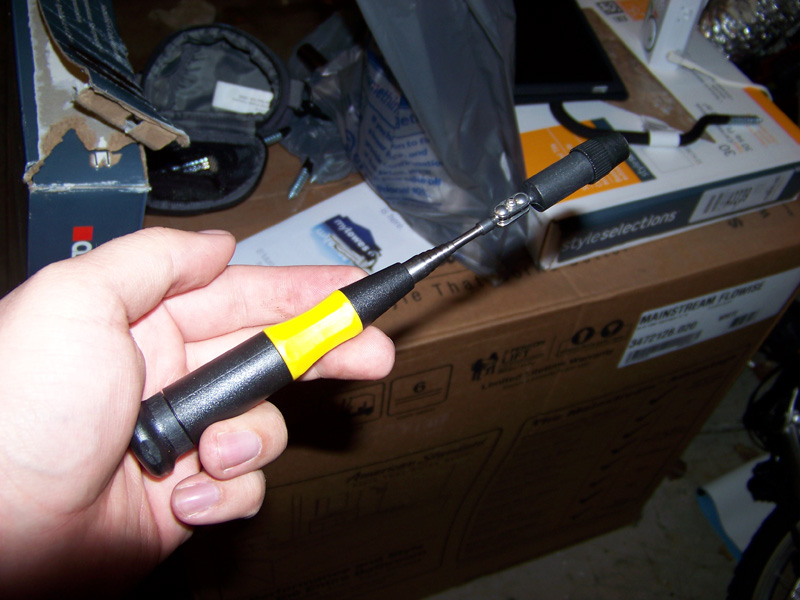
*NOTE: If you manage to drop any of the coil pack bolts in this process, you may want to make sure to have one of these around. It’s an extendable, flex magnet which you can pick up at any Auto Parts store, like Advance Auto Parts or Home Improvement store, like Lowes:
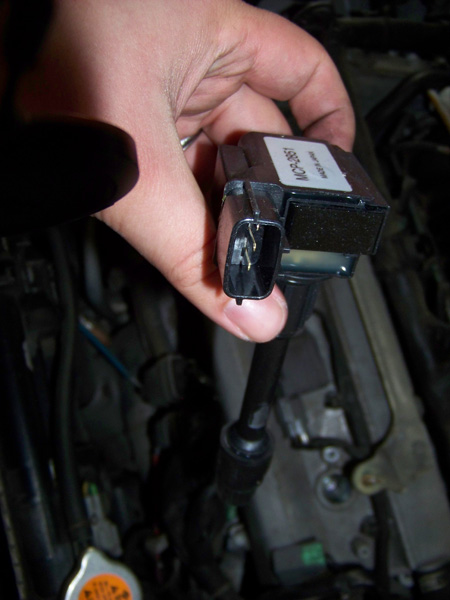
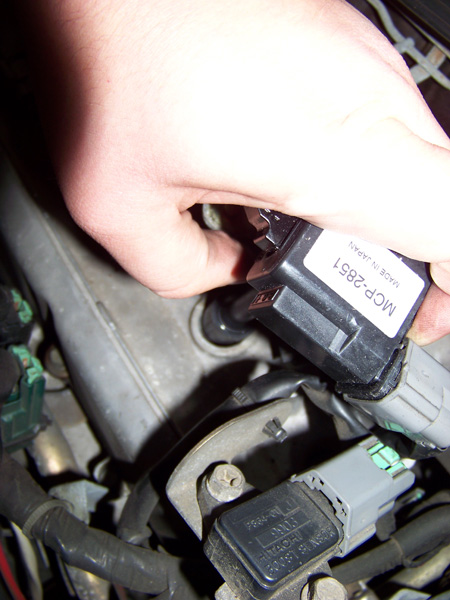
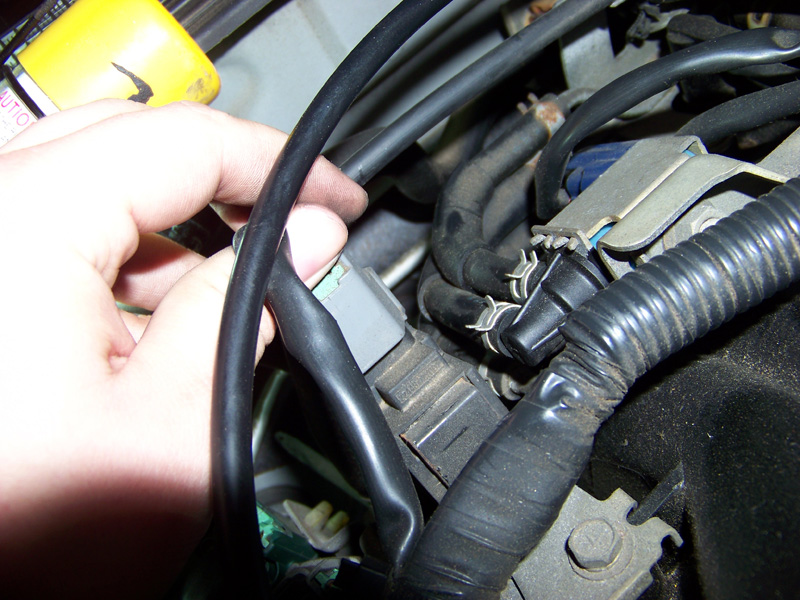
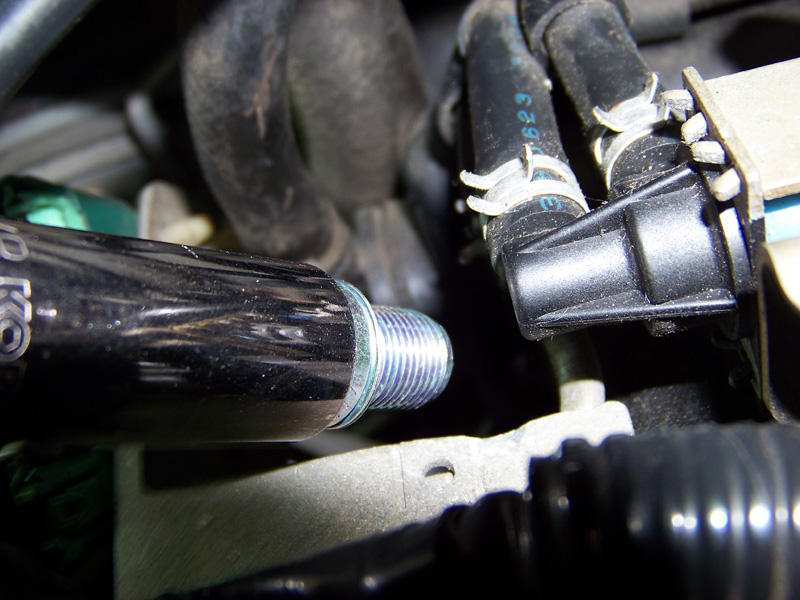
Now you will gently lift the coil pack straight up, working it out of the cylinder head:
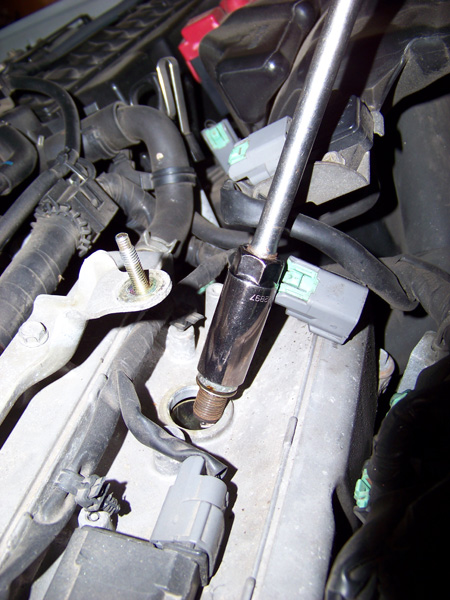
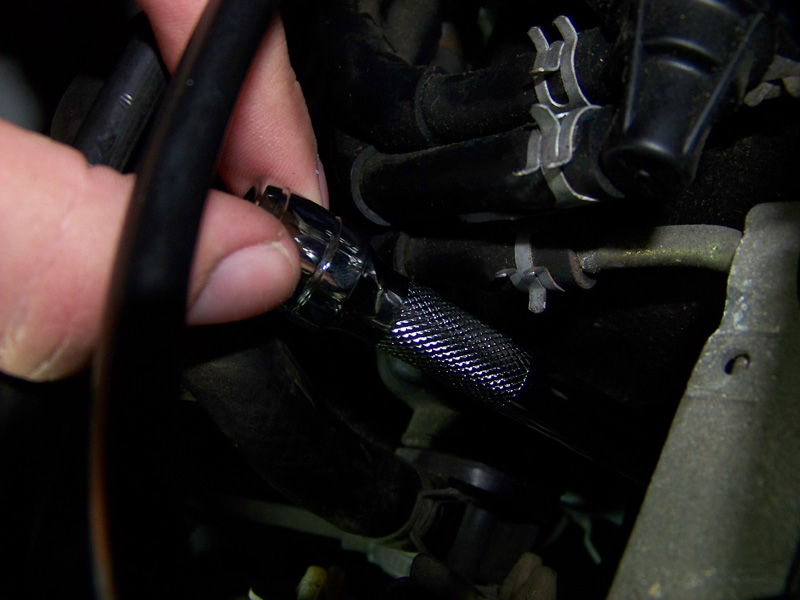
Next you will remove the spark plug, using your 10″ extension and 5/8″ spark plug socket(You may have to add a short extension on the other plugs to make removal easier):
Once you get the spark plug loosened, remove the ratchet from the extension and spin the extension with your fingers to remove the plug:
Now replace the spark plug and put it back into the cylinder head, re-tightening it with you fingers until snug:
Now tighten it back down with you ratchet, until snug:
Next, you will replace your coil pack. Remember to put grease on the end of the coil pack before replacing:
Now you will replace the bolt to secure the coil pack and re-tighten it. Also remember to re-connect your wiring harness, pressing it until you hear it click:
Now you will repeat this process for the other two. Keep in mind you need to be careful when lifting out the coil packs and plugs, in case you have to move any hoses or cables out of the way that may be blocking things.
Once you’re done replacing all of the plugs, you will need to check and make sure everything is secure, then you’ll replace your engine cover:
Then make sure to re-connect your battery:
Now you’re done! Shut the hood and go for a test drive!
Comments or Questions? Follow this link: How to: Replacing Spark Plugs and Coils Maxima/I30/I35
NICOclub is back again with Carlisle Events to host our 18th annual NICOFest Carlisle AutoX…
Kraft Auctions Offers Fans a Chance to Own a Piece of Datsun Racing History
We built Datsun Ranch in 2014, and it was the culmination of a lot of…
Since it's not just Datsuns that are vintage anymore ("classic Nissan" still sounds weird, right?),…
Let's talk about big brake kits for a bit. For the purposes of this article,…
What do these terms mean? Pulsed Secondary Air Injection (PAIR) Valve: The PAIR valve sends…