Find related tutorials and information on your vehicle in NICOclub’s Nissan Forums & Infiniti Forums |
This write-up will work for a vast majority of sunroof-equipped vehicles. Does your sunroof leak, or do your A-pillars drip water? Do you even get water coming from the front overhead console of your vehicle? Chances are, you have a leaky sunroof with clogged drain lines, and the good news is you won’t have to spend any money to fix it! (Provided you already have all the proper tools for the job.)
This particular write up is done on a 2007 Nissan Quest, but as I’ve stated, a vast majority of sunroofs are the same design, and this should be a good baseline to get you going on your repair.
Let’s get started!
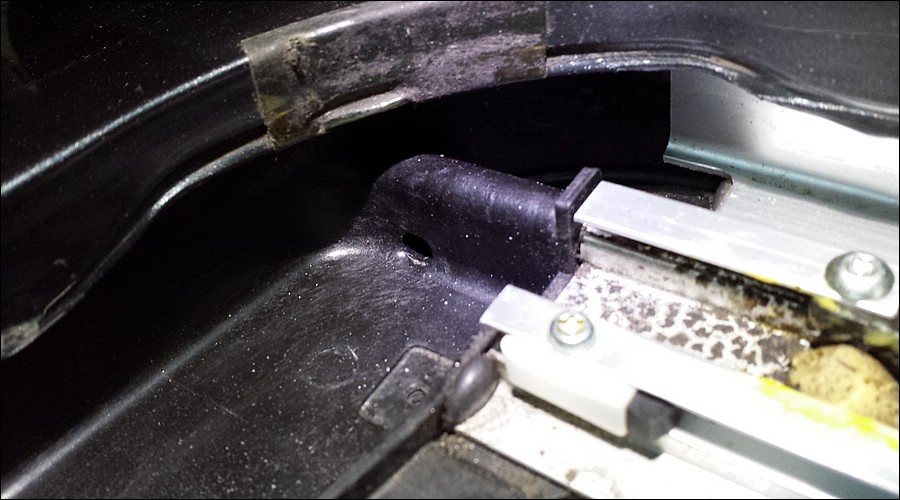
Start off by opening the sunroof. Easy enough. Then, remove the wind deflector. On this vehicle, it’s held in by two screws, one on each side. Then, you should see something like this:
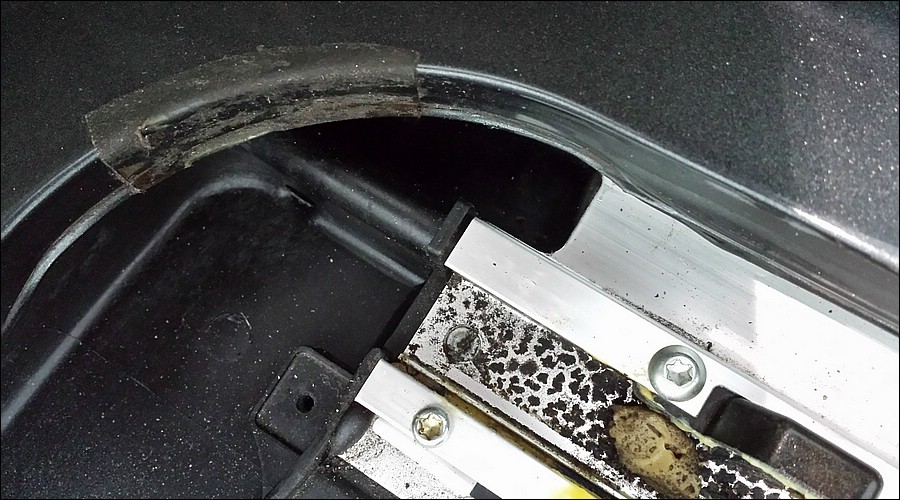
There should be two small holes on each side (yours may only have two total, as it may only have front drains. The Quest has front and rear drains). Here’s a better view from the top:
In my case, both holes on the right side were clogged with some dirt. I vacuum cleaned the tray, wiped it down with damp paper towel and cleaned both holes with pipe cleaner. Soft wire may work as well. That did the trick for me. At least on the right side drain.
I though that was it, but after pouring some water in the tray, I found out that my left side drain was clogged as well. I tried pipe cleaner and wire again, but it didn’t work for me this time.
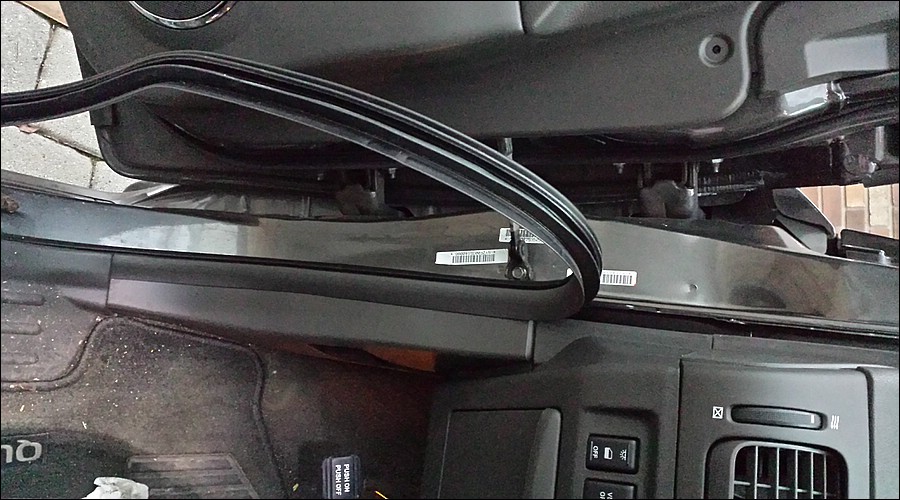
If this is your case, next step would be to remove your door weatherstripping in the door opening.
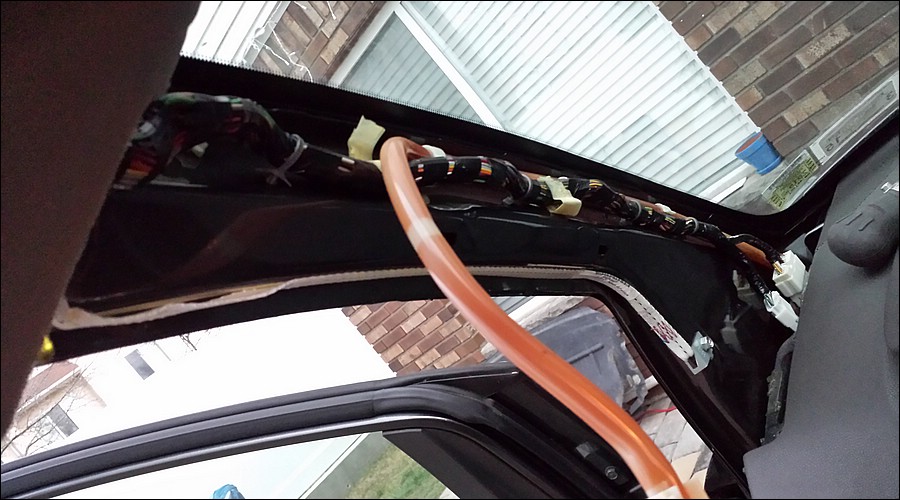
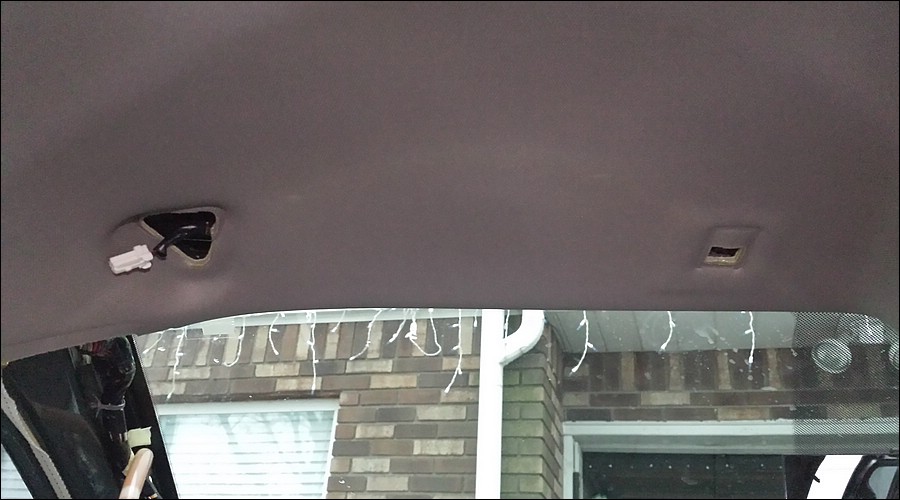
Remove the A pillar cover, and you should be able to see something similar to this:
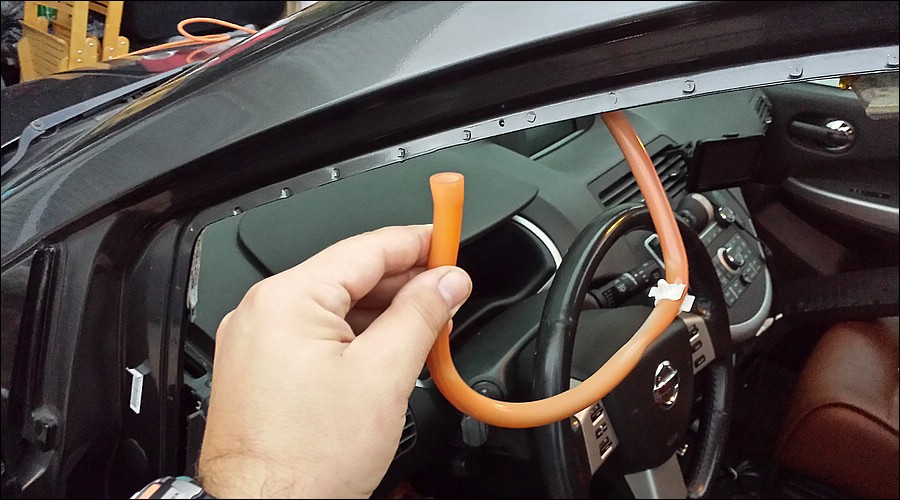
That soft, flexible hose should be your drain line. Next, remove the sunvisor:
This should allow you to pull the headliner down just enough to follow that hose to where it’s connected to the drain and pull it off. NOTE! Get some rags ready, as there could still be some water and gunk in the lines.
Voila! The line is off! Now, there are a few different options you can use to unclog the hose. You can use a pipe cleaner if you have one long enough to reach the clog, or a piece of soft wire (being very careful not to snag the hose and tear it), or you can try to force the clog out with either a low PSI of compressed air or water. Don’t go full blast if you choose this option, as the hose could be old and weak, and you definitely don’t want a blowout. After you clear the clog, run some water from the hose through it just to make sure the clog is completely washed out. You just did all this work; You wouldn’t want to have to do it again, would you? Reassembly is reverse order, and you’re all done!
No pictures of the rear, as it wasn’t needed in my case, but the procedure is pretty much the same. You may have to remove some trim pieces or headliner retainers to be able to access above the rear headliner.
All in all, I give it a difficulty rating of 2 out of 5 stars. Believe me, it looks like a much more daunting task than it actually is. Not quite as easy as replacing an air filter, but close.
Article content and photos are credited to siny240sx!
NICOclub is back again with Carlisle Events to host our 18th annual NICOFest Carlisle AutoX…
Kraft Auctions Offers Fans a Chance to Own a Piece of Datsun Racing History
We built Datsun Ranch in 2014, and it was the culmination of a lot of…
Since it's not just Datsuns that are vintage anymore ("classic Nissan" still sounds weird, right?),…
Let's talk about big brake kits for a bit. For the purposes of this article,…
What do these terms mean? Pulsed Secondary Air Injection (PAIR) Valve: The PAIR valve sends…