by MeanGreens14
Overview:
This is a write up on how to change out subframe bushings on the Nissan S14 chassis. No. Not the little spacers that go in between the top and bottom of the subframe, we’re talking THE ACTUAL BUSHINGS. Doing this job on your own will save you lots and lots…did I mention loads of money. Although. Unless you have invested in a hydraulic press there will be a small dollar amount to burden. This cost should not be too much (2-3 hundred at the most). You can expect approximately four or five hours of shop labor. It is a potentially lengthy project, but well worth it for hard core driving enthusiasts.
The downtime is approximately one week depending on your skill level and shop wait time.
Difficulty: ****
Time: 4-5 hours
Cost: $300-$400 (including labor)
Tools:
– air tools and a compressor
– metric socket and open-end wrench sets
– large wooden blocks
– floor jack and stands
Materials:
– bushing set
Procedure:
Jack up the car and place it on stands. Make sure it is secure before proceeding. Place your blocks under the hubs to support them while the car is elevated.
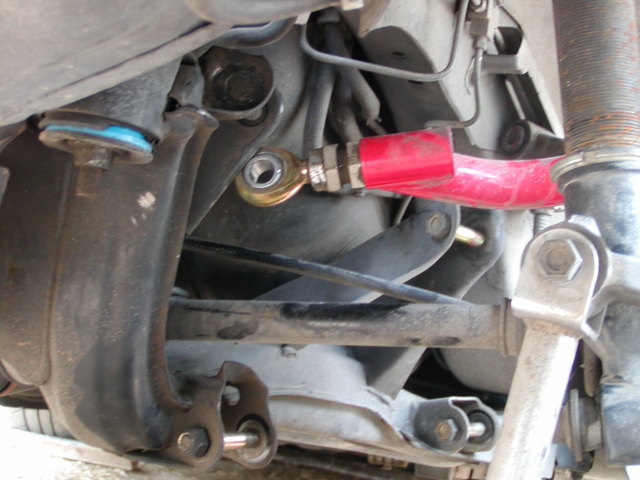
Take a good look at your subframe and how the suspension components are attached to it. Make a note of all of the sizes and types of wrenches you will need to remove the bolts attaching them. Go about disconnecting them.
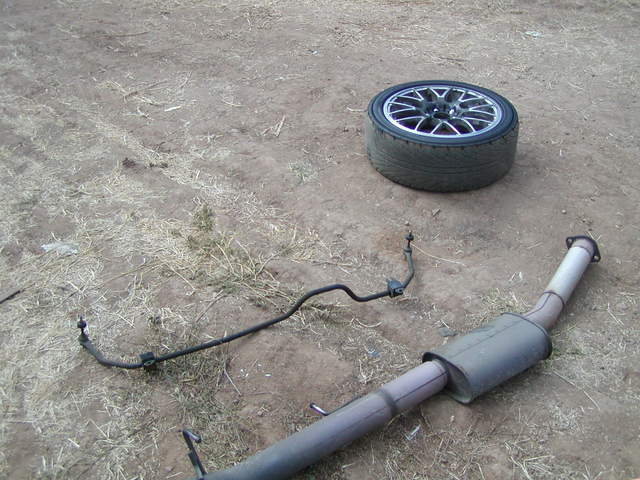
Remove your exhaust and swaybar (if you have one :P) and pull your axles. Next, pull the e-brake bracket and remove the driveshaft.
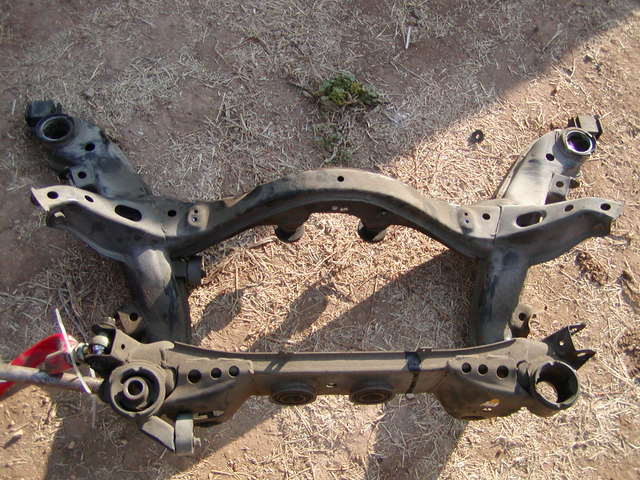
Place your floor jack under the differential and unbolt the subframe nuts in a cross-pattern. Balancing the assembly on the jack, lower the subframe and remove the differential.
If you don’t have access to a press yourself, you will need to take the subframe and the bushings to a shop and have them remove the old ones and replace them for you. This could take a while, so its best to contact the shop of your choice beforehand and make sure they know what they are doing and set up a time and estimate.
Installation is the reverse of removal. Make sure you tighten all related bolts to their specified tq settings as outline in the FSM!
send questions to radiokid27@hotmail.com
NICOclub is back again with Carlisle Events to host our 18th annual NICOFest Carlisle AutoX…
Kraft Auctions Offers Fans a Chance to Own a Piece of Datsun Racing History
We built Datsun Ranch in 2014, and it was the culmination of a lot of…
Since it's not just Datsuns that are vintage anymore ("classic Nissan" still sounds weird, right?),…
Let's talk about big brake kits for a bit. For the purposes of this article,…
What do these terms mean? Pulsed Secondary Air Injection (PAIR) Valve: The PAIR valve sends…