NOTE: This will be a multi-part series where we compare a couple relatively new and popular products so that our readers can make an informed decision as to what to buy.
Every year, the NICOclub staff attend the SEMA show in Las Vegas – and every year, we come home with a laundry list of cool new products in the automotive aftermarket industry. This year, I caught up with the owner of All-Fit, a company that’s changed the game in – of all things – universal body lip kits.
So, when NICOclub got started, way back in the Dark Ages (2002, you whippersnappers!), one of our earliest articles has been copied, re-shared, improved upon, and most of all, referenced – many times over. It was simple: A low-budget way to install a lip kit on your 240sx using Home Depot vinyl molding. Wouldn’t you know, someone’s come up with a way better mousetrap.
Although I spent a couple hours “talking shop” with AJ (the owner), we really didn’t spend a lot of time discussing the product. Instead, he simply said, “Take it home, try it out, and tell me if you find something better on the market.” Can’t beat that kind of guarantee, so away we went with a couple All-Fit kits (along with a few pieces of the competitor’s material for comparison) and headed back to Arizona to do some installing.
Checking through some of the sales literature (because I like to do my homework for you guys), there’s a lot of discussion of All-Fit’s process for custom manufacturing of a material that can withstand impact with curbs and the expected scrapes that a low-hanging front lip will have to endure. I also did a little reading on the installation process, as well as the hardware they provide for a super-secure installation.
Looking at the competition’s finished product in pictures, it was pretty clear that the All-Fit product would look very similar, if not identical, after installed on the car – but playing around with the material in my shop, it was pretty clear that the All-Fit material is quite a bit more durable. To me, it doesn’t make sense to spend a couple hours installing something if there’s a chance you might have to reinstall it six months later. You may feel otherwise, but I prefer to “do it once and do it right” – eve if it means a couple extra dollars.
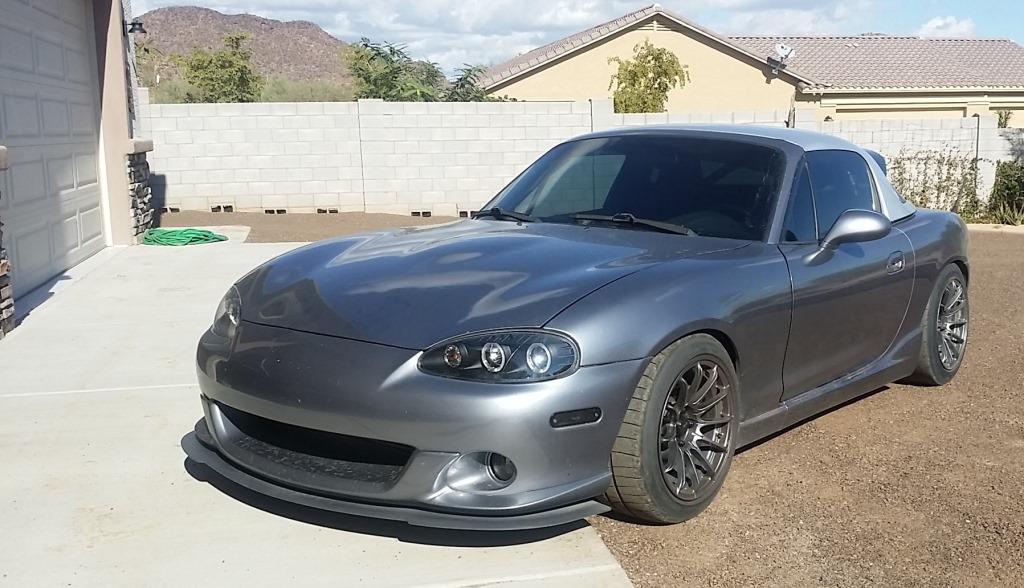
For the first installation, I decided to put this product through the wringer – One of the cars I spend a lot of time in isn’t a Nissan (oh, the scandal!) but a 2004 MazdaSpeed Miata. Nothing I own is stock, and my Miata is heavily modded for track use and heavy-duty, high-speed, urban traffic warfare. Not only is the car significantly lowered, but I have a TrackDog Racing front splitter that spends its entire existence in a pretty harsh environment – 3″ above Arizona pavement at subsonic speeds.
The goal? Give the splitter a more substantial appearance, while protecting it from road debris and suicidal desert mammals. Let’s rock.
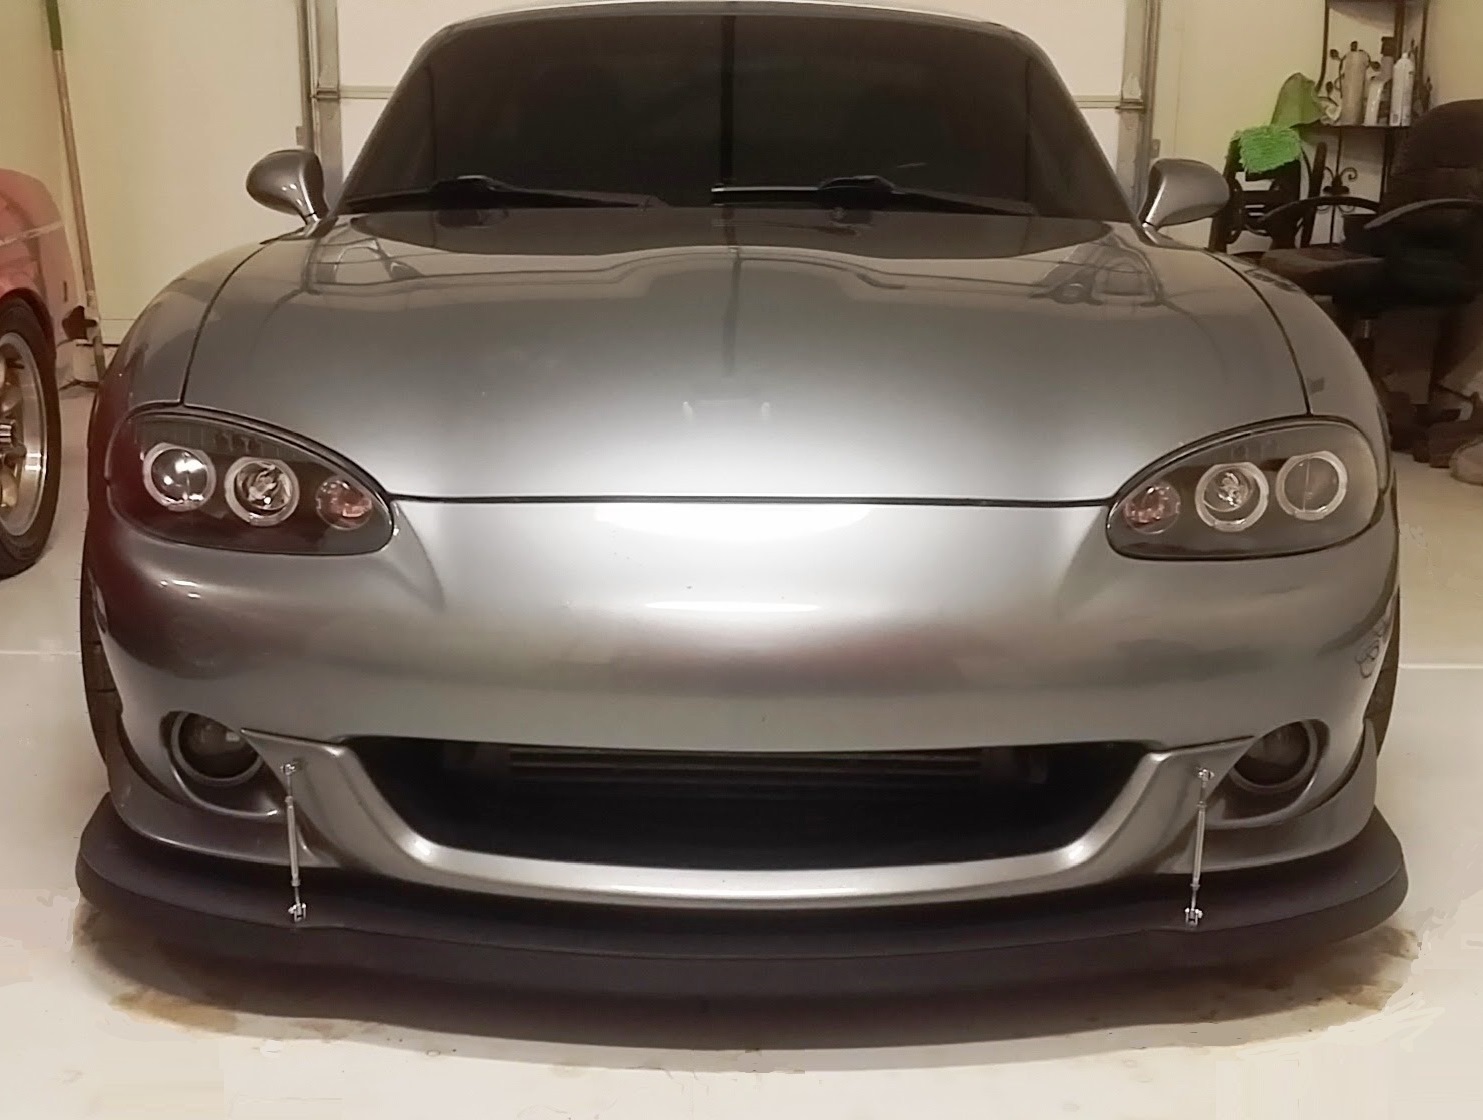
The All-Fit material is quite a bit more firm than the competition’s lip material, so it’s not as easy to install. That’s ok, because easy often means lame. I found that slowly “working” the curve of the lip during installation, while making some strategic pie cuts in the mounting surface, allowed me to lay down a clean, perfect radius that followed the contours of the splitter perfectly. I’ve had a lot of experience working with automotive grade 3M adhesive, which is what All-Fit includes on their lip.
[Note: Nearly every photo of the installation process was un-usable due to glare. I removed the bumper to do the installation, and photographing the black surface against my reflective shop floor was a colossal fail. We’ll get some detailed pics of the trimming technique in the next article.]
Speaking of the 3M adhesive, it’s some of the stickiest stuff in the business, and using a few tricks made sure this thing won’t come off, even in a catastrophic impact: These tricks include roughing a narrow strip on the mounting surface with 200-grit sandpaper, cleaning the surface thoroughly with soap and water, followed by an alcohol wipe. Then using the supplied adhesion promoter, and finally applying a little heat from a heat gun to the adhesive during installation. While All-Fit highly recommends using the supplied additional hardware for a super-secure installation, my installation would require the hardware to remain exposed, so I passed on that. However, I can totally see the value in it – Using a screwdriver to apply the screws, coupled with the broad ABS plastic backing plates, will keep the lip mounted effectively in even the most extreme conditions.
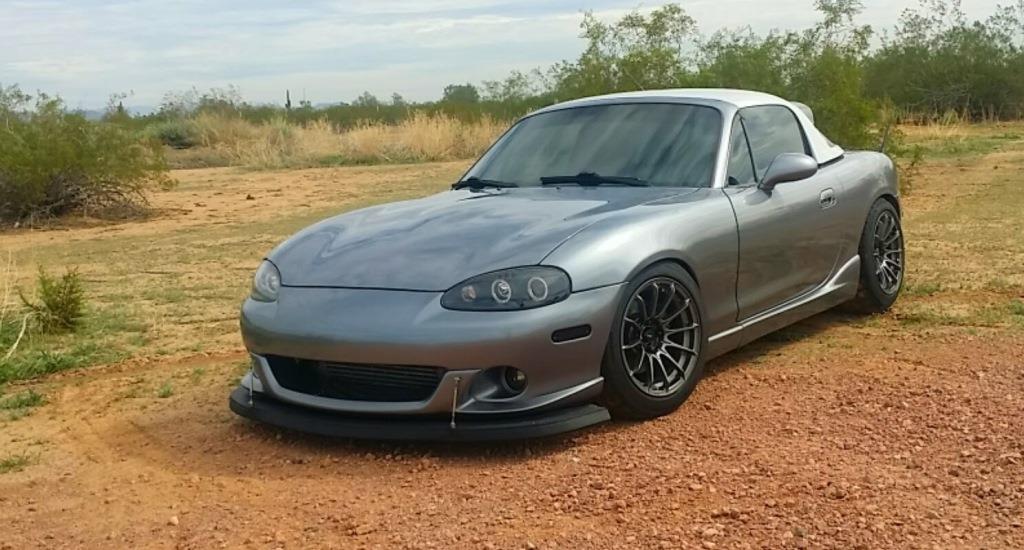
Here’s a look at how it turned out immediately after installation, and a few more pics after a month in the wild:
I’m totally happy with the outcome – The lip kit gives the splitter an even more aggressive look, and the added layer of protection is already evident. We’ll do another install in a couple weeks on a different car, so you can see a more traditional-style installation!
You can buy the All-Fit universal lip kit for your car here!
Here’s a review of a competitor’s product – I like the All-Fit, but you may prefer something else! Universal Lip Kits: Battle of the Budget – Part 2!
NICOclub is back again with Carlisle Events to host our 18th annual NICOFest Carlisle AutoX…
Kraft Auctions Offers Fans a Chance to Own a Piece of Datsun Racing History
We built Datsun Ranch in 2014, and it was the culmination of a lot of…
Since it's not just Datsuns that are vintage anymore ("classic Nissan" still sounds weird, right?),…
Let's talk about big brake kits for a bit. For the purposes of this article,…
What do these terms mean? Pulsed Secondary Air Injection (PAIR) Valve: The PAIR valve sends…