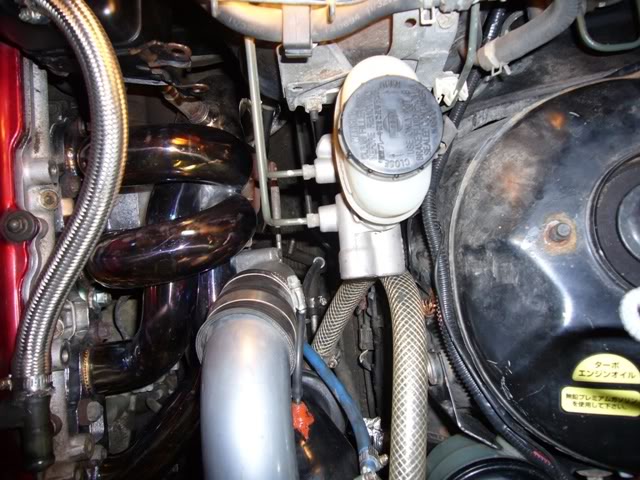
So you installed a tubular turbo manifold, but you’re worried your brake fluid is getting a little warmer than you’d like it. You have a few solutions to this problem, first, you could heat wrap the manifold to keep heat in, it will keep your under hood temps down, but will void your manifolds warranty and most likely cause it to crack. Second you could spend a fair amount of money and buy a shiny and functional heat shield made specifically to do what you want it to. Or the last option, if you are like me (el cheapo) you can make your own.
Difficulty: *
Time: 30 mins – 1 hr.
Cost: $5-10
Materials:
– 2×4 piece of wood and edge of a work bench
– piece of sheet metal
Tools:
– hammer or mallet
– tin snips
– drill and bits
Procedure:
I tried to do this as simply as possible, I want everyone with any mechanical ability to be able to do this.If you happen to have a sheet metal brake lying around you could use it to bend the metal, but if you do have one, you don’t really need me now do you.
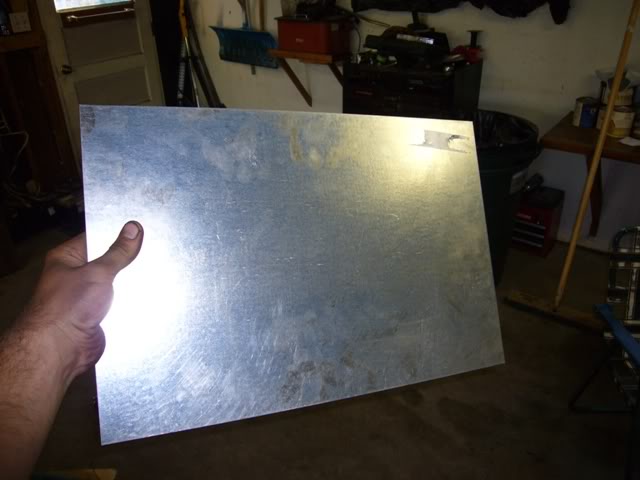
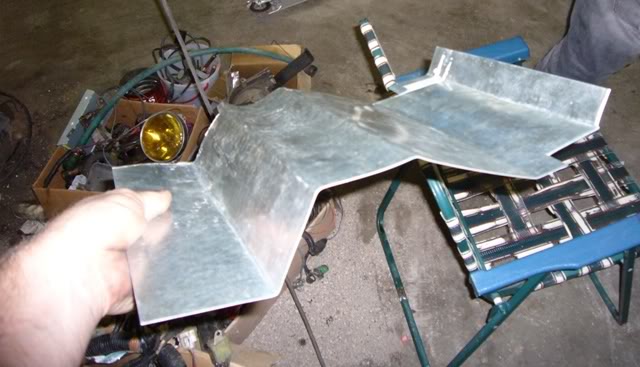
Now before you get started you will need some steel, I picked some up from Home Depot, it was less than $5, and it was 12” by 18” by 1/16”.Make sure not to get galvanized steel because the fumes can make you sick, I used zinc plated.
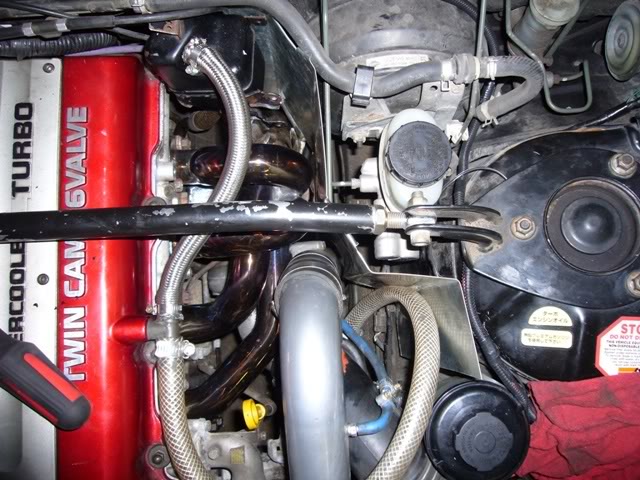
1.Ready, let’s go; park the car wherever you’re going to work on it, you won’t need to jack it up.Pop your hood and let the engine cool, you will be working in close proximity to the exhaust manifold and turbo.
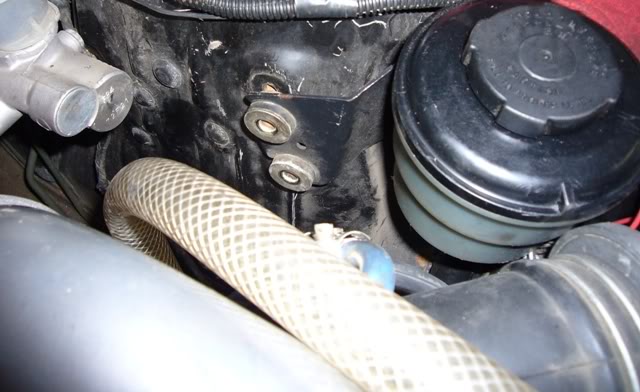
2.Once everything is cooled down, remove your strut tower bar and brake booster line, this will allow you to slide the shield in and out to test fit.Also remove the bolts securing the power steering reservoir to the fender well.
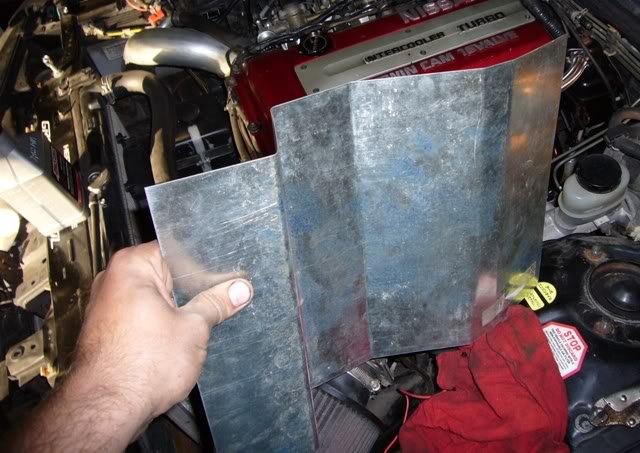
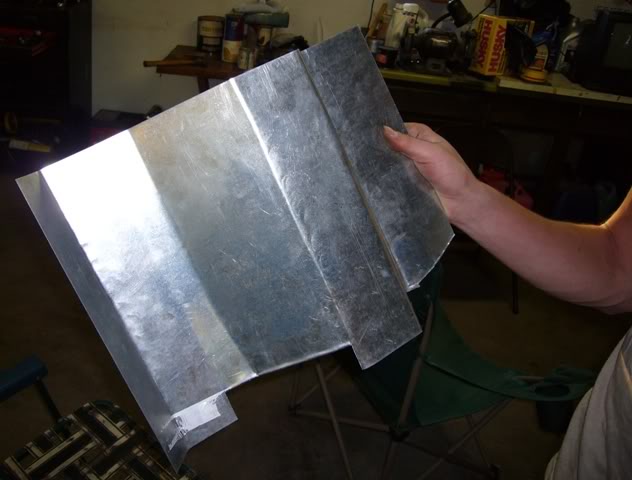
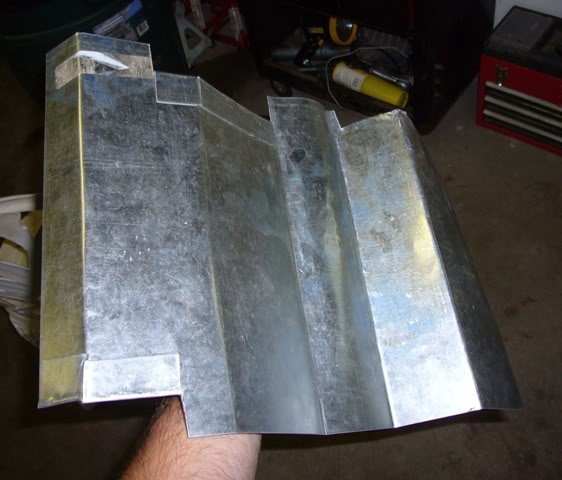
3.Now that things are out of the way, grab your metal, if you are using the same size piece as I did you won’t need to cut any, if your piece is larger you will need to cut it down to size.
4.Because everyone’s dimensions are a little different I can’t really give you exact measurements, it’s up to you to decide where to make the bends.
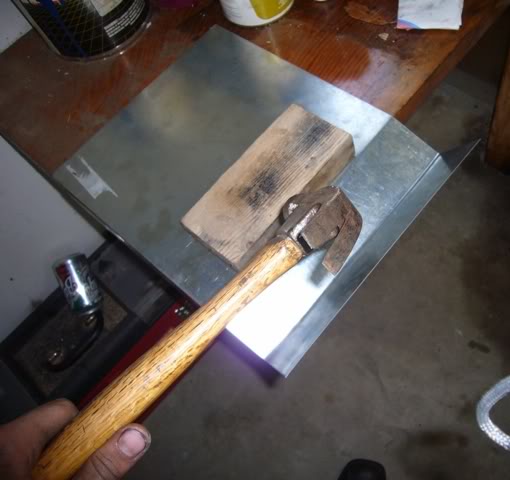
5.The easiest way to work the metal is by laying it on a flat surface with a hard straight 90 degree edge.Use a 2 by 4 on top of the metal to create a clean bend, for tighter bends use a hammer to work the metal further.
6.Start on one side and work bend by bend towards the other side.Test fit often, until you have all the bends correct, don’t worry it will take a while, don’t give up.
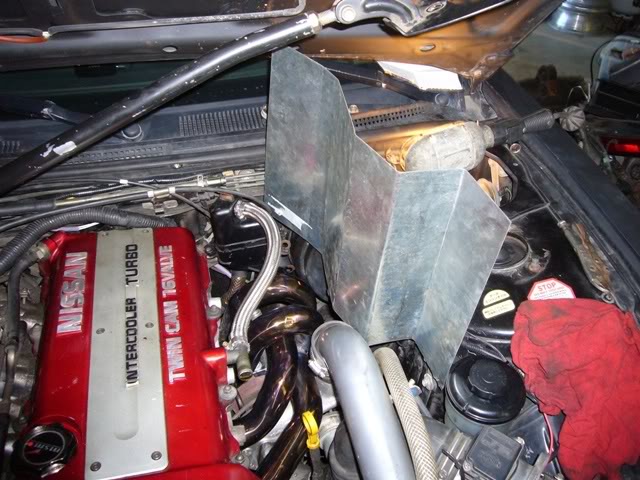
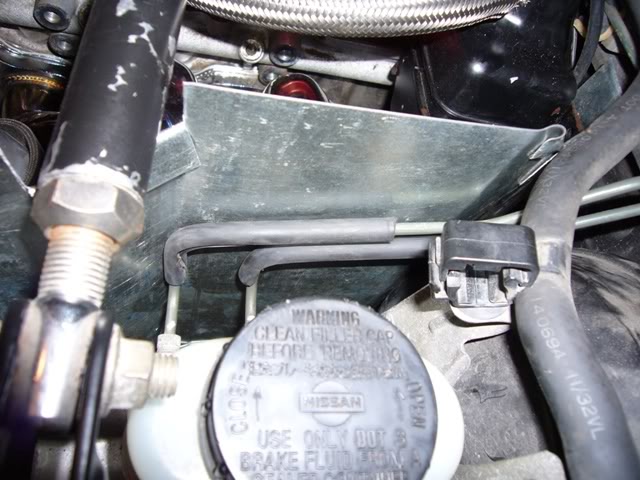
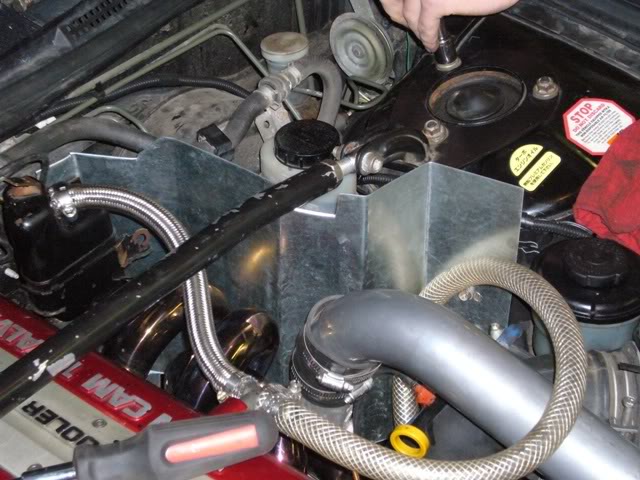
7.Once you have all the bends you need, slide the shield into place and check for any notches that need to be made.I made 4 notches all together, 2 on the bottom and 2 on the top.The 2 bottom notches were for the ABS wires, and for the waste gate actuator arm.The top 2 were to allow the strut tower bar and brake booster line to clear the shield with out rubbing.The easiest way to notch the metal is to make two cuts with the tin snips, then bend the peice between them over, then you can pound them flat.This way you have less sharp edges.
8.Before mounting the shield in place you need to make sure it isn’t rubbing on anything, you don’t want it touching anything like the brake lines or the manifold.You especially need to make sure there are no vacuum lines or cables rubbing on the edges because the hot vibrating metal will cut right through them.
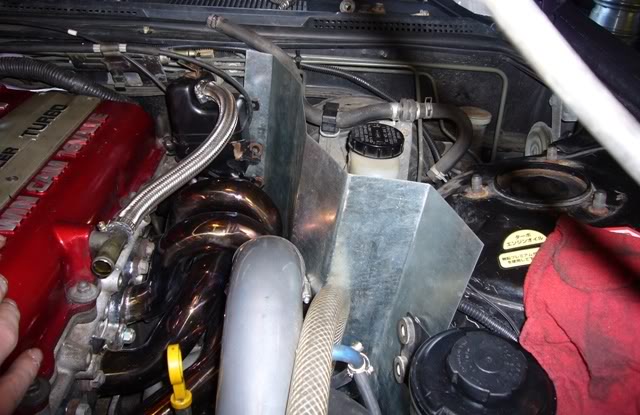
9.Now that you have it all mocked up its time to mount it, remember how you removed the power steering reservoir bolts?Well, I used them to hold the shield to the fender well.I marked them off with a sharpie and used a drill with a slightly over-sized drill bit to make the holes, that way it will have some wiggle room.I also braced the back of the shield to the oil separator can that I relocated when I installed the manifold.
10.I was a little worried about the proximity of the brake lines to the heat shield.I decided to cut open some vacuum line and to slide over the brake lines as an added layer of protection.
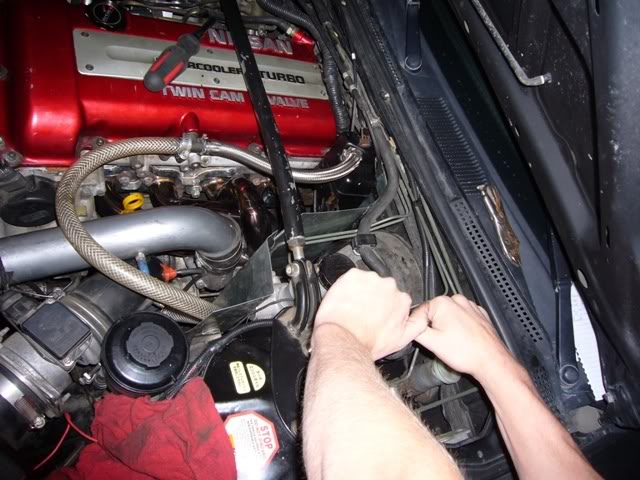
11.If you are running stock motor mounts, you may want to start the car up now and power brake it to make sure the engines movement isn’t causing it to run into the heat shield.I have Nismo motor and transmission mounts and I didn’t have any problems.
12.Now you can reinstall your strut tower bar and brake booster line, also make sure the shield is going to clear the hood when it is shut.
13.You’re all done, now you can sit back and bask in the glory of all your awesomeness.Now would also be a good time to call yourself a pro fabricator, don’t worry, you deserve it.

I also trimmed the very front corner so there is less of a sharp edge on it, but I failed to get a picture.
Without an infrared thermometer I can’t think of any way to test the temperature difference from one side of the shield to the other.If anyone builds a shield like this or has an aftermarket one and they also happen to have an infrared thermometer I would be very interested to know what the answer to that question is.
by FlatBlackIan