1. Loosen lug nuts slightly, allows easier removal when wheels are free
2. Jack up car and place on stands, frame area just before it bends to engine bay. Frame will seem heavier there
3. Remove lug nuts and wheels
4. Remove the engine lower cover. This will allow access to the back of the main tension rod bolt.
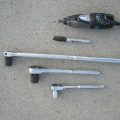
5. I then loosened the nuts holding the tension rod to the control arm. Loosen each one a little at a time to not put all the pressure on one . I used a 1/2 ratchet with a small piece of pipe to give me more leverage
6. Loosen the main bolt holding the tension rod to the sub frame. You may need to use a second socket to keep the bolt from spinning. The nut is a 19mm and the rear bolt head is a 17mm if I remember correctly. Again I used a 1/2 ratchet and a small piece of pipe for more leverage.
7. Make sure to note the dots on the arms so you know where to put them back in if you are replacing the bushings in the existing rods. There is a minute difference in the angle of the bolts between the left and right.
8. I suggest cleaning everything well including bolts etc. If the bolts and nuts are rusted, I would suggest getting new ones from the dealer. The manual states to replace the bolts and nuts but I think this has to do with the cinch part of the nut and rusting. I talked to a few people and no one said it was really required.
Now is a good time to inspect areas and clean up areas you normally cannot reach, especially if the goo has leaked out of your old bushings
If you are replacing the tension rod bushings make sure the arrow on the new bushings are assembled with the arrow facing the rod.
Reassemble
9. Slide the rod over the control arm and assemble the tension rod mount to the sub frame. The bolt goes thru from the inside of the car to the outside. Lightly assemble the nut enough to allow the bushing free movement but enough to keep the bolt in place.
10. Put the bolt on the tension rod thru the control arm and tighten the bolts. Use the alternating method to avoid straining or bending the rod. Not that it will happen, I just always learned it is better to alternate in this situation.
11. Torque the tension rod nuts on the control arm to 72-87 ft-lb of torque. Tighten 3/4 of the torque then torque to final tightness.
12. assmeble the wheels , lightly tighten the lug nuts, lower the car to the ground, tighten lug nuts to 72-87 ft-lb of torque. do this using an alternating pattern. Helps prevent warpage of the rotors.
13. Tighten the tension rod main bolt to 101-123 ft-lb of torque. Tighten 3/4 of the torque then torque to final. You will need to use a second rachet to keep the bolt from spinning. The ratchet end will hit the sub frame so you should not need to hold it in place. Just tap the second ratchet when done and it should come off. There really is not enough room to torque completely so what I did was to tighten to about 80 ft-lb then put the car up on ramps and finish the torquing. I did not jack the car up to prevent any slipping of position of the rod whith the suspension fully extended before I final tighten. The bushing is to be unstressed when the car is in it’s normal ride height position.
14. Good idea to check the torque on the bolts before reassembling the cover.
15. Replace the cover.


