This past weekend (4/12/03) I completed installation of an electric lock on the tailgate of my 2002 Frontier. My friend CarlP was of enormous help in the planning and completion of this. It already had locks, but they were not electric. It was extremely straightforward and can be done with not more than a screw driver, a wrench, and pliers.
All in all it took under 3 hours and cost less than $10.
1. Bought door lock actuator kit 742 from bulldog security, $8. This actuator has 2 wires – when you put +12 on one and ground the other it moves in one direction. Reverse the wires, it moves in the other direction.
2. Tapped into the wires that correspond to the +12/ground lock/unlock signals just BEFORE they enter the back left door (wiring harness in the post). I forgot the colors, but they are actually pretty easy to find if you have a friend to press the lock/unlock and you have a sharp +12/ground probe to jab through the insulation of the wires in the harness – I think they might be the front most 2 wires. I then ran this wire neatly out the back left door and under the bed to the tailgate. I haven’t yet found a nice way to get wires out of the rear of the cab near the bottom, so any input to this would be appreciated.
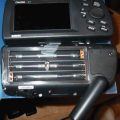
3. Removed plastic bedliner on tailgate – the round things on the end DO come out, but it’s a pain… just get a screw driver between the round thing and the plastic tab from the liner, then pry/tap until it’s out. Bending the tab is ok, so you only need to remove one of them and then just bend the liner so it’s sticking straight up from one side of the tailgate. The screws in the center also hold the access plate to the door opening/locking mechanism.
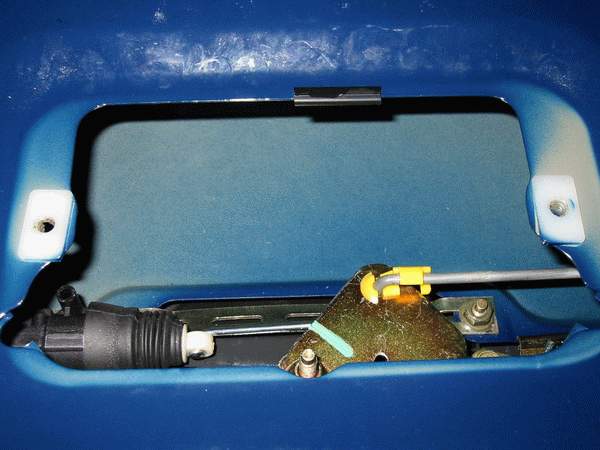
4. Looking directly inside the access panel, you can see the entire mechanism. There are 2 main bolts (RED ARROWS, below) sticking up on either side. The door actuator kit comes with some slotted piece of metal – I had to use a drill to make holes slightly bigger than the slots. The plate was mounted as far left as it could go. Also, the plate to mount the actuator needed to have a twists in it (GREEN ARROWS, below) so that the nuts could come down flat and the rest of the plate would avoid piece of the door handle mechanism

5. The actuator (PURPLE ARROW) was mounted to the left, on the included plate. The rod from the actuator was bent about 35 degrees (RED DASHED LINE) such that it comes under the door opening mechanism, towards the piece that moves when you turn the key.

6. The piece that moves when you turn the key has a nice peg sticking up from it. What I did was just to bend a loop in the actuator rod so that it fits tightly around the peg (YELLOW ARROW). The throw of the actuator is a little short, so you have to put the bend in exactly the right spot. When in the “unlocked” mode, the actuator will actually cause the handle to be about 95% engaged – more than enough to transfer the force of the handle to the unlatching mechanism. The blue outlined area is the part that no longer engages because of the actuator, but as you can see, the green outline area is more than enough. When the door is “locked,” the piece with the peg (which is attached to the green box area) slides to the right, so that the green box is entirely clear of the unlatching mechanism. Thus, you can pull the handle as much as you want and it won’t unlatch the door.
So, now my tailgate unlocks whenever the back left door does. This is very useful to me as I have a tonneau cover and like to store stuff in the bed that I might want to access while the truck is running. If somebody was very motivated, they could find my wires and apply +12/ground to the right ones and unlock all the doors in my truck, but if they were that motivated they could also smash my windows… then they’d just have to wrestle with the ignition disabler on my remote starter.
