Fog Light Modification Infiniti Fourth Generation Q45 Wiring Relays Tools Electrical Battery Cable Yellow Customize Personal Soldering Wire Taps Crimping Splicing Strippers Connectors Bundle Cut Strip Shock Short Jumper
I thought I had done this already, but could not find it. I am doing it over due to requests I keep getting of how to do this.
Tools I used
Ratchet
10mm socket
Flathead screwdriver
Wire strippers
Wire cutters
Wire crimper
Crimp caps (wire splicer [butt connectors] or solder & heat shrink will work, too)
Needle nose pliers
Wire (preferably red, 10 – 12 – or 14ga will work) This will be your jumper wire.
As with any electrical mod, you should always disconnect the negative battery cable. You can use the 10mm socket to do so. If you have any questions on how to do this viable step, please refrain from proceeding with this specific modification.
After the battery cable is disconnected, you can proceedto locate your area of operation and familiarize yourself with it.

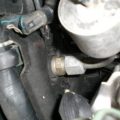
You must remove the coolant overflow reservoir in order to do this. Once you have located the reservoir, remove it. To do so, simply use your needle nose pliers to loosen the hose clamp holding the coolant reservoir hose to the reservoir, and slide the reservoir out.


Next, remove the relay box cover. There are small clips on either side that will allow the removal of the cover. Once the cover is removed you can locate the three or four relays that need to be removed to allow removal of the relay box. In this case, I had to remove three; the ‘FR FOG LAMP’, ‘HORN 2’, and ‘AIR CON’ relays.


In the next few pics, you will see the 10mm bolts that removal is required to proceed. The entire relay box must be removed in order to complete this modification.


There is a clip at the front base of the relay box as well. It must be removed, too.


Now we are ready to move on. We have the relay box out, relays removed, and plenty of work area since the coolant reservoir was removed. A few more steps and you will be half way done.
The box is snapped together on either side of the relay box. Using the needle nose pliers to release these snaps will separate the box and expose the wiring.


Now, see the somewhat oval hole here just above the headlight housing?

Put your flathead there when you are not using it so you do not lose it.

Time to locate the wires you will need to cut, splice, andjump to in order to use your fog lights whenever you want. The first wire to locate and cut is the dark green wire with a yellow stripe underneath the fog light relay plug. Once you locate this, use the wire cutters to cut this wire. Then you will want to cap off the wire coming from the vehicles wiring harness.


Now you can take jumper wire and strip either end with the wire strippers. Also, go ahead and strip the end of the dark green wire coming from underneath the relay box. Twist one end of the jumper wire together with the dark green wire below the relay box. After they are twisted together you can slide the crimp cap over top of the wires and crimp the cap to the wires.


The next step willbe locating the light green wire below the wiper relay plug underneath the relay box. We are going to use the wire strippers to only expose a section of the wire. This open section is where you will tie in the jumper wire. After attaching the jumper wire to the light green wire, I chose to wrap the connection in an abundance of electrical tape.
Having heat shrink, or optional wire splicing connectors would have been ideal, but I did not realize that I was out of both until I got to this step. This is where “The 6 P’s” come in to play. (Prior Planning Prevents Piss Poor Performance)


Now, it’s time to test out the work.
All off

Fogs only

Fogs and parking lights

Fogs and headlights

One last one you might want to check is fogs and High Beam. I had H7 HID’s which were low beam only, thus no need for me to try that out. If you still have your stock setup, feel free to test that out as well.
Lastly, reverse the removal instructions and put everything back together. Hopefully you will not have anything left over. Enjoy!
Article by: jltibbs


