We’ve all been there – At the absolute most inopportune time, you turn the key and hear the tell-tale weary half-turn of the starter, the loud buzz, or the simple *click* that tells you there’s no juice in your car battery. Sure, you can get a jump start to get you on your way, but you’re still going to need to address the issue – you’ve got a bad battery.
Any good battery maintenance program won’t help if your current battery is sulfated or damaged. So, let’s go through the testing process, and in our next installment, we’ll start our maintenance regimen with a good, functional, fully-charged battery.
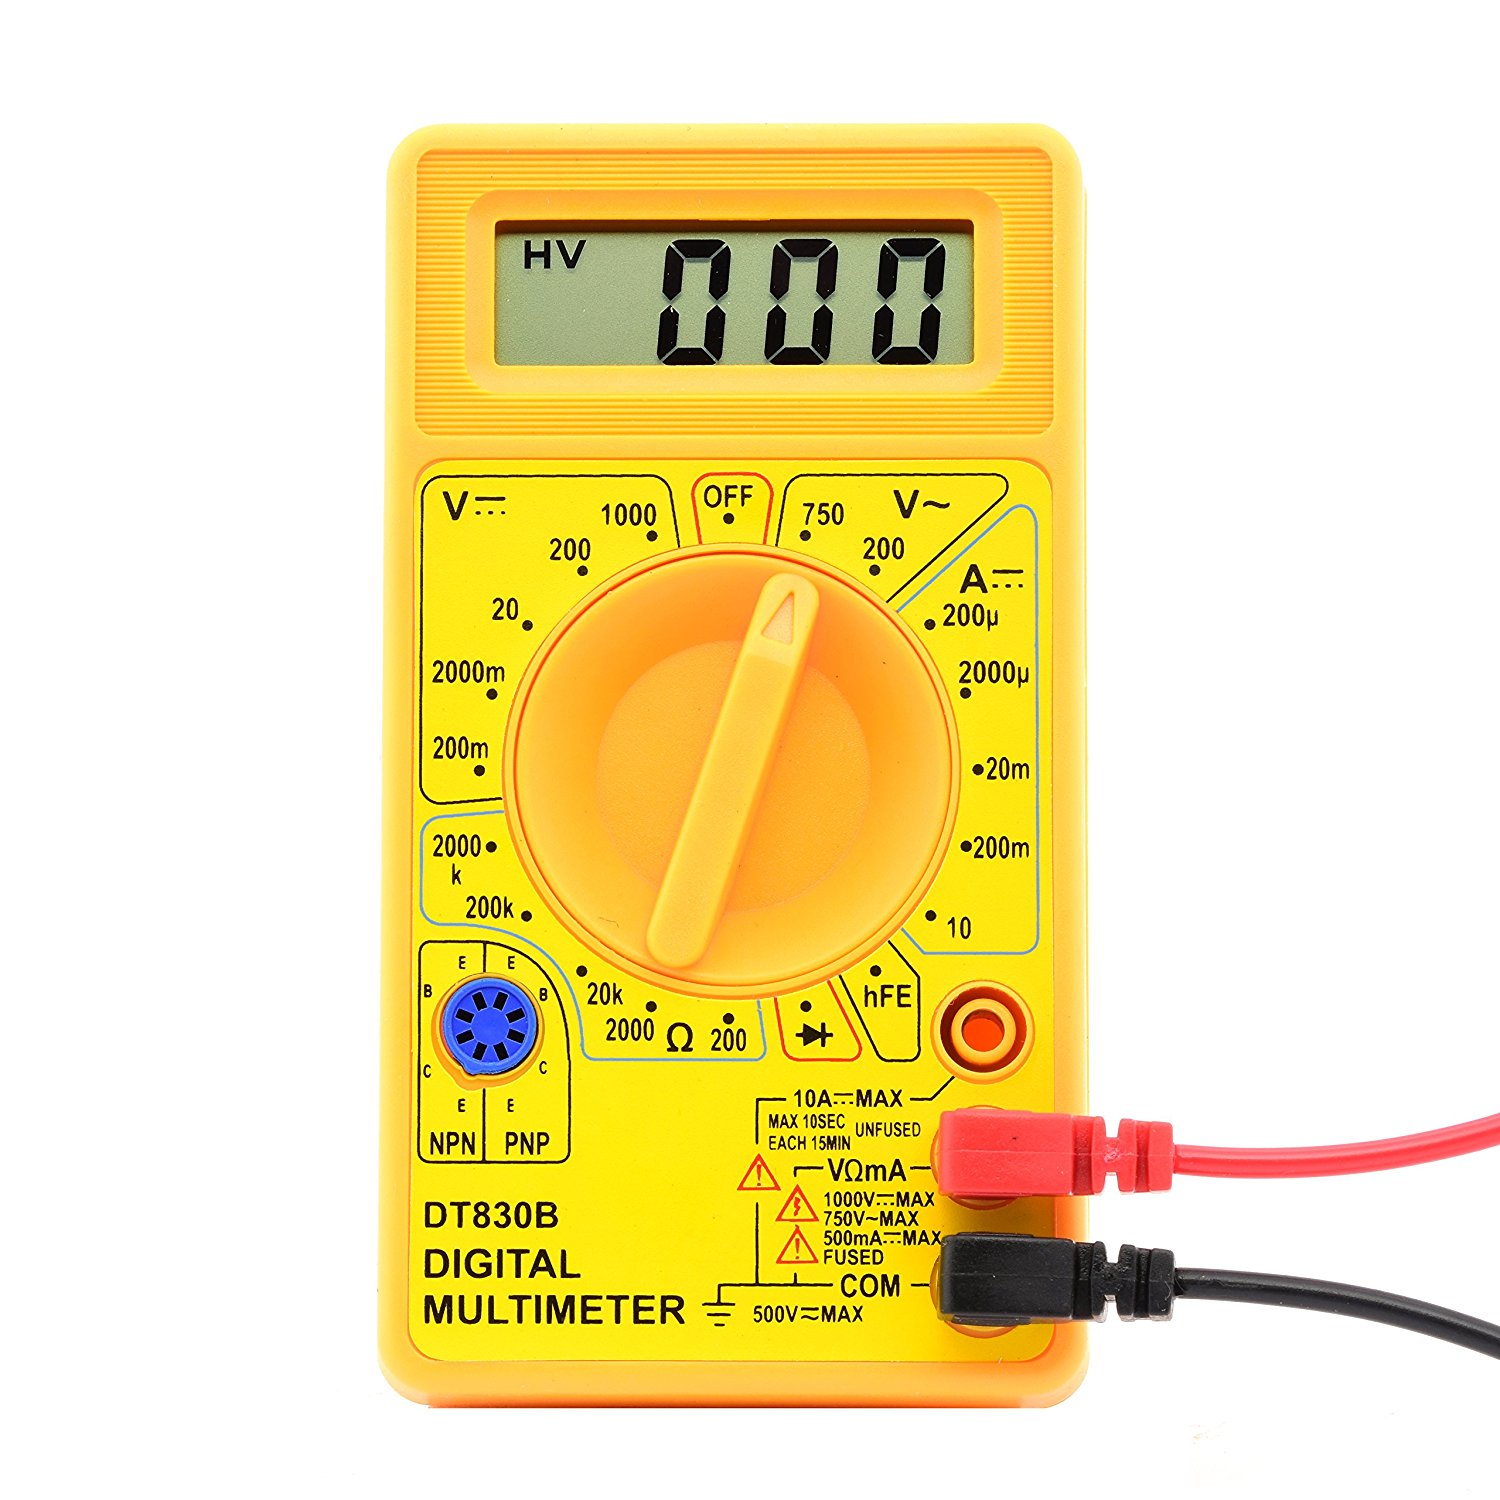
Test For Voltage
First order of business is simple: We’re checking for voltage. You don’t need a fancy tester for this – in fact, the $3 (or sometimes free) multimeter from Harbor Freight will do this job just fine. Turn off any electrical items in the car, switch the dial to the 20V position and put the red probe on the + terminal, black probe on the – terminal. You should see 12.5 to 12.8 volts.
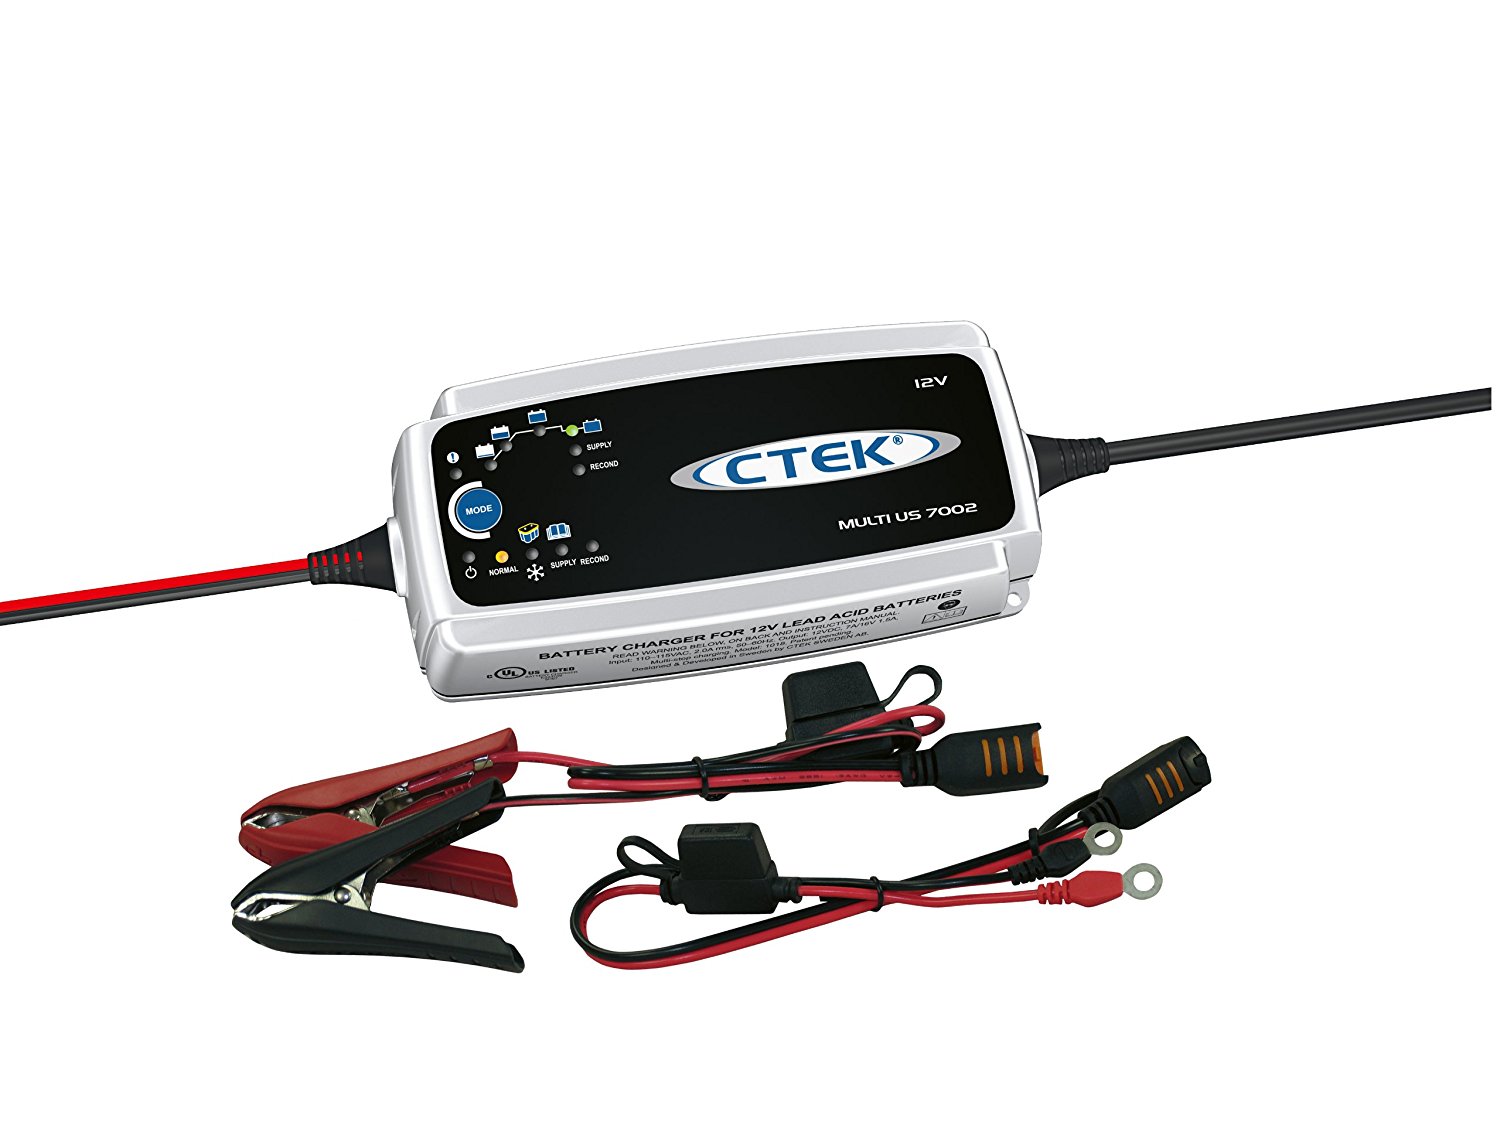
If the battery voltage is low, stop now and put your battery on a battery charger until the open-circuit voltage is 12.6 volts. I like to use a smart charger, such as the one from CTEK:
Don’t be tempted to simply jump-start your car and think the alternator will charge it. The alternator isn’t designed to produce that amount of current for that long and may be damaged – plus, a badly-discharged battery has high internal resistance to any charge. Buy a quality battery charger – the smart chargers, like the one pictured above, won’t overcharge the battery, so there’s no danger of cooking off the electrolyte.
Test Electrolyte Level
Pop off the battery fill caps – they simply pry up, and look inside each port to determine the fluid level. If the fluid level is low, using a small funnel, add distilled water to each individual port to bring the level up to the bottom of the hole. Don’t be tempted to use tap water, as the minerals and dissolved solid will reduce charging efficiency quite quickly.
This won’t likely improve your battery’s condition – but it’s critical to ensure that the next test is effective.
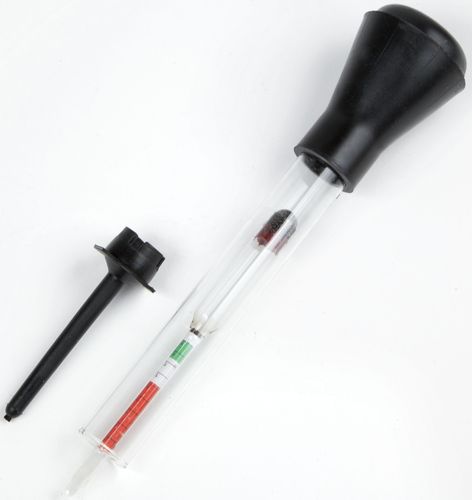
Test Specific Gravity
If the battery shows low voltage (or if you jump-start it, drive it, and the battery still won’t take a charge), you’ll want to check the “specific gravity” of the fluid, otherwise described as the ratio of sulfuric acid to water in the battery – this tells you even more than the multimeter, and is done using a hydrometer.
You’ll want to use the tool like a turkey baster – Draw up enough fluid to cover the hydrometer float. Tap it gently to remove bubbles, and read the results. VERY IMPORTANT: Don’t go waving the tester around to show everyone your results – the fluid in the battery WILL burn exposed skin, damage your clothes, and mess up your paint. If you do spill some, immediately rinse it off with lots of water – but it’s better to just leave the bottom of the hydrometer inside the battery while testing. If your battery is in good condition, the specific gravity should be 1.265 or better. But much like a compression test, all of the cells should show very similar readings. If you notice variations of .05 or more across the cells, your battery is toast.
Charging System
If the fluid level is very low, your charging system may be generating too much voltage. To test for this, start the car, and conduct the voltage test (with your multimeter, as described above) with the engine running (higher than idle – have someone hold the accelerator at 1500rpm or so). You should see about 14.6 volts. If you see a number significantly higher (or lower) than this, your issue is with the charging system (alternator, or associated wiring), which we will cover separately. Additionally, if your battery passed all the above tests but you’re still having cranking / starting issues, you’ll want to do further research – Asking the experts here on the forums is a great start!
In our next installment, we’ll give you some tips on keeping your battery functional for as long as possible – and as battery prices continue to climb, it’s definitely worth following!
NICOclub is back again with Carlisle Events to host our 18th annual NICOFest Carlisle AutoX…
Kraft Auctions Offers Fans a Chance to Own a Piece of Datsun Racing History
We built Datsun Ranch in 2014, and it was the culmination of a lot of…
Since it's not just Datsuns that are vintage anymore ("classic Nissan" still sounds weird, right?),…
Let's talk about big brake kits for a bit. For the purposes of this article,…
What do these terms mean? Pulsed Secondary Air Injection (PAIR) Valve: The PAIR valve sends…