Having decided to pull the L20b and not look back, the next order of business was to decide what powerplant to replace it with. I’d grown weary of fiddling with the carbs and linkages, and besides, I want to drive this car, not tinker with it (we have plenty of other original Datsuns to fiddle with). A while back, I entertained the idea of swapping in a 1UZ, and even went as far as to buy a wrecked LS400 with low miles, pulled the engine, harness and ECU, and sourced a 5-speed and an adapter bellhousing. Those bits sat on the shelf in my shop for a year, but an offer came in that I couldn’t refuse, so they all went down the road.
I’m a big fan of reliable NA powerplants, and a local importer had a S14 SR20DE automatic transmission engine available for less money than I’d have spent on the machine work for the L20b. I know JB Coachwerks had been working on a front-sump crossmember for the 510, so this was an easy call. No need to waste time – we drove across town, inspected the engine, and loaded it up that same day.
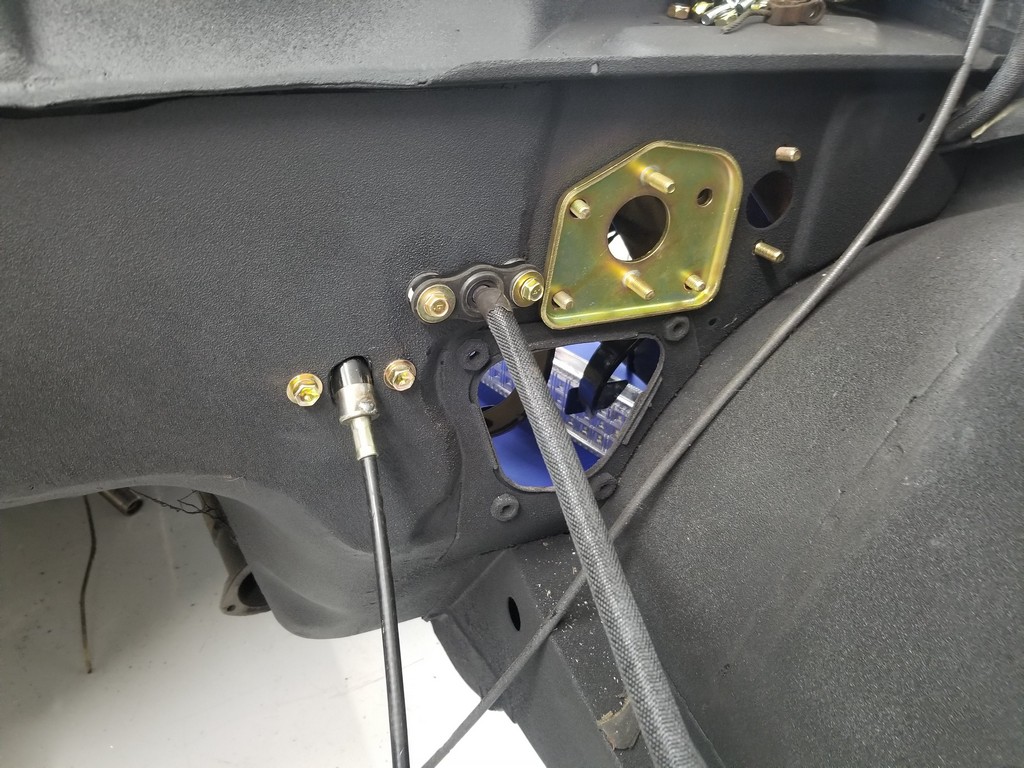
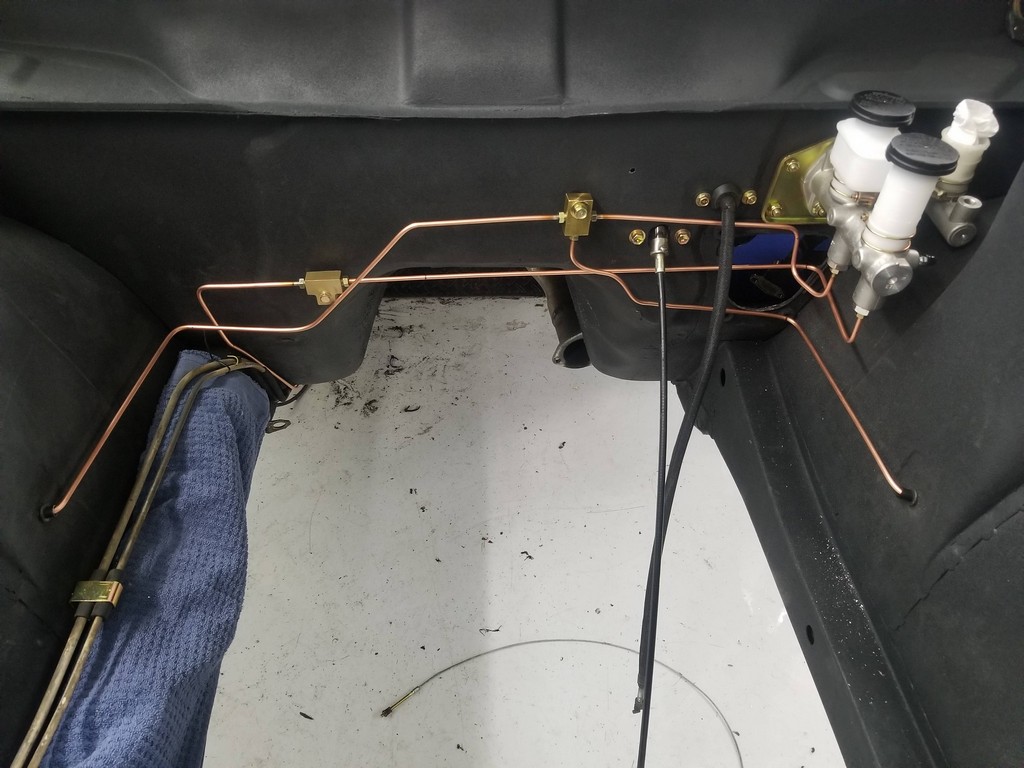
With the engine out, I noticed the old brake lines had been weeping, wrecking the paint on the fenderwell and frame rails. So, out with the master cylinder and the old lines. Plus, we’d be using different holes for the wiring and throttle, so I decided to clean up the firewall and delete the hood prop. Of course, with the new crossmember, I’d be upgrading to a steering rack, so the old box could go away as well. More holes to weld up, and more work, but it’s something that always bugged me, so may as well get it done. Here’s the fresh, smooth firewall, with new hardware, awaiting the engine install… and the new brake lines.
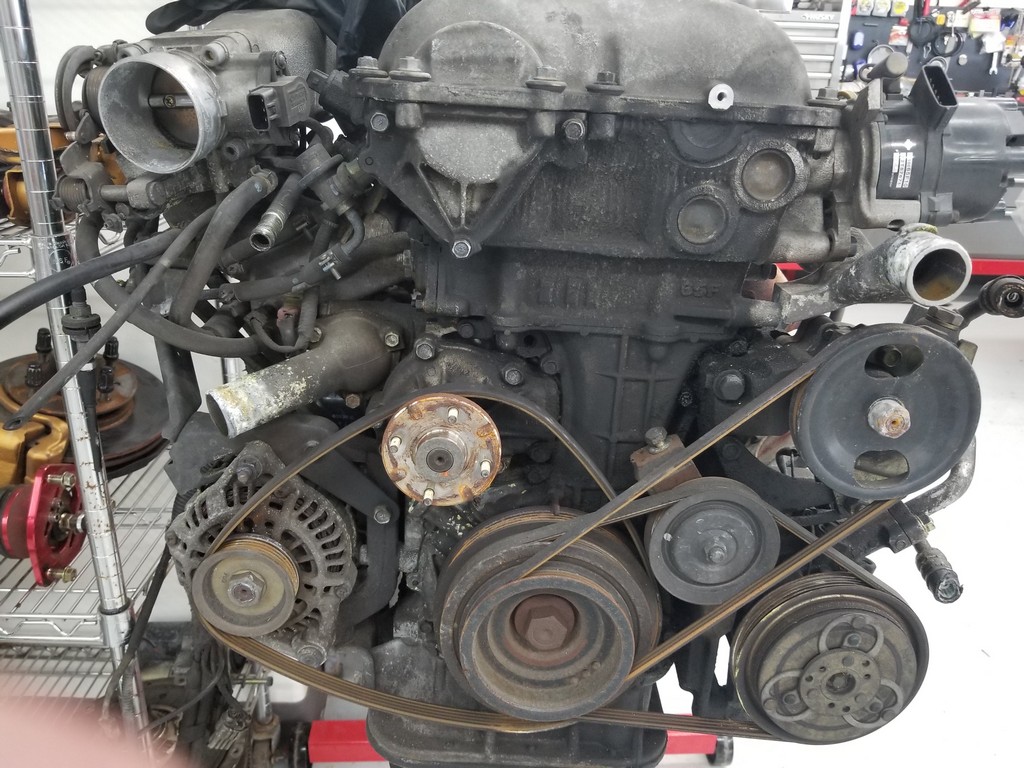
With the bay cleaned up and fresh, it was time to turn my attention to the engine. This one had perfect compression, and appeared to have never been touched. All the bolts looked factory-fresh, albeit coated with a layer of road grime. My suspicion was that the motor had a pretty cushy life for its 60k KM, especially with an automatic transmission. BUT, nothing gets installed looking like this, so disassembly began.
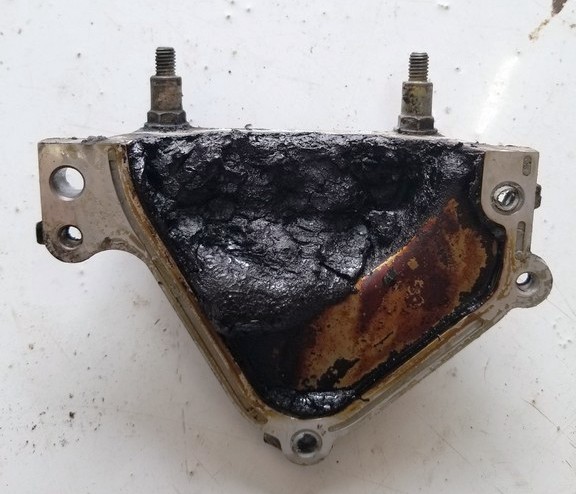
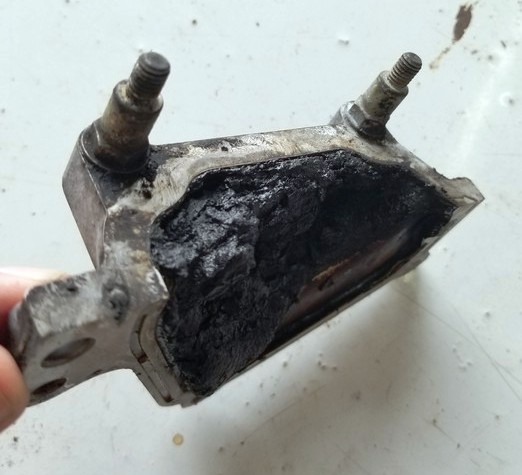
Cushy life indeed. Removing the valve cover and pan made me think maybe I’d made a mistake. I’d never seen an engine that gunked-up. In fact, I’d be amazed if it had more than a couple oil changes. Although the drained oil was clean, the thick black goo residing in the head and pan were terrifying. I mean, the VTC cam sprocket was literally encased in a cocoon of black tar. Here’s the VTC cover, just to give you an idea:
The bottom end was no better – the crank had self-clearanced the thick black mess, and the pan was almost completely filled with funk. Even IF the oil had been changed recently, there’s no way they could have added more than a couple quarts on the refill – there was simply no place for it to go. The good news? No apparent wear anywhere that I could see. A lighted borescope is super-handy for this purpose, and while I initially thought I had a paperweight, I decided this engine was just past-due for some love, with no ill effects from being neglected.
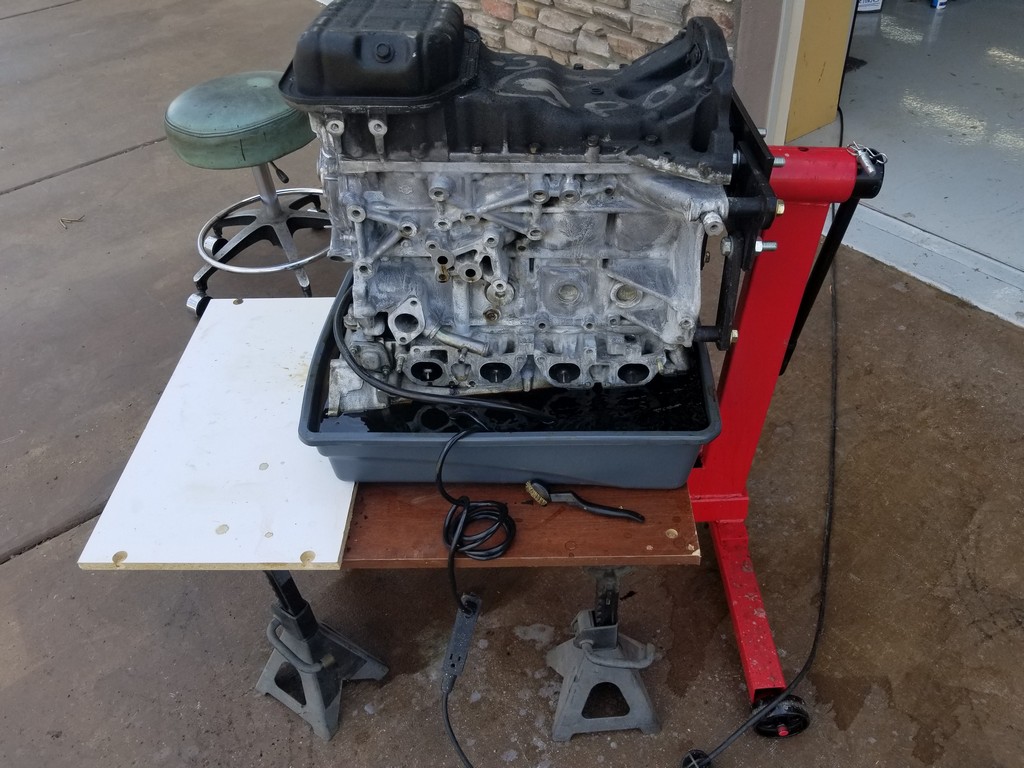
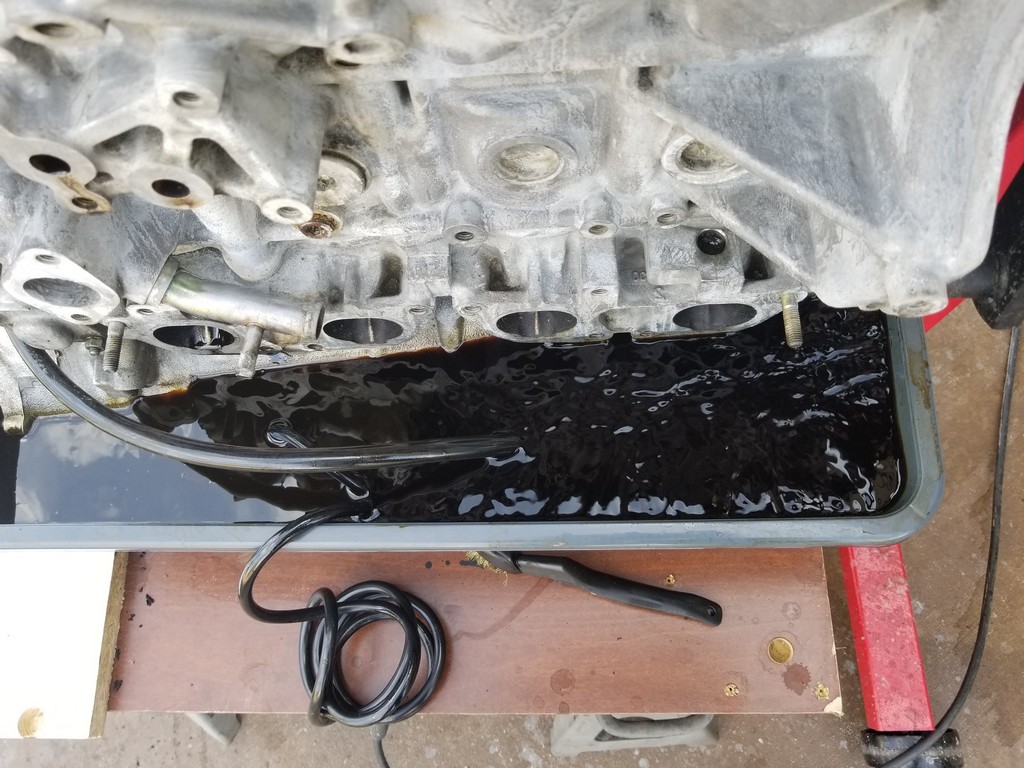
Now, how to de-funk an engine without a complete teardown and rebuild? Very carefully. I wanted to ensure that the solution went no further down than the valve retainers, and no further up than the midline of the crank. The rest would have to be managed by several immediate oil changes, after startup. I rigged up a cleaning station, so that the engine could be partially “dunked” in cleaning solution. With the engine immersed in a bath of my favorite degreaser, I circulated the solution with a small aquarium pump and a heating element, set to 100*F.
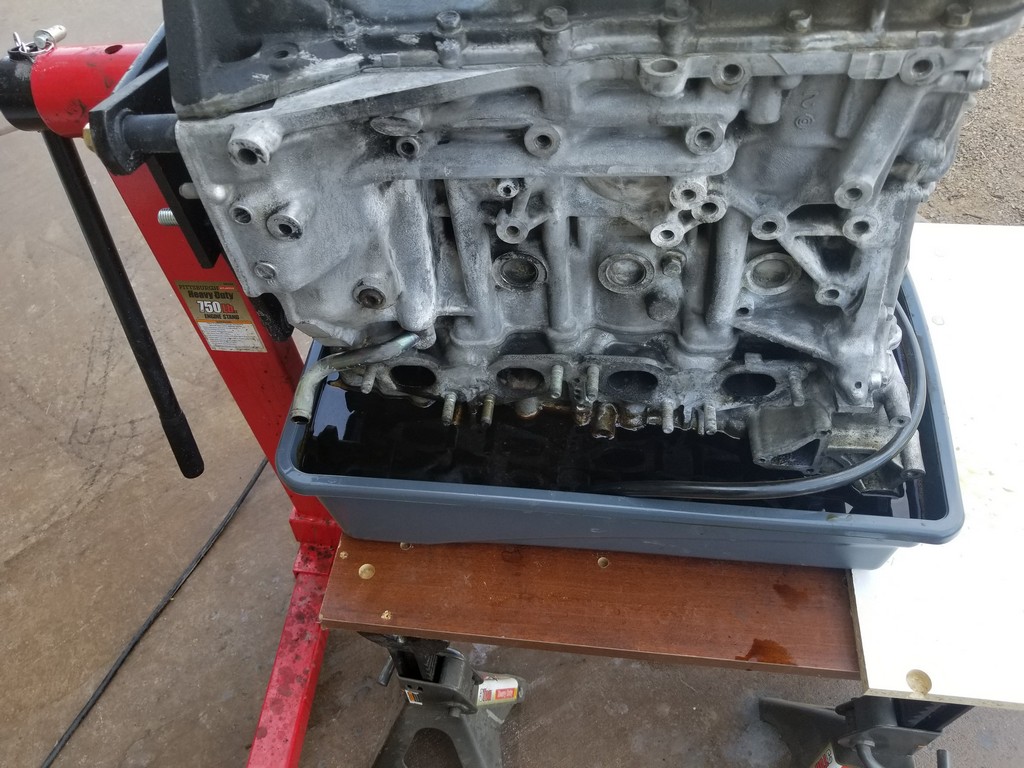
The bottom end sat in the cleanser for 48 hours. Another 24 hours to drain, and the surfaces looked fresh and new. Flipped the engine over, and immersed the head – same results. A good scrubbing of the exterior of the engine, followed by lots of tapping holes and chasing threads, ensured there’d be no surprises during reassembly. Finally, the block got masked, and a coat of etching primer and several coats of high-heat Eastwood gloss black engine enamel had the block and head looking factory-fresh.
All removed components were media blasted, and either replaced, powdercoated or plated, along with their hardware, prior to reassembly. This is where it really pays to take lots of pictures, because when the hardware comes back from plating, it’s ALL in a bucket. Sorting into baggies, labeled with location, makes reassembly a much easier task. Bench-testing anything electronic prior to assembly saves a lot of hassles later.
OK, next episode, I promise – LOTS more pictures! 510 Restoration Redux Part 3
NICOclub is back again with Carlisle Events to host our 18th annual NICOFest Carlisle AutoX…
Kraft Auctions Offers Fans a Chance to Own a Piece of Datsun Racing History
We built Datsun Ranch in 2014, and it was the culmination of a lot of…
Since it's not just Datsuns that are vintage anymore ("classic Nissan" still sounds weird, right?),…
Let's talk about big brake kits for a bit. For the purposes of this article,…
What do these terms mean? Pulsed Secondary Air Injection (PAIR) Valve: The PAIR valve sends…