Over the past couple years we’ve had various NICO project cars ranging from a fully built KA powered 240SX Convertible to a supercharged G35. We decided to move on to a newer vehicle this time. We chose the new G37 Coupe for this task.
If you’re like me, and have a regular job 5 days a week, you want a nice comfortable commuter. However, you’d also like to have a car that you can take to the track on occasion, thrash on it a bit, and head back to work in the same vehicle on Monday. The G37 Coupe is a great choice to tackle both these tasks.
As with any build, the first step involved is determining what you want the car to do and what you want to use it for. For this particular project, we chose an ’08 Coupe with the 6MT. We want the car to be first and foremost, a daily driver, but capable of taking a beating on a full day at the racetrack.
To begin this project, after a few thousand miles to break in the vehicle, our first step was to change the oil to a synthetic blend. Its a good idea to break the engine in with the oil that came in the car before you make the switch to synthetic. The synthetic we went with was Valvoline 5w-30, but any good synthetic brand will work. I recommend however to stick to the same brand you start with for the rest of the engine’s life.
To help figure out what parts of the car we should upgrade, we took the car to a track day at Virginia International Raceway. In completely stock form, we took it out to see its faults. Two issues with the car were discovered while on the track.
The first issue we came across was that after a few laps of getting the car up to temperature, the rev limiter changed. Normally, the rev limiter limits the VQ37VHR to 7500 RPM. However, after a few laps, we were suddenly bumping into the rev limiter at 6100 RPM, far below the peak horsepower range. A few laps later (short shifting at 6100 RPMs), the car would cool down a bit, and the 7500 RPM limiter would be back. Obviously, this is an issue when you are trying to drive the car hard and have fun on the track.
The second issue we ran into was that the clutch fluid seemed to boil over. After a few sessions on the track, the clutch pedal lost pressure and we had to rest the car. With no clutch pressure, shifting gears becomes an impossibility.
The following weekend we headed to a second track day at Las Vegas Motor Speedway. This time, we knew of the two issues mentioned above, but wanted to test it once again to see if there were any other issues we want to address. And there was.
The third issue with the car was the brakes. The gigantic 4 piston front calipers and 2 piston rears may be fine for stopping the 3600 lb beast on the street. But when it comes to the track, they simply aren’t enough. Not only did we experience brake fade, but we also boiled the brake fluid as well as destroyed the pads on all 4 corners.
To fix the issues above, our first choice was to fix the rev limiter that tends to have a mind of its own. We called up Enjuku Racing to see what they could do for us. They sent us an ISIS oil cooler kit designed for a 240SX with an SR20DET.
The ISIS kit comes with everything you need to install it on a 240SX. However, we were putting it on a G37, so we knew some things might not work. The only issue we ran into was that the oil lines supplied with the kit aren’t quite long enough for the G37.
Short oil lines weren’t that big of issue because the ISIS kit does not come with an oil thermostat. By adding a thermostat, we had to add more oil lines anyway.
Because we are building this car to be a daily driver first and foremost, longevity and reliability is something we needed to address. We picked up an oil thermostat to go with the kit so we didn’t compromise our cold start lubrication for our daily commute.
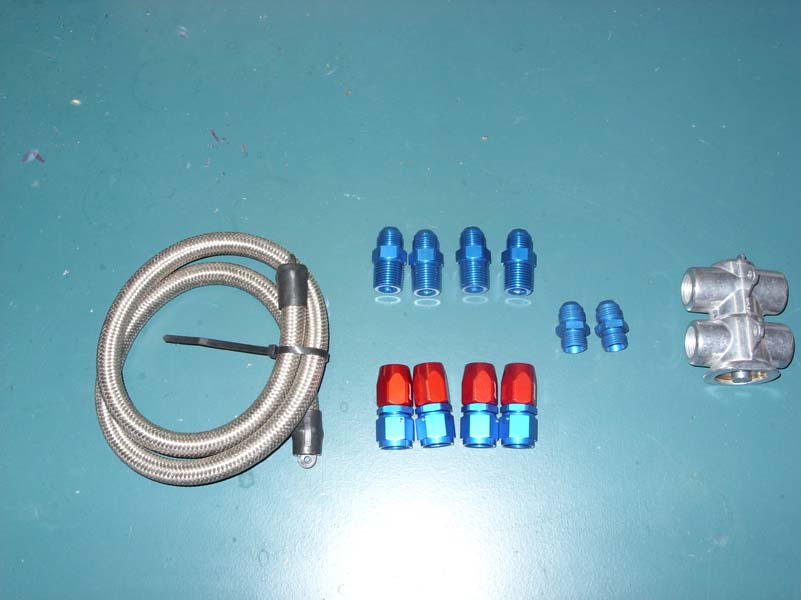
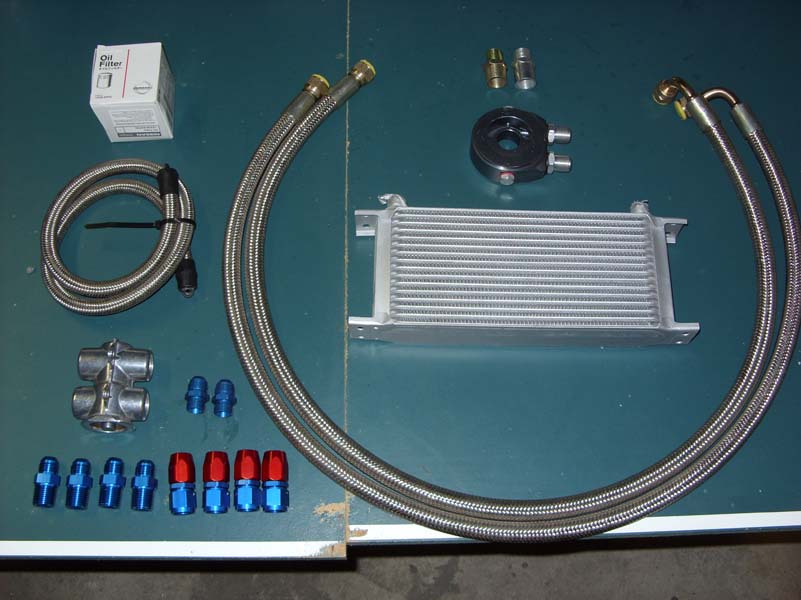
In addition to the oil thermostat, we picked up the following fittings to connect it:
4 1/2″ NPT Male to AN-8 Male fittings
4 AN-8 Hose ends
2 18×1.5 MM Male to AN-8 Male fittings
3 ft. Stainless Braided Hose
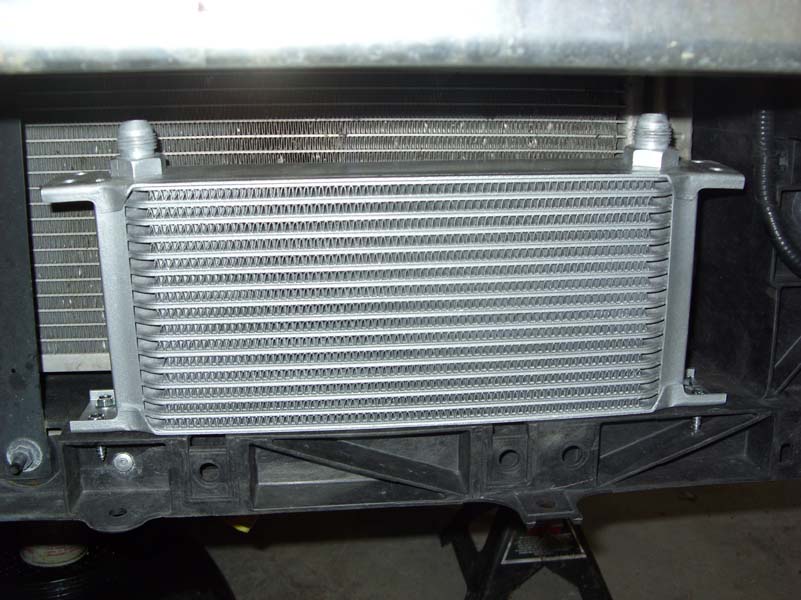
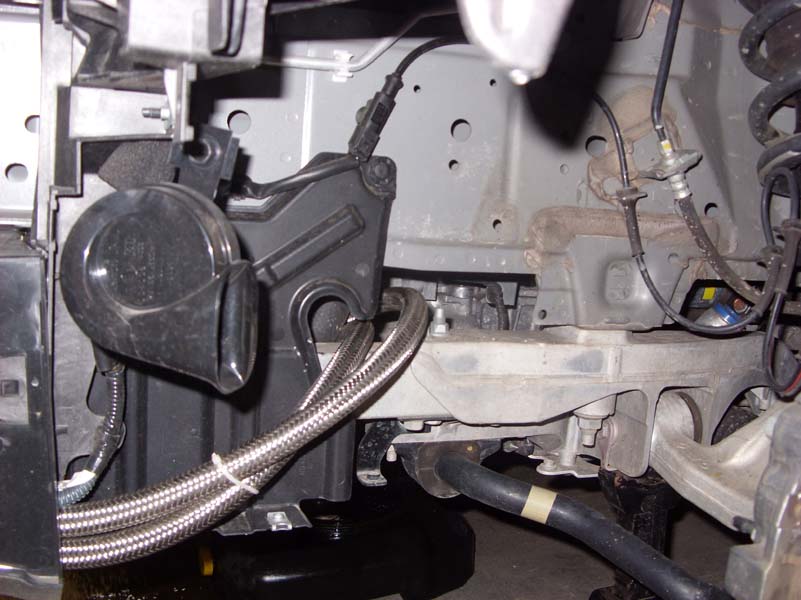
In addition to the parts we picked up, the ISIS kit came with the oil cooler, 2 AN-8 oil lines, the oil filter sandwich plate, 2 different sandwich plate adapters (for 2 different threads), and 2 18×1.5 MM fittings. To begin the install, jack up the front of the vehicle and take off both front wheels. Remove the undertray as if you were doing an oil change. Remove both fender liners by removing 5 10mm bolts and 7 clips on each one. Once the fender liners are removed, you will see a 10 mm bolt that holds the corner of the front fascia onto the fender. Remove this bolt on both sides as well.
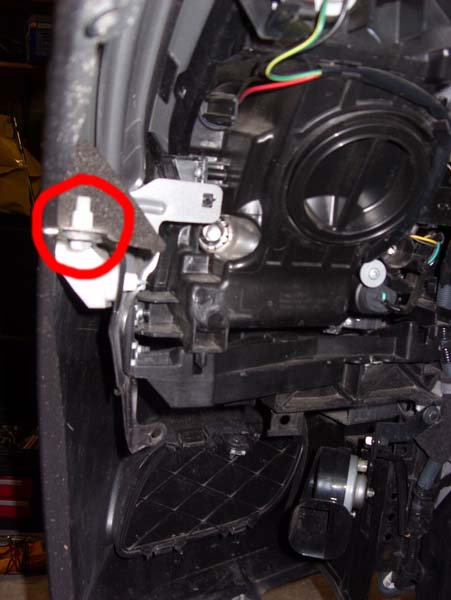
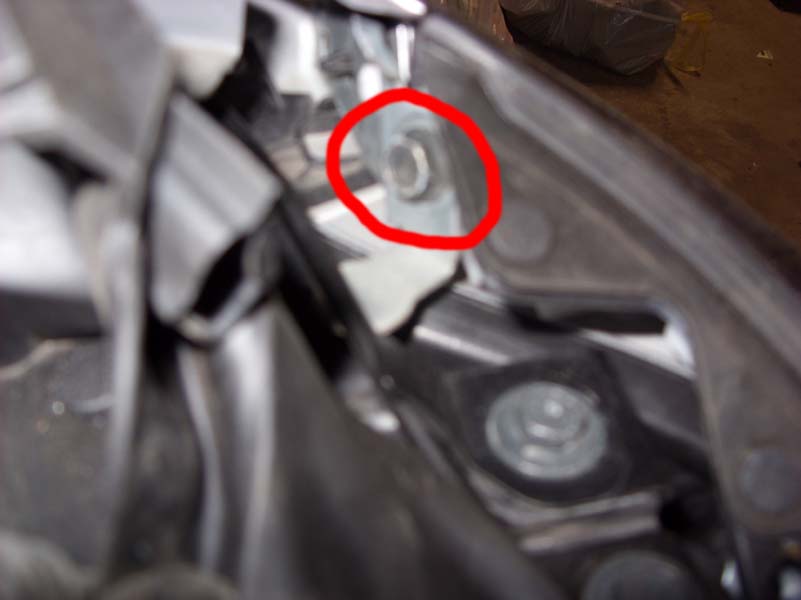
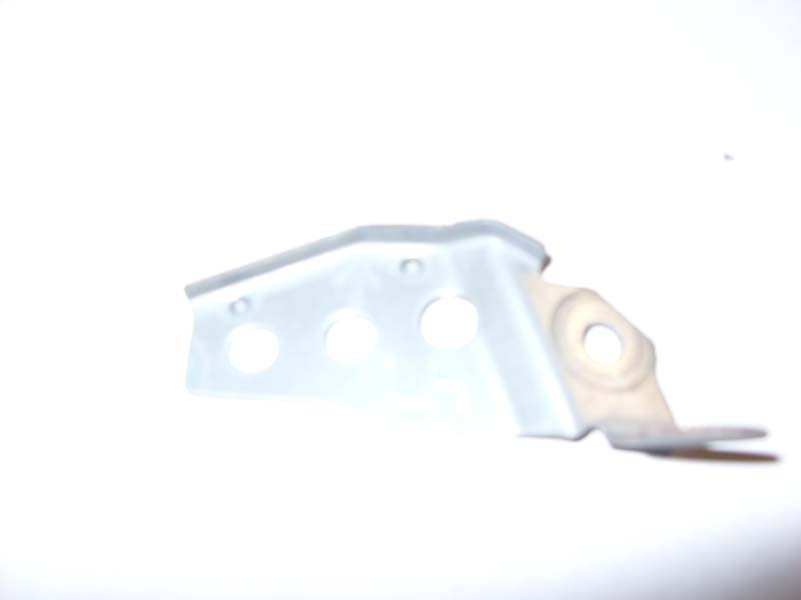
Remove all the clips on the top of the fascia. Next pull back the rubber weatherstripping above the headlights. There is a 10 mm bolt behind each side that holds a metal bracket on, which holds the top of the front fascia on.
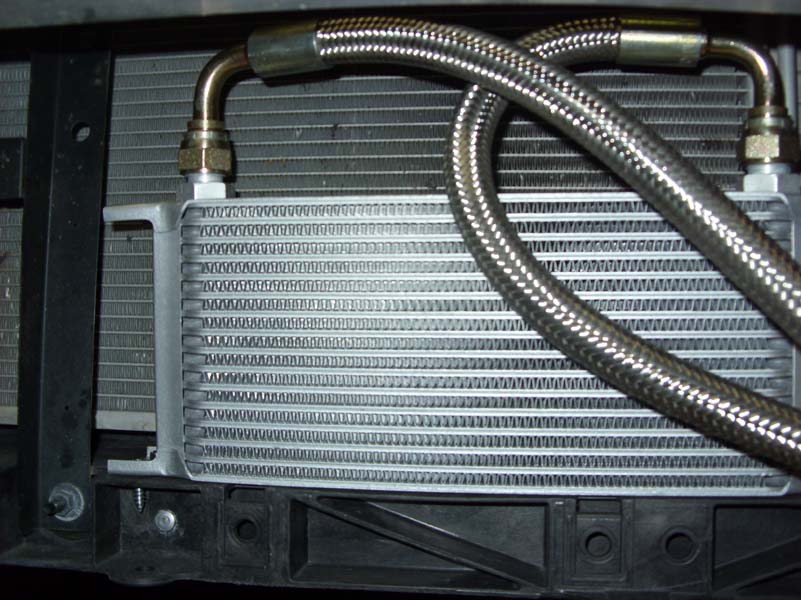
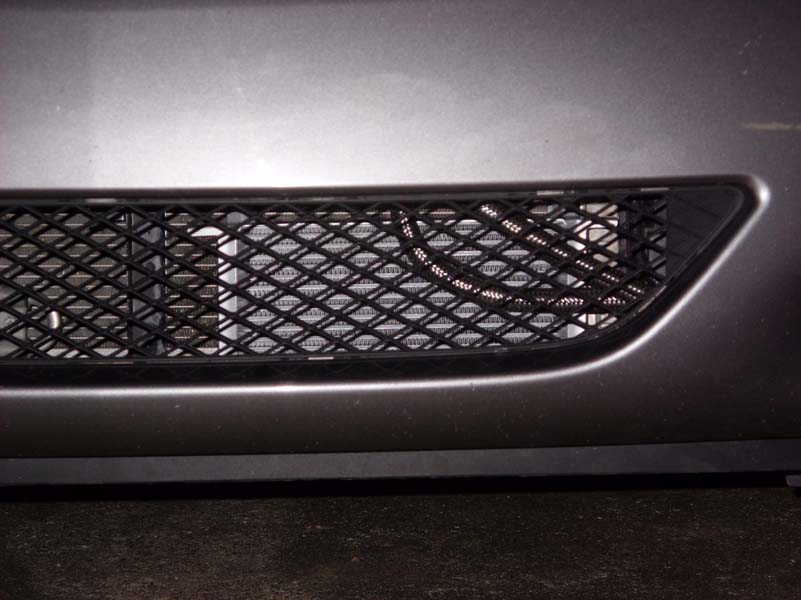
Remove the brackets from each side and remove the front fascia. With the fascia removed, use 4 self-tapping screws and secure the oil cooler to the core support in front of the radiator.
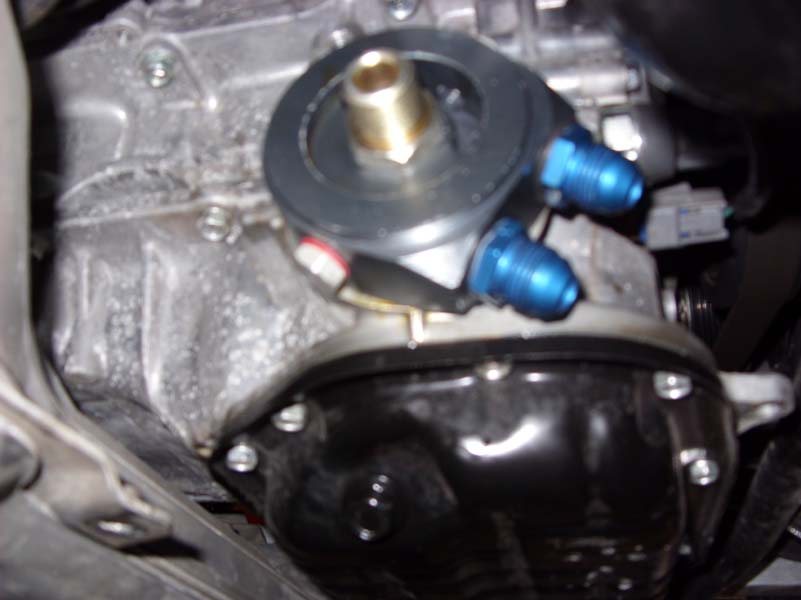
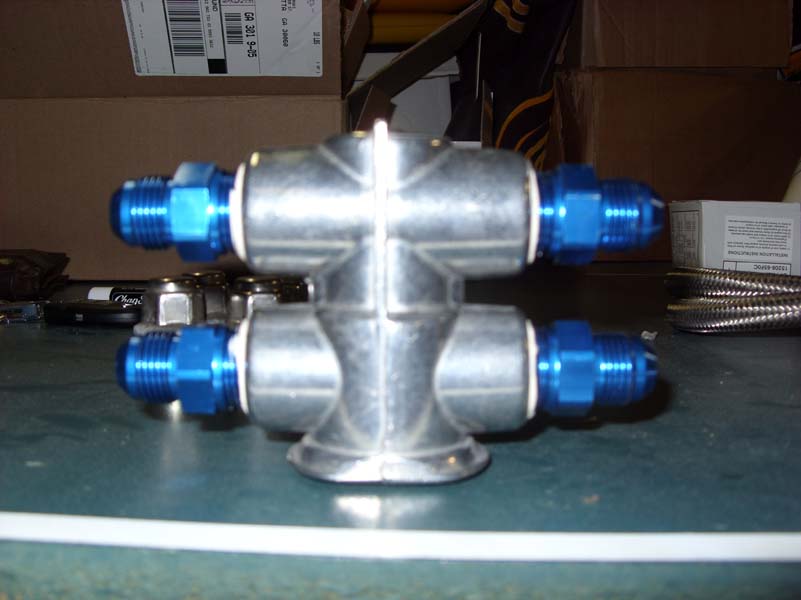
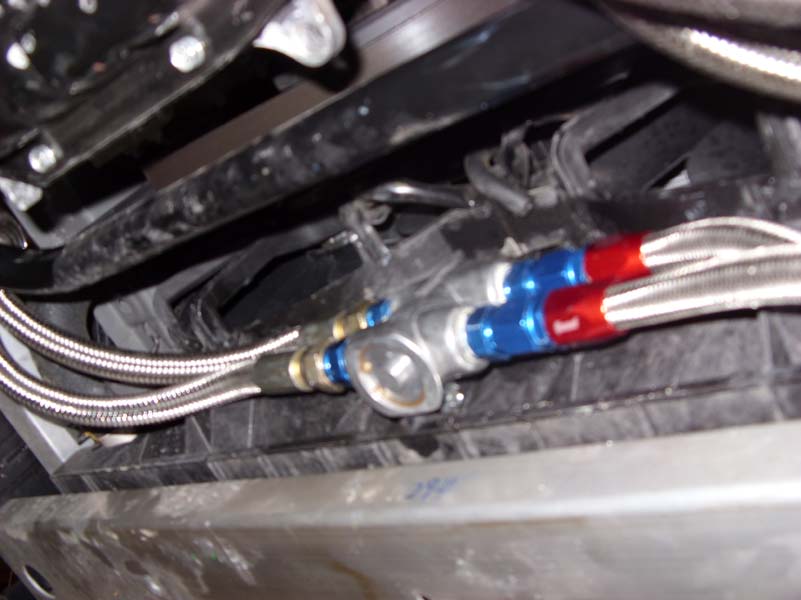
The kit comes with 2 18×1.5 MM adapters, however we chose to replace them with better quality anodized fittings. Screw the fittings into the adapter plate, and use the gold adapter plate fitting to secure the sandwich plate to the block. Next, apply thread sealant to the 4 AN-8 fittings and screw them into the thermostat.
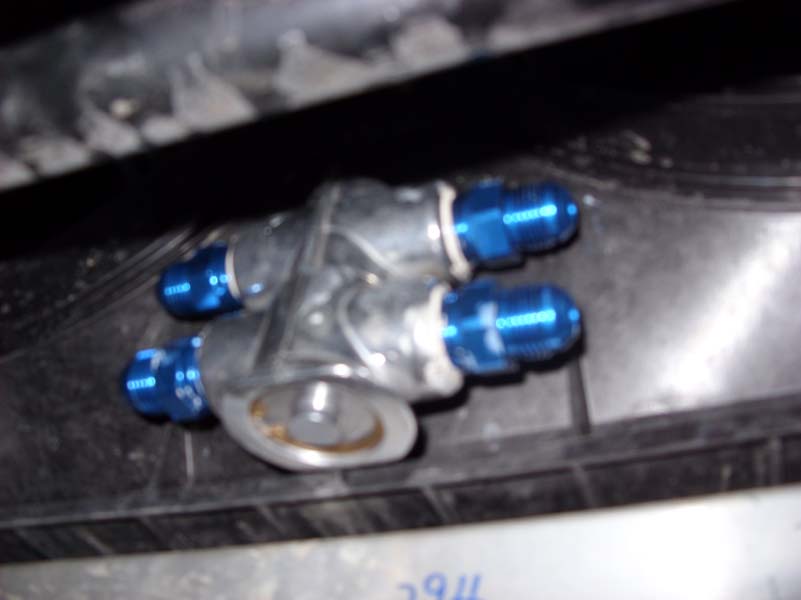
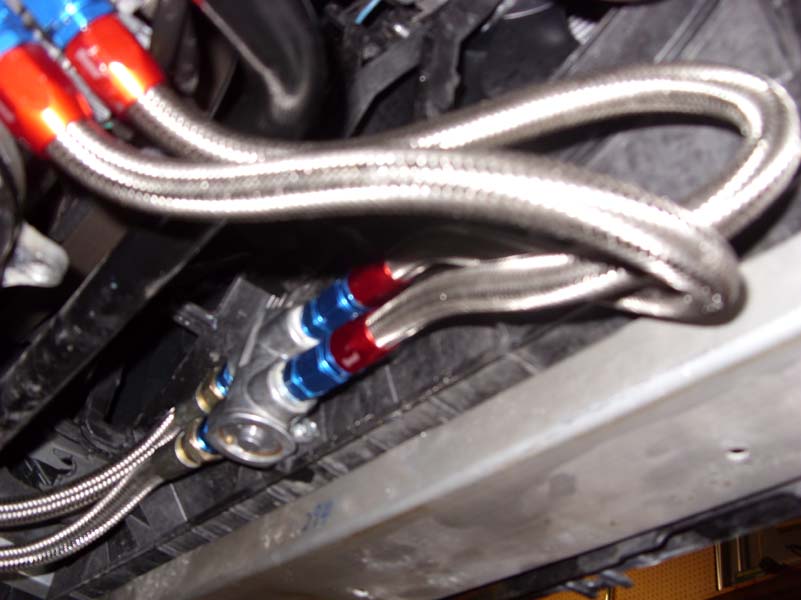
Use 2 self tapping screws and secure the thermostat to the lower radiator shroud. Using the 3 ft section of hose and 4 hose ends, create 2 1.5′ oil lines.
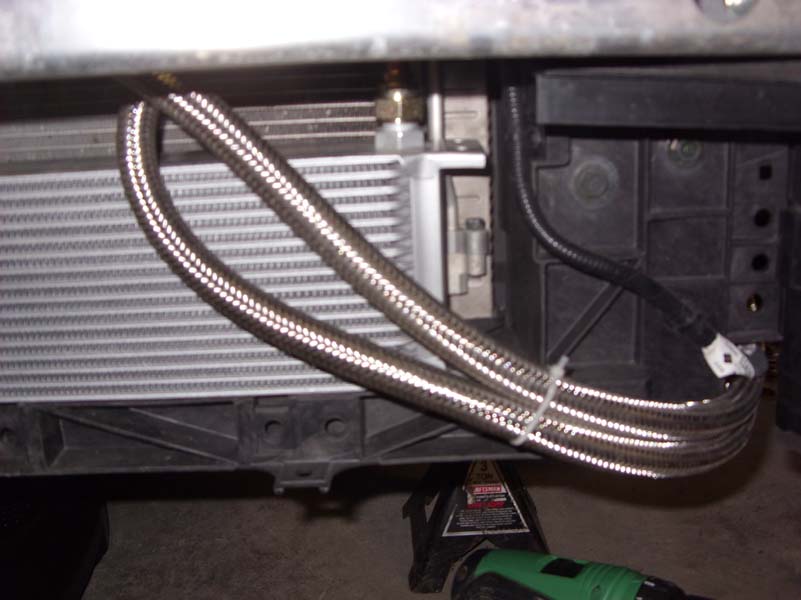
Connect the 2 new oil lines from the oil filter sandwich plate to the thermostat (make sure to locate the “hot” and “cold” side on the thermostat, it does make a difference). Next, connect the 2 supplied oil lines from the thermostat to the oil cooler. The lines can be routed above the driver side frame rail, around the corner, and to the oil cooler.
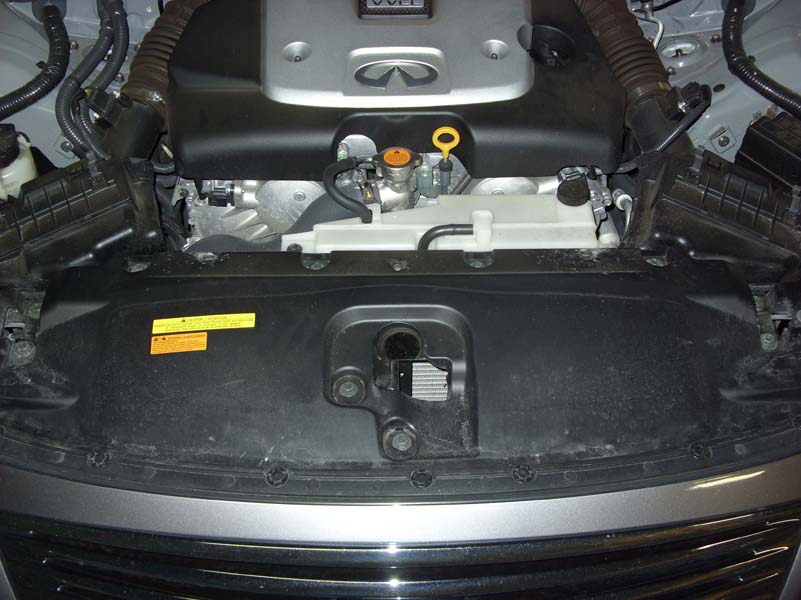
Replace the oil filter and fill the car with 6 qt of oil (1 additional qt of oil is needed because of the added capacity of the oil cooler and lines). Check for leaks, and if all is well, bolt the fascia back on. Then install the fender liners, lower undertray, and wheels. This is the completed result.
Before we take the car to the track and see if our oil cooler makes a difference in the rev limiter, we have some other things to address. We’ll address the other issues one at a time before we head back to the track. So stay tuned, and continue to follow through NICO’s Project G37.
View other segments:
Part I: Oil Cooler Install
Part II: Coilovers Install
Part III: Brakes
Part IV: To the Edge of the World and Back
NICOclub is back again with Carlisle Events to host our 18th annual NICOFest Carlisle AutoX…
Kraft Auctions Offers Fans a Chance to Own a Piece of Datsun Racing History
We built Datsun Ranch in 2014, and it was the culmination of a lot of…
Since it's not just Datsuns that are vintage anymore ("classic Nissan" still sounds weird, right?),…
Let's talk about big brake kits for a bit. For the purposes of this article,…
What do these terms mean? Pulsed Secondary Air Injection (PAIR) Valve: The PAIR valve sends…