
Find related tutorials and information on your vehicle in NICOclub’s Nissan Forums & Infiniti Forums |

Overview:
Coilovers allow the ultimate in adjustable suspension performance for your car, and they are easier to install than a strut/spring combo!
Tools:
– FSM
– Floorjack
– Jackstands
– Breaker bar
– Torque wrench (0 lbs ~ 150 lbs)
– Various sockets, ratchets, breaker bars including 10mm, 14mm, 17mm
Materials:
– WD-40 or other penetrating fluid
– About 4 hours of time
– a friend (don’t really need but it’s better to do work with friends)
Procedure:
Support the car on 4x jackstands per the proper locations as described in the FSM. Test the stability of the car on the stands before attempting to start work.
Remove your wheels.
Starting at the front:
Spray all the bolts and nuts that will be taken off with WD-40 liberally and let it sit for about 5 minutes before using the socket and wrench/breaker bar to remove. The lower bolts are first.
Be careful when trying to take these 2 bolts off, the assembly will drop:
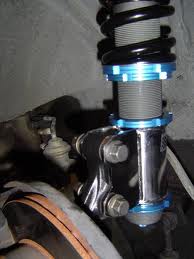
After the 2x lower bolts are removed, move the brake rotor assembly out of the way and have your friend support the bottom of the old strut while you remove the 3x 10mm bolts securing it to the strut tower from above.
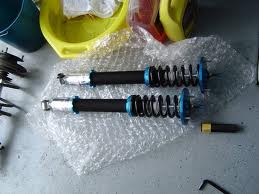
Have your coilovers measured and pre-adjusted by this point, its time to put them in place of the struts you just removed.
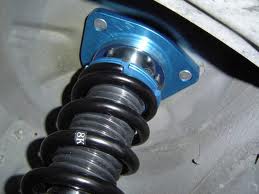
When installing the bolts make sure to torque them to the proper specs as detailed in the FSM:
When thats finished, you should have this:
Now re-attach the lower part to the brake assembly. What I did was I put a block of wood under the assembly and then used my jack to jack it up while I aligned the holes.
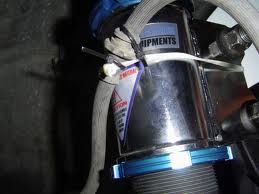
Since the SPL coils do not come with the brake line holder clip, I had to zip tie it to the strut like this:
Front coilovers are now installed!
For the rears:
Use the same technique on unbolting the rears as you did in the front.
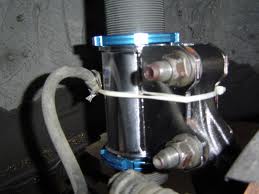
Watch out for the rear assembly as well. Things will look slightly different, there is a single 17mm nut/bolt attaching/supporting the bottom of the damper to the rest of the suspension assembly, and there are only 2x 10mm bolts at the top to be concerned with.
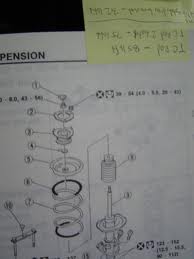
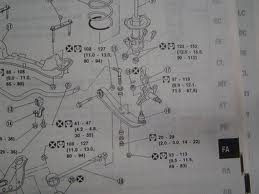
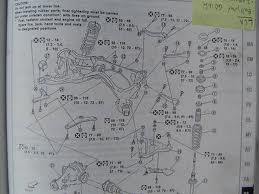
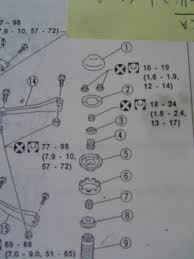
For reference, pages concerning the assembly from the FSM are included:
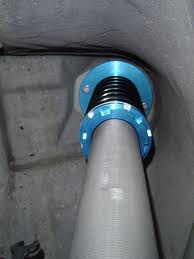
You will notice a rubber dust boot covering the top of the damper in the strut tower; this is optional but if you choose to retain it, you can cut a hole in it so that the adjustment knob is accessible.
Remember to check all bolts and spring perches before you lower the car onto its suspension again!