Here’s a little write-up on how to remove the Cooling Unit from your G50 Q45. The Cooling Unit is where the AC evaporator is found as well as the expansion valve. I’m starting with the glove box already removed, since most of us have done this and to help keep this short and sweet. I’ve included a few pictures to help you visualize the write up. I’m following what I did and I do not claim to be a Q45 mechanic.
Tools you’ll need:
Large crescent wrench
17mm wrench
12mm wrench
19mm wrench
Phillips screwdriver
Ratchet
Extension
10mm socket
12mm socket
Razor blade
First thing I did was remove negative cable from the battery post then released the pressure from the AC system (officially vacuumed the system since simply releasing freon is strictly against the law!!) so I could remove the high and low pressure lines at the firewall in the engine compartment. In the picture below you’ll see the big low-pressure line, which I unfastened first. This is where I used the large crescent wrench. (32, 30mm)
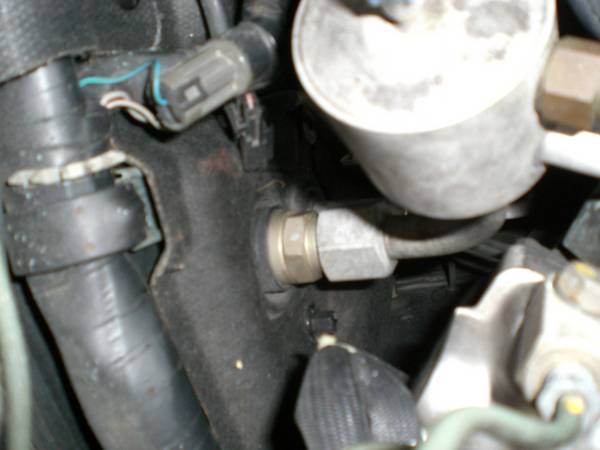
Now in order to get at the high-pressure line directly below the bigger low-pressure line I remove the bracket in the picture below by removing the nut. (Replace the nut when the bracket has been removed so you don’t lose it)
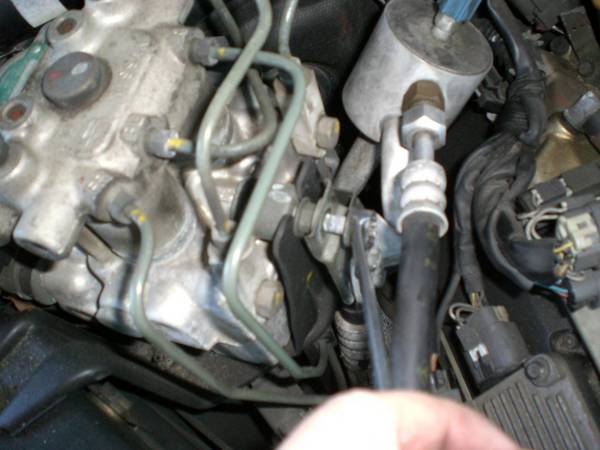
With the bracket unhooked it’s easy to move and manipulate the lines to get to the smaller high-pressure line directly below the high-pressure line you just unfastened. The 17mm wrench and 19mm wrench are needed here. Now I would suggest wrapping the ends of lines from the engine compartment with duct tape to keep the critters out.
Now in the car behind the glove box is a back wall, which you will have to remove using the Phillips screwdriver. There are a number of screws including two plastic screw fasteners at the top. Once all the screws are out pull the wall down and place all your screws where you won’t loose them. You should now be looking at this:
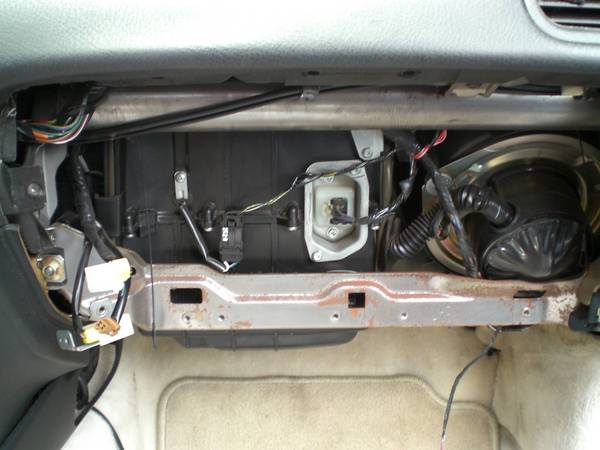
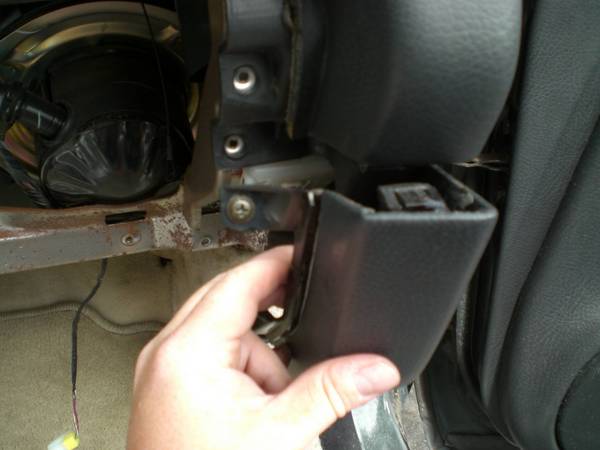
To the right you can see your blower motor and in the middle is the cooling unit, which you’ll be pulling right out shortly. Looks like it’s really in there doesn’t it? Don’t worry; it’s not all that bad. That bar will be coming out but first you’ll have to move over to the right and remove the trim you see here and it’s very easy:
Next the bar comes out. There are a few different screws that have to come out and once 10mm nut comes off to the right. Just follow the bar and you’ll see all the screws and bolt that have to come off:

It’s almost done!! Going back to this picture there are a few connectors to disconnect and 6 screws to remove:
The two connectors need to be disconnected first, and then you’ll see a bracket with 2 screws in it at the top right corner of the cooling unit. You can see part of it in the picture. Unscrew that bracket. Now you’ll need the ratchet and extension to get to the two 10mm screws way up top in the back of the cooling unit. (Not in picture) The last two bolts are at the bottom of the cooling unit at the firewall. Once those are out you’re cooling unit will come right out. Simply pull towards you!
The cooling unit is two pieces, which are screwed together; unscrew them. Now I took a razor blade and cut the foam right at the points where the two halves separate so that I wouldn’t ruin the seal. You’ll have some other little pieces to take off as well:

Once the cooling unit is apart and the evaporator is pulled out you may have a little cleaning to do! Keep in mind that I have a 14-year-old car and it doesn’t look like anyone has visited here in a while:
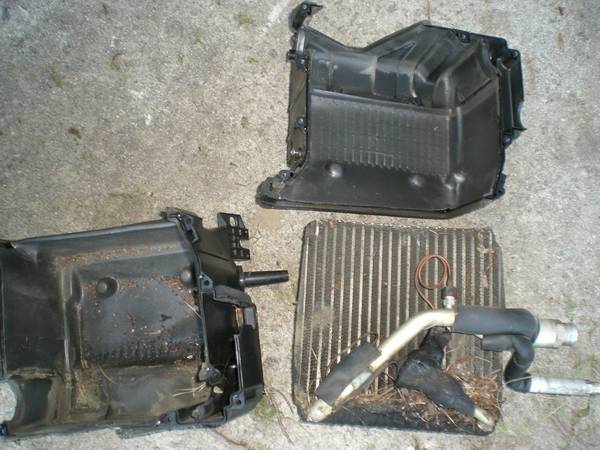
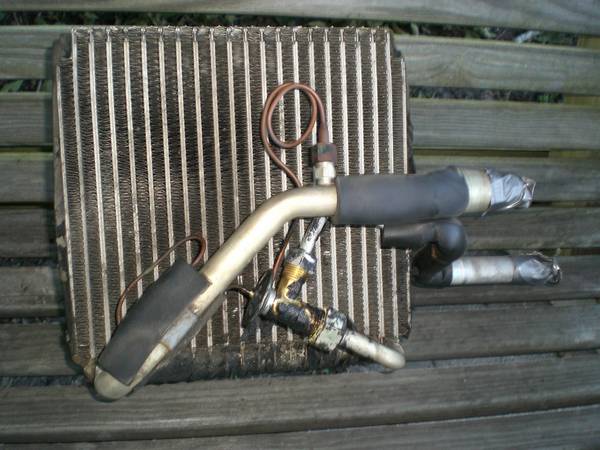
Tape the high and low-pressure lines up ASAP so you don’t contaminate them with dirt, bugs or whatever. I used the blower attached to an airline to blow out the evaporator with some high-pressure air. I also unwrapped the expansion valve. The copper lines you see in this picture are part of the expansion valve:
So there you have it. Not to hard, but it take some time and patience. That’s as simple as I can make it and if I missed something you will be able to make your own decision as to how to do it. I just hope this helps a little. I’m sure someone will find something wrong with it.
Oh yeah, this according to Infiniti’s own books, which I now have in my possession, I saved 1.3 hrs on the evaporator core unit, 1.3 hrs on the changing of the expansion valve, 1.3 hrs on the evaporator case(cooling unit) and .4 hrs on the glove box assembly. So 4.3 hrs at $90 -$120 hr dealer rate, $75 hr foreign auto mechanic rate, $65 neighborhood chop shop rate or $0 using this article!