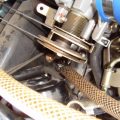
The following directions have been compiled to assist in the installation of an Injen intake onto a ’02-03 Maxima. The directions should also work with ’00-01 Maximas as well.
Tools needed: 10mm socket + ratchet, ratchet extension, 10mm wrench, flat-head and phillips head screwdriver, Pliars
——————————————————————————–
Parts: The injen intake should consist of the following parts: Upper tube, lower tube, billet MAF adapter, 16″ breather hose, cone filter w/ clamp, 2ea 3″ hoses, 1ea 3.25″ hose, 6 clamps, 4ea 10mmx16 bolts, 1ea 10mmx25 bolt w/washer.

——————————————————————————–
Pre-Installation: The installation of the intake requires the factory intake be removed all the way to the throttle body. The air inlet, air box + MAF, and breather hose will be replaced.

——————————————————————————–
Step 1: Remove the air inlet pipe by removing the two plastic screws with a Phillips head screwdriver. The whole air inlet should simply come right off.

——————————————————————————–
Step 2: Remove the five 10mm bolts that hold the airbox in place. Disconnect the MAF and disconnect the “quick ties” from the from the metal air box bracket and move the cable out of the way. Remove the breather hose by squeezing the hose clamp with pliers. Finally, using a flat-head screwdriver, loosen the hose clamp at the throttle body. The whole intake should come out at this time utilizing a little patience. See the image for step 3 to see the proper hose clamp to loosen at the throttle body.

——————————————————————————–
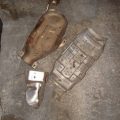
Step 3: The image to the left shows the complete factory airbox including the throttle body hose clamp not shown in step 2. Remove the two 10mm bolts holding the metal bracket to the air box. Put aside as this will be utilized later.

——————————————————————————–
Step 4: Remove the MAF from the airbox by loosening the clamp holding the rear-section and removing this section. Remove the four 10mm bolts. From this step forward, be careful with the MAF as touching the inside may cause failure.

——————————————————————————–
Step 5: Install the billet MAF adapter to the MAF utilizing the 4 10mmx116 bolts. Install the 3.25″ hose and two clamps to the other side of the MAF. Not Shown: Install 3″ hose and two clamps onto the billet MAF adapter. Finally, install the last 3″ hose and two remaining clamps onto the throttle body. Installing the 3″ and 3.25″ hoses takes patience. Again, be careful of the MAF when installing the hoses and billet adapter onto this section.

——————————————————————————–
Step 6: Connect the Upper Pipe to the MAF via the 3.25″ hose side as shown in the image to the left. Slide the other end of the Upper Pipe into the 3″ hose that has been installed onto the throttle body. Install the 16″ breather hose onto the Upper Pipe and onto the proper engine outlet. Only tighten the clamps enough to hold this section together as this will allow movement for future steps. At this time, install the filter onto the lower pipe and tighten the filter clamp as this part will not need to be adjusted.

——————————————————————————–
Step 7: Slide the filter end of the Lower Pipe down in front of the radiator. For proper location, slide it in at an angle towards the battery. This will take some patience since the transmission linkage can hang it up somewhat. Once “in place”, the pipe should somewhat line up with the upper intake section.

——————————————————————————–
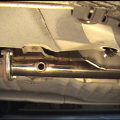
Step 8: Once the lower section is in place, it should be mounted utilizing the 10mm hole slightly above and back of the radiator pipe. On vehicles with 6sp manual transmissions, there should be nothing utilizing this hole and the 10mmx25 bolt and washer should be utilized to mount the lower pipe utilizing some fancy finger work and the 10mm wrench. On vehicles with automatic transmissions, the transmission fluid pipe bracket is utilizing this mount point. For automatics, remove the 10mm bolt, bend the fluid tube slightly out of the way, position the lower tube mount behind the fluid pipe bracket, then install the 10mmx25 bolt and washer as mentioned above to mount both the lower pipe and fluid pipe bracket. This may require bending out the lower pipe bracket somewhat to allow adequate clearance for the fluid pipe. Once everything is mounted, take this time to tighten down all clamps.

——————————————————————————–
Step 9: Remount the Air Box metal bracket utilizing the 2 original 10mm bolts. On the MAF cable, carefully slide the “Quick Tie” back 3-4″ and remount it on the metal bracket. Since the MAF is further away, I personally only utilized the one “Quick Tie” to hold the MAF cable in place.

——————————————————————————–
Final: Crank the vehicle and enjoy!!!!
Article by:audtatious
