How to replace both serpentine belts and both idler pulleys
-by jmanscotch
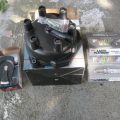
Obviously, start by buying the parts you intend to replace. The two drive belts are different sizes, so you need to be sure to order the correct side if only doing one. Also, the two idler pulleys are of slightly different designs so you’ll need to ensure you’re purchasing the correct one or correct pair. I purchased Goodyear belts and ACDelco pulleys from Amazon for about $90 total. The Goodyear belts have great reviews, the AC Delco pulleys were just cheap like all other brands I could find, so I went with them.
Tools I used:
– 13mm and 14mm shallow sockets
– Ratchet and Extension
– Work Light

Belt Diagram to show belt routing and basic ideal behind idler pulley adjustments:

To get to both idler pulleys, you’ll want to access the bottom of the engine. Begin by removing the splash guard – it’s just several screws holding it up, so dive in.
Next, you need to identify which pulleys are the idler pulleys. The diagram above shows their location. Below are actual pictures that show you what they look like and both show their location in reference to the oil filter (it’s a blue filter, in my case).
Oil filter would be in the bottom right side of this photo. This is the passenger side (Alternator/Power Steering) idler pulley.

This is the driver side (HVAC) idler pulley, oil filter is bottom left of photo.

Both idler pulleys are adjusted and removed in the same manner, so what I show for one, applies for both. To start, you need to loosen the 14mm nut in the center of the idler pulley – don’t remove the nut, just loosen a little. This will then allow you to turn the 13mm nut/bolt that will adjust/slide the pulley up and down along its bracket, which loosens and tightens the belt.
Loosening the center pulley nut:

After the center nut is loosened, use the 13mm socket, with the extension, to unscrew (counterclockwise) the tensioning bolt at the bottom of the pulley bracket. Here is the pulley with tension on the belt:

Here it is again with the adjusting bolt screwed out and tension removed from the belt:

At this point, there’s slack in the drive belt and it can be removed. Note that HVAC drive belt sits behind the alternator/power steering belt since both belts loop around the center crankshaft pulley, so to get it off you’ll have to remove the alternator/power steering belt first. To remove the alternator/power steering belt, you’ll have to take it off the pulleys and then carefully work it out and over the cooling fan. This isn’t hard, just be careful not to break/damage the cooling fan blades (don’t get the belt stuck on one and yank).
Now that the belts are off, you can finish removing the idler pulley(s) and replace them with new units. Grab your 14mm socket again and finish removing the center nut on the pulleys. Make sure to be attentive while removing the nut, washers and pulley itself, so you know which order and orientation to put them back in.
I didn’t take a picture of the alternator/PS side, but here is the A/C side and its order:
Nut > Dust cover > Brass washer > Idler Pulley < Brass washer < Dust cover < Mounting point Keep in mind that the dust covers are meant to seal when installed correctly, so ensure you don’t flip them around and install them backwards. 
Here’s a comparison of the two idler pulleys. The alternator/PS pulley has a slightly wider surface area and the A/C pulley is skinnier.

Here’s the belts I replaced…yours need replaced if they look even half this bad:

Now it’s time to install the new idler pulleys, new belts and tighten everything back down.
Pulley installation is easy and the reverse of the removal steps. Keep center nut slightly loose while tightening the tension adjusting bolt. The rule of thumb I used for ‘how tight to tighten’ is to tighten the pulley/belt until I could *barely* turn/twist the belt 90 degrees. So tighten, check it then adjust until satisfied. Once tension is set to the correct point, finish by tightening down the center pulley nut. I didn’t torque them, just good and snug then a quarter more of a turn.
Here I found access to a longer span of the belts and tried twisting them to see if I could just barely get them to twist 90 degrees:

Double check that both belts are seated properly in all associated pulleys/groves. Double check that the four bolts/nuts you touched are all back in place and tightened down. Double check that all tools are removed from engine bay and then start the truck and visually inspect the belts and idler pulleys to make sure there’s no issues with the reinstall.
Hope this helps someone who’s a little less experienced and needed a little extra visual guidance to convince them to jump it. It really isn’t a hard DIY and much like any DIY task, it all makes more sense when you jump in and get hands on the actual parts.


