First off, I’m going to include some pictures and diagrams once I get back to my home computer later today, so this is just the write up phase of things and I”ll include pics from the FSM…
So anyway, this weekend, I went over to Ryan’s house to replace the brakes on his G35….Here’s what we used:
Hawk HPS pads
Stillen slotted rotors (I think)
Just so anyone knows, this was a REALLY easy job and it was certainly worth my drive down there (because I got to bed the pads) and it was worth Ryan’s time rather than paying the dealer a few hundred to do it…
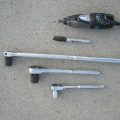
Here’s what you’ll need, as far as tools..
– 22mm socket for the caliper bracket bolts (I think its 22mm, we used a 7/8 socket because we only had up to 19mm)
– if memory serves, the rear caliper bolts were 18mm
– 3 inch or bigger C clamp
– Brake grease
– Breaker bar, air tools preferred
– various extensions and so forth
– Jack and Jackstands (NEVER EVER EVER EVER USE THE OEM JACK FOR THINGS LIKE THIS!!!! NEVER!)
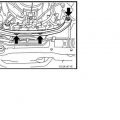
So we started with the front.. Really wasn’t that hard, except getting the calipers off. Its pretty hard to get in there, because the wheel well is so small and those huge bolts are really cranked on there good. This is where air tools would make it easy because you could get in there with an air gun without too much problem….(figure 1)
Just 2 bolts on the caliper bracket, and the caliper and bracket come off…be sure to support the caliper on something, we had a crate that we set it on. You don’t want to let the caliper dangle by the line….
At this point, if you’re just replacing the pads, then you can simply undo one of the caliper pins (illustration), lift the caliper up, and replace the pads as stated later…. (figure 2)
So now the caliper is off….You can now take the rotor off… What I thought was especially cute, is that on most rotors they give you a threaded hole to push the rotor off with a small 12mm bolt. On the G, they already have it there for you… Those Infiniti guys were really thinking about the people that work on brakes, because whenever I do it I always end up taking a bolt somewhere off the car and using it for that!!
(figure 3)
Anywho, once the caliper is off, you can take off the rotor…if it wont come off by hand, use that 12mm bolt supplied on your OEM rotor…Simply screw it in and start tightening it…it forces the rotor away from the hub and you’ll feel it POP off… Then simply remove the rotor.
It is ideal to thoroughly clean the hub of all the rust and stuff with a dremel or wire brush…unfortunately, i didn’t have my wire brush thing for my dremel so I didn’t do that..however I applied some WD40 on there just because…..
This is a picture of the hub and as you can see it needs some serious cleaning, this was before I cleaned it…..
Now that the rotor and caliper is off, you can replace the pads. On the OEM calipers, there is a small clip that holds in the pad on the upper left hand side of each side of the caliper. Get some needle nose pliers and pull that clip down, and then you can simply push the pad out with your finger… I noticed that only 1 per side of the hawk pads had these clips, whereas the OEMs had 2…doesn’t really matter…but definitely put the one WITHOUT THE CLIP on the PISTON…
One thing I sort of discovered by accident is that the caliper bracket just pulls off. You have to remove the caliper bracket in order to push the piston back… So simply pull the caliper bracket away from the caliper, and set it aside… You can then use your C clamp to push back the piston. BE SURE TO TAKE OFF THE LID TO THE MASTER CYLINDER! What we did, instead of sucking fluid out, is just took off the lid and put a towel over it.YOU DO NOT WANT TO SPILL BRAKE FLUID ANYWHERE!!If this is your first time messing with brakes, you should probably replace your brake fluid….which will be discussed later…
so once you push the piston back , you can put the caliper bracket on the slide pins and install the pads. Before you do that, put a little bit of that grease on the pins…..
To install the pads, simply put them in with the flat side facing down(the top of the pad is curved, and the bottom is flat)…..It does not matter which side they go on….
Cover the back and sides of the pad with the grease, and install into the caliper…
Once you install them and the caliper is ready to go back onto the car, put the rotor on..I noticed it helps to put a few of the lug nuts on finger tight to hold the rotor in place…You don’t need to put that little nut back on the rotor as with our aftermarket rotors they did not work…. save them for later use…
Repeat this 3 times…the rears were MUCH easier than the front, I did one rear brake in about 15 minutes….
Another thing of note is that I did not see any jack points for the rear. The frame goes too far forward, and the chassis is so stiff it will actually fall back somewhat…. I supported it on the subframe with my jack stand, there is a level place, it is hard to describe, but you should see it…..
Now that your brakes are done, you are now ready to bed the pads..An excuse to violate the brakes, life is good, right??
it is VITAL that you bed the pads in correctly or they will not work right….
First off be sure to pump the pedal a few times so you get full pressure back…
Now go out and make about 10 40-almost 0 stops..apply over half pressure….You don’t want to stop all the way!!!! Just stop most the way but while your doing the bedding process, NEVER come to a complete stop with your foot on the brake..
After you do that, let the brakes cool for a few minutes, then do a few 60+ to zero stops applying full pressure…
Congrats you have just replaced your brakes on your G35! Now, next time wear some rubber gloves so that your not scrubbing brake crap off your hands for 3 days!!!


