Article Series
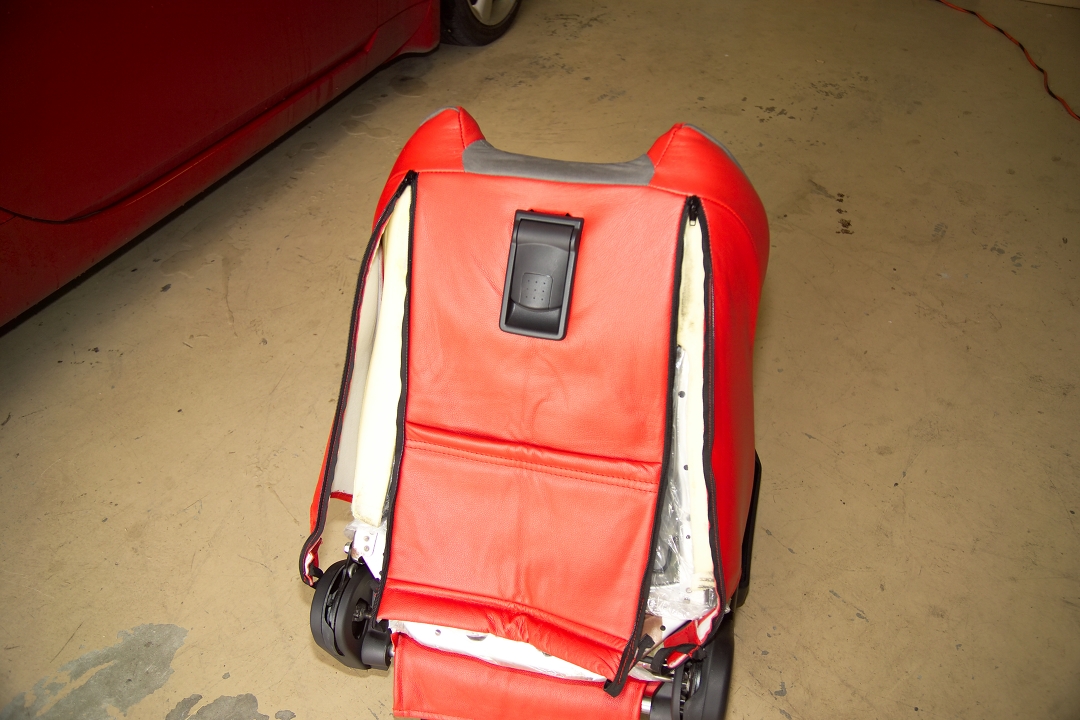
At this point, we need to discuss the issue where the covers do not comply with the OEM specifications. The OEM cover U-channels are metal and have a smaller profile compared to the leather covers. The new covers have larger, plastic U-channels. This means that the two cover sections must be overlapped and squeezed to a much greater extent to engage. This, combined with less stretchable nature of leather, makes this the most difficult step of the installation. Take note of just how tight this fit is at this time.
Once the leather has relaxed, remove the cushion/cover from the frame and attach the two hog rings to the inside bottom of the cushion. At this point, I found it necessary to remove the bottom 1” of the foam where it wraps around the bottom bar of the frame. This was needed to give additional clearance for the plastic U-channels.
We are now ready to install the seat back on to the frame. Slide the cushion back onto the frame, making sure it is resting on the top of the frame. Fit the cushion around the frame sides and under the bar at the bottom. Tilt the seat back as needed to dress the U-channel between the plastic side covers on the frame and the bar at the bottom of the frame.
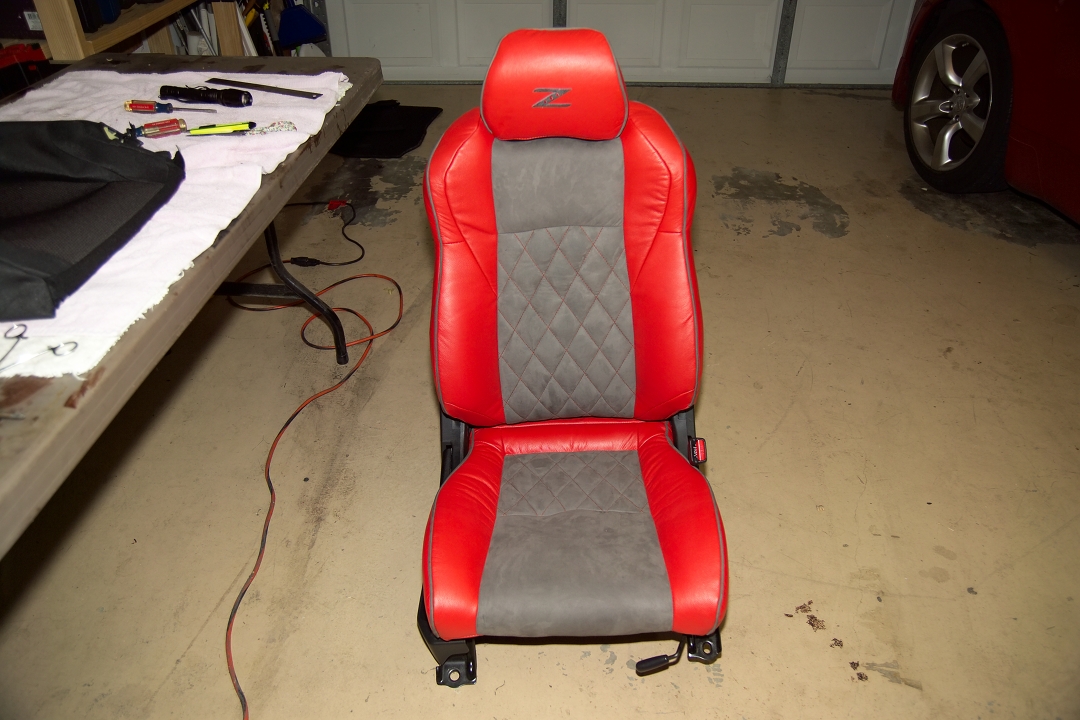
At this point for the passenger seat, do the final trimming for the auxiliary tilt release bezel, dress it through the cover, and secure the panel with two screws.
Do not pull the zippers down at this time, as it will make engaging the U-channels harder. Try as I might, I could not get enough overlap to engage the U-channels. I then compressed the front of the cushion with a board and clamping. I also cut some notches into the rear U-channel to create three separate tabs. At this point I was able to engage the center tab and used the additional leverage to engage the other two tabs. Perhaps Interior Innovations will adjust their specifications to account for the larger size in the future, but this is what I had to do. (NOTE: Some customers report that allowing the covers to bake in the sun for several hours makes this part of the task a little easier.)
At this point, close the zippers. Using the OEM cover as a template, mark and pierce the top of the seat cover for the headrest ferrules. Use caution, and go small! It is better to under-trim the holes rather than risk having a cut show after the ferrule is installed. Slide the ferrules into the seat until they snap into place in the frame.
Insert the bottom cushion into the outer frame and turn the seat assembly over. Adjust the seat cushion so that the 12mm bolts fit and tighten. Pull the last flap of the cover around the bar and secure the elastic to the seat springs.
Install the new headrest cover: Unlike the seat cushions, you cannot remove the fabric covering the headrests, as it is glued in place. To install the leather cover, release all of the Velcro strips to maximize the bottom opening. Turn the cover inside out and then push the top back in half way. Place the new cover over the headrest and work it down little by little squeezing the cushion as needed (again, think of putting on a condom). Once in place, secure the bottom Velcro strips.
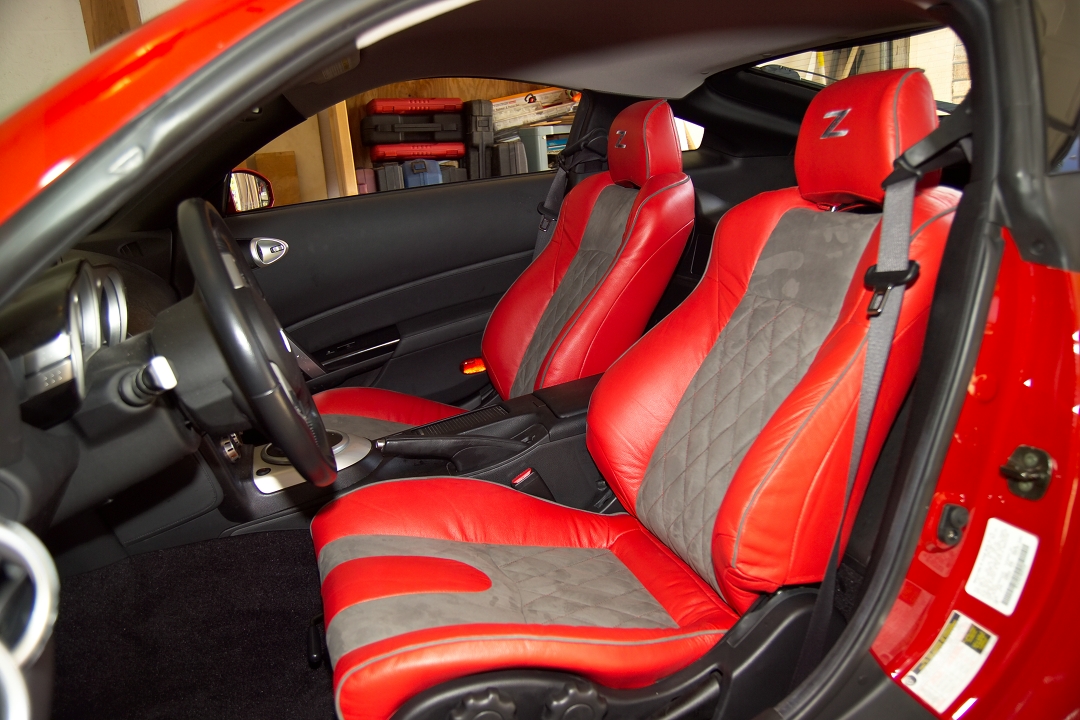
Re-installing the seats: This operation is pretty much the reverse of the removal process. Remember to leave the headrests out, and tilt the seat forward before installation.
If you have airbags, verify the battery is still disconnected before reconnecting the wiring. Use zipties to secure the wires to the seat frame.
Mount the seat frame, engaging the locating pin. Install the front mount bolts, but don’t torque them down yet. If necessary, connect the battery now. Move the seat forward and install the rear mount bolts. Torque the bolts to 25-40 ft-lbs. and replace the plastic caps. Move the seat rearward, torque the front mount bolts and install the plastic caps.
I hope you’ve enjoyed this installation article, and I also hope it helps you with your own seat upholstery replacement. Thanks for joining us!
The author, Dale (djwarner), is a long-time member of the NICOclub forums and an avid Z enthusiast.