The following directions can be utilized in the replacement of HID bulbs in the 2002-2003 Maxima. These instructions cannot be utilized with other years of the Nissan Maxima. One person can accomplish this task with no no problems. Please view pictures with steps for additional detailed information.
Tools needed: 10mm deep socket or wrench
The 2002 and 2003 Maxima utilize D2R HID bulbs. These bulbs fit into the headlight housings in a certain direction based off the key as seen in the picture. Bulb orientation has the bulbs power wire in the “down” position, thus this “bar” will be on the bottom when installed.
When handling the bulbs, DO NOT touch the bulb as oil from your fingers will shorten their life.
Step 1. Disconnect the battery. I chose to disconnect the negative battery terminal. Due to the tight confines within the engine bay, the drivers side is tight and will require the battery to be moved unless you have hands the size of a child. Using the 10mm socket or wrench, loosen the two nuts from the battery tie-down. One loose enough, you can disconnect the hooks and move the battery out of the way. This will give enough space to work. On the passenger side, there is nothing to move. You simply have to work around the windshield washer tube.
Step 2. The HID bulb has a sealed cover (utilizing a rubber O-ring). To remove this cover, twist counter clockwise to release and you will be able to remove it.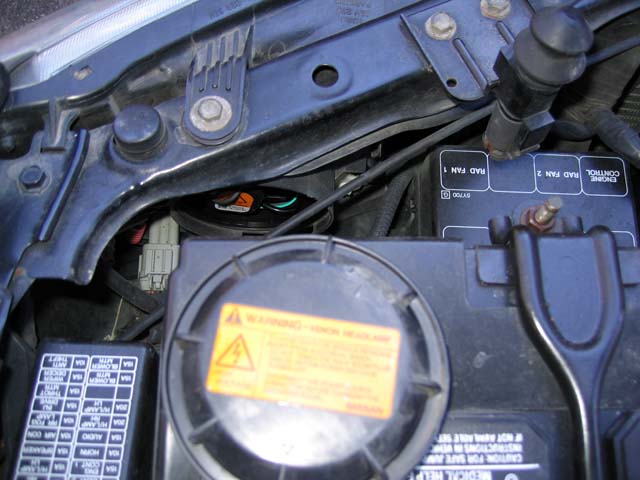
Step 3. Once the HID cover is removed, you will have access to the socket. To remove the socket from the HID bulb, twist counter clockwise and pull backward. You may need to wiggle it somewhat but it will disengage.
Step 4. The most difficult part of the installation seems to be figuring out how to disengage the retaining ring from the HID bulbs. Per the diagram, you will need to depress each “hooked” end of the ring inward (toward the front) and slide inward to toward the bulb. Once each side is done, the bulb will loosen up and you will be able to remove it. Do not touch the bulbs. 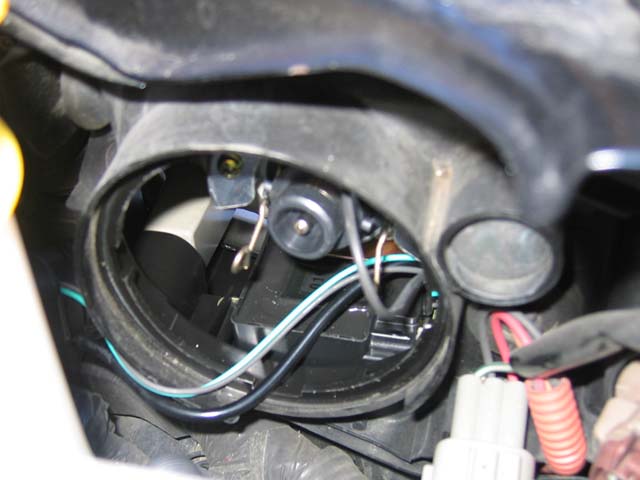
Step 5. Time to install the new bulbs. Remove the bulbs from their packaging without touching the glass section. To install the bulbs, use one hand to hold the retaining clip out of the way (it is hinged from the top) and slide the bulb in. It is easiest to insert the bulb with the “power wire” on the bottom as this should align the bulbs key. Once inserted, twist the bulb slightly left and right to ensure it is in. Move the retaining clip over the bulb and re-engage each end of the clip.
Step 6. Reinstall the socket but leave the cover off. Once both new bulbs are installed, temporarily reconnect the negative battery post and turn on the headlights to make sure both bulbs are functioning appropriately. If all is well, reinstall the HID covers and remount the battery (remember to tighten down the negative battery post).
All done!!!
Article by: audtatious