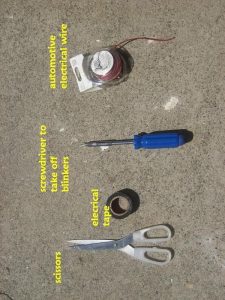
The ever-popular sleepy eyes can be achieved through a variety of different methods. This particular one combines low-cost with functionality and the reassurance from completing the job yourself!
Difficulty: **
Time: 1-2 hours
Cost: less than $10…
The Nissan and Infiniti enthusiast community - Repairs, modifications, resources and much more!
by Greg
by Greg

Okay, the purpose of this write up is to provide a free solution to a 150 dollar problem.JWT offers these gears for that price, and while they are useful, few people actually find 150 dollars of horsepower here.However, if you want to use a 248 cam on your intake side, you’re going to be retarding that cam 1.7 degrees.This puts the intake opening event .7 degrees before TDC, which is certainly not helping your top end (which is why you have a 248 in there in the first place).So to correctly install a 248 on the intake side you would have to use a 2.5 degree advance, this would make you only .8 degrees advanced over stock.For this write-up i have taken my goals one step further, and i only redrill the gear for a 5 degree advance.
by Greg
by Greg

hey guys,
so I’ve been searching for some good HID projectors to retro into my Silvia front.those with the Silvia know how poor the output of those lights are. the cut-off is nice but the output seems lacking.if you think they’re pretty good, I guess i just have some high standards for lighting.i haven’t tried re-based bulbs in the Silvia projectors, but if you do that, your cutoff is going the wrong way and you’ll be blinding everyone driving towards you, not cool. “but it will be mad tyte JDM **** yO!”seriously, its lame, don’t do it…
by Greg

Rattlecan paint jobs have gained a negative reputation in recent years as it seems any 16-year-old kid is all-too-eager to ruin his perfect factory paint in the hopes of giving his car that “street racer” look. For those of us who have mismatched panels, badly oxidized paint, etc… it can be a cheap temporary alternative to spending all your project budget on the real thing. Depending on your skill level and patience, you can come out with results that rival the real thing.
by Greg

Ok, there’s been lots of discussion on how/what to do when relocating batteries. These are spread among a gajillion threads & w/ no pictures or diy as I’ve seen. I decided to take pics when I did it a few weeks back (everything still works, YAY!). Also, having it run inside the engine bay & a hole a I drilled w/ no grommet where it could spark and blow me up was not a fun idea – and thanks to everyone who told me it was an unsafe idea, hahaha.
The benefit, obviously, for most people doing this mod: to run turbo piping. Also, better weight distribution, cleaner engine bay, etc…
by Greg
by Greg

So after an exhausting search for a nice spoiler-less (and more importantly rust-less) hatch to replace my messed up one, I finally found one this morning. A trip to a not-so-local junkyard and $100 later, I had one in my driveway, ready to install.
I saw that there were some people who had trouble replacing their hatch (mostly with the wiring), so I figured why not take pics while my friend and I did it and make a cool little DIY for NICO.
by Greg

by justin shar (sharjt) Overview: The characteristics of a supercharger can be superior to a turbo in some situations. For drivers who want to take advantage of the instantaneous boost and excellent low-end this system provides, sharjt and wattydchi provided this writeup. Difficulty: **** Time: 8-12 hours Cost: Tools: Materials: – supercharger install kit– eaton […]
by Greg