Article Series
- Restoring a 1968 Datsun 510 Sedan - Meet "Betty"
- Restoring a 1968 Datsun 510 Sedan - Front Suspension
- Restoring a 1968 Datsun 510 Sedan - Rear Suspension
- Restoring a 1968 Datsun 510 Sedan - Differential and Rear Brakes
- Restoring a 1968 Datsun 510 Sedan - Wiring with a universal harness
- Restoring a 1968 Datsun 510 Sedan - Engine install, door hinges and bumpers!
- Restoring a 1968 Datsun 510 Sedan - Weatherstrip and window squeegies
- Restoring a 1968 Datsun 510 Sedan - Part 8 - Seats and Wiring
- Restoring a 1968 Datsun 510 Sedan - Part 9 - Lighting
- Restoring a 1968 Datsun 510 Sedan - Part 10 - Radiator and cooling system
- Restoring a 1968 Datsun 510 Sedan - Part 17 - NICOclub
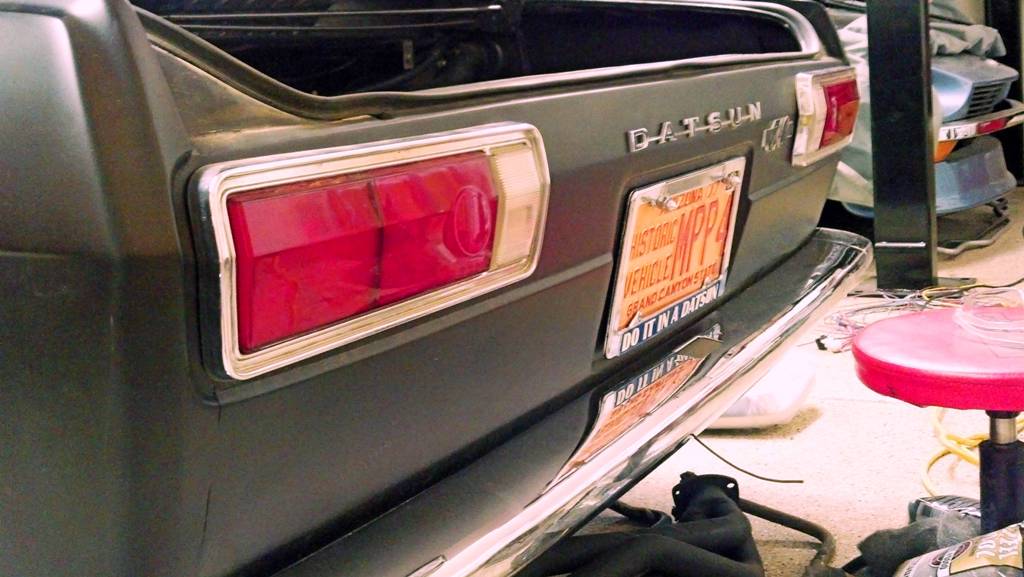
With the wiring wrapped up, I wanted to get some of the boxes out of the trunk, so I decided to take a day and install all the lighting. I had collected a stack of 510 taillight housings and trim (from the huge load of parts I acquired early in the build), so I went through and selected the cleanest ones – One pair actually still had flexible taillight gaskets! Since the tails were simple, they went in first. The local auto parts store carries some older-style bulbs, and I didn’t want to chase down non-functioning lights, so all new bulbs went in. Each one got a light coating in dielectric grease before installation, and I think the tails turned out real nice:
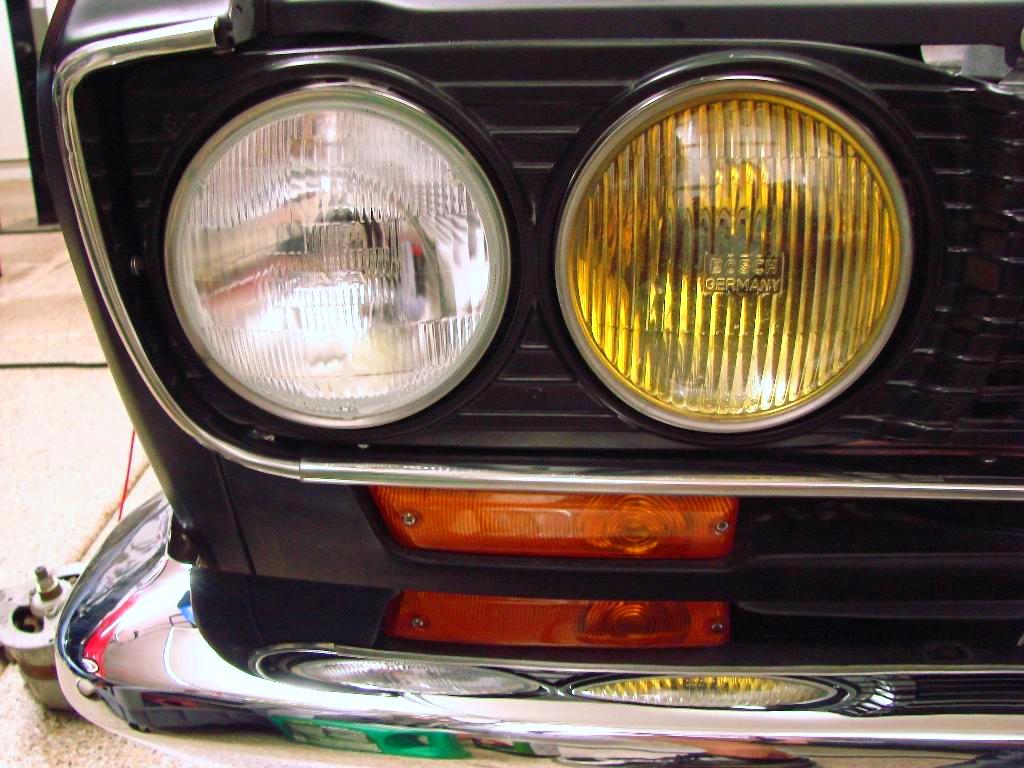
Finding the correct headlights was a little more difficult – Most auto parts stores used to carry sealed-beam lamps, but they’re pretty scarce these days. There’s an old-school neighborhood NAPA about 15 miles up the road, and a quick call to them yielded a new set of lamps. Even though all the wiring was run and routed, none of the connectors was attached, and none of the lighting wires were terminated yet – I wanted to make sure all my wiring was run in bundles, as cleanly as possible… So all this got done along with installing the front-end lighting.
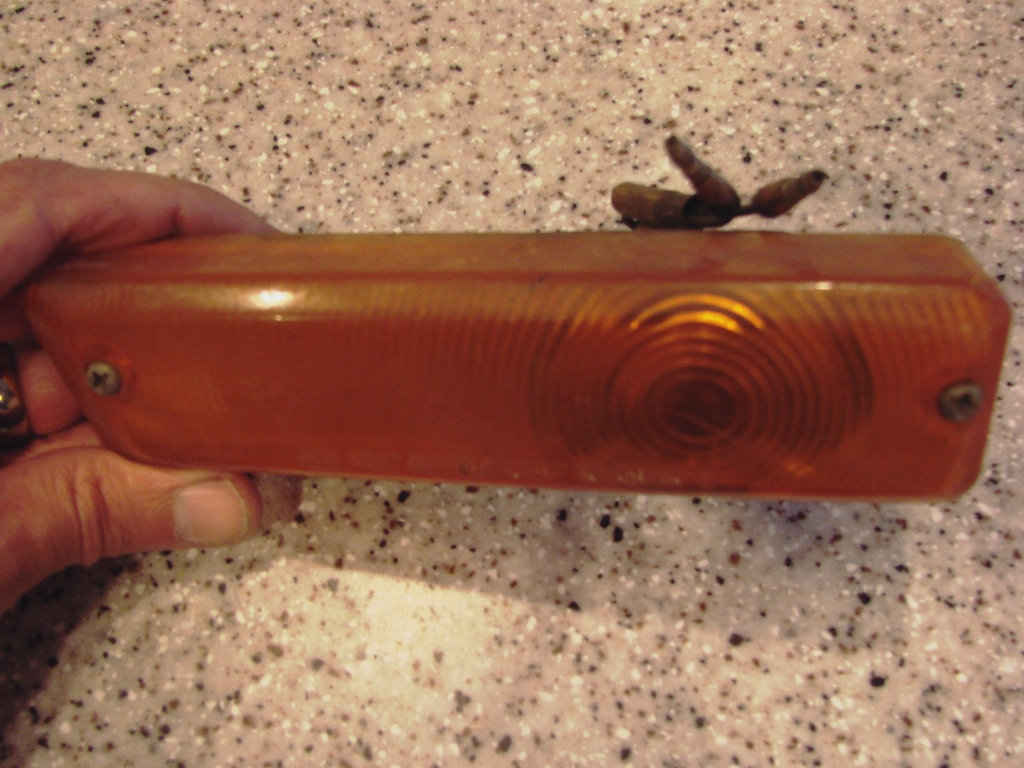
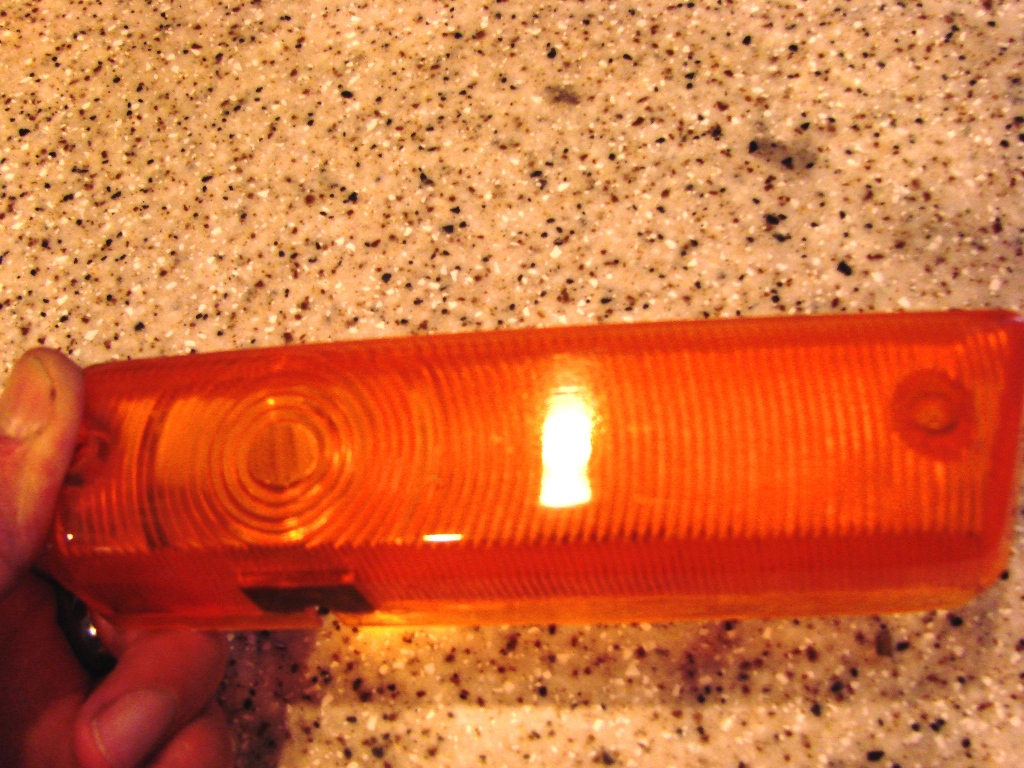
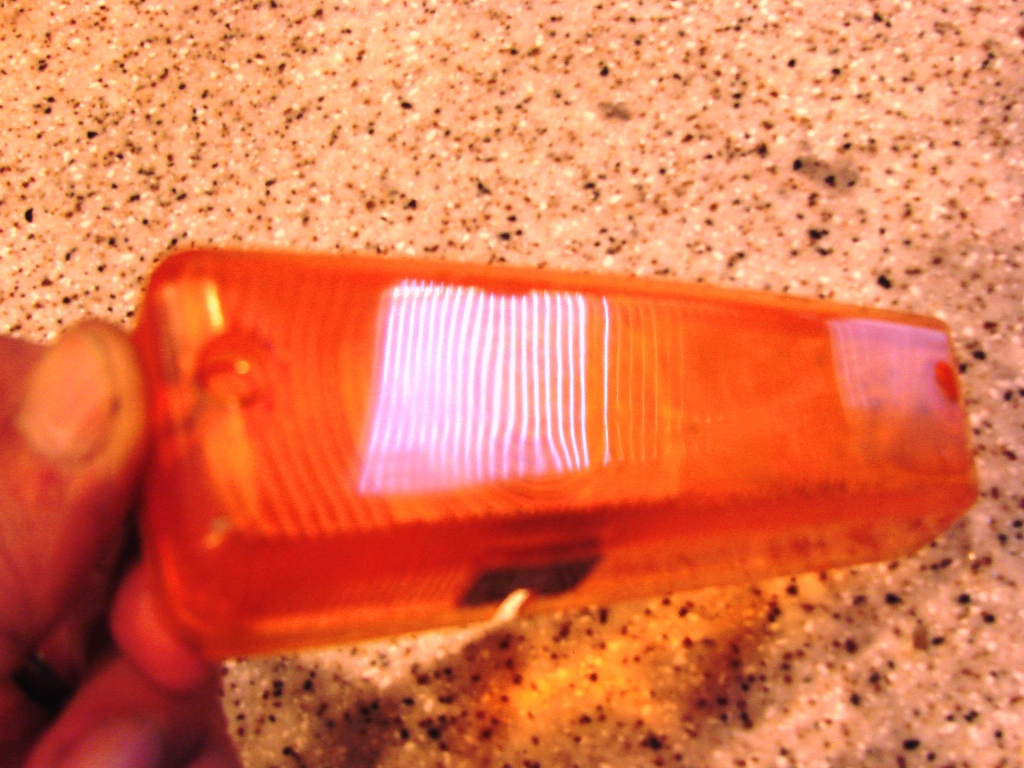
Refurbishing the lenses and housings for the front turn signals would ensure that they look “factory-fresh”. It’s a simple process, wet-sanding with 600 / 800 / 1000 grit wet-dry paper, followed by a vigorous polishing with regular plastic polish. I use Novus Plastic and Acrylic Polish, it’s great stuff.
Here’s the before and after (click for detailed view):
Once those were wired and grounded, I installed the new headlights (as well as a sweet set of Bosch yellow fogs in place of the high beams – Can’t pass up that classic old-school look on a proper Datsun!) The headlights were set up a little differently, with the low beams activating all four lights, and the high beams activating the second filament in the outer lights (not exactly correct for the car, but these are the upgrades you can do when you’re building it yourself). Routed the headlight wiring along the same path as the turn signal wires, so they can all be bundled cleanly.
Since the grille, headlight rings and front-end trim were hogging up space, I went ahead and refurbished those as well. The stainless trim responded real well to a two-hour polishing session. Starting off with fine-grit wet/dry paper for the areas with scratches, and working towards a finer polishing compound on a polishing wheel attached to a Dremel tool, I wanted to make sure the trim looked as good as possible. Since the grille and headlight rings were already powdercoated black, the trim needed to be pristine. I think it all turned out pretty nice:
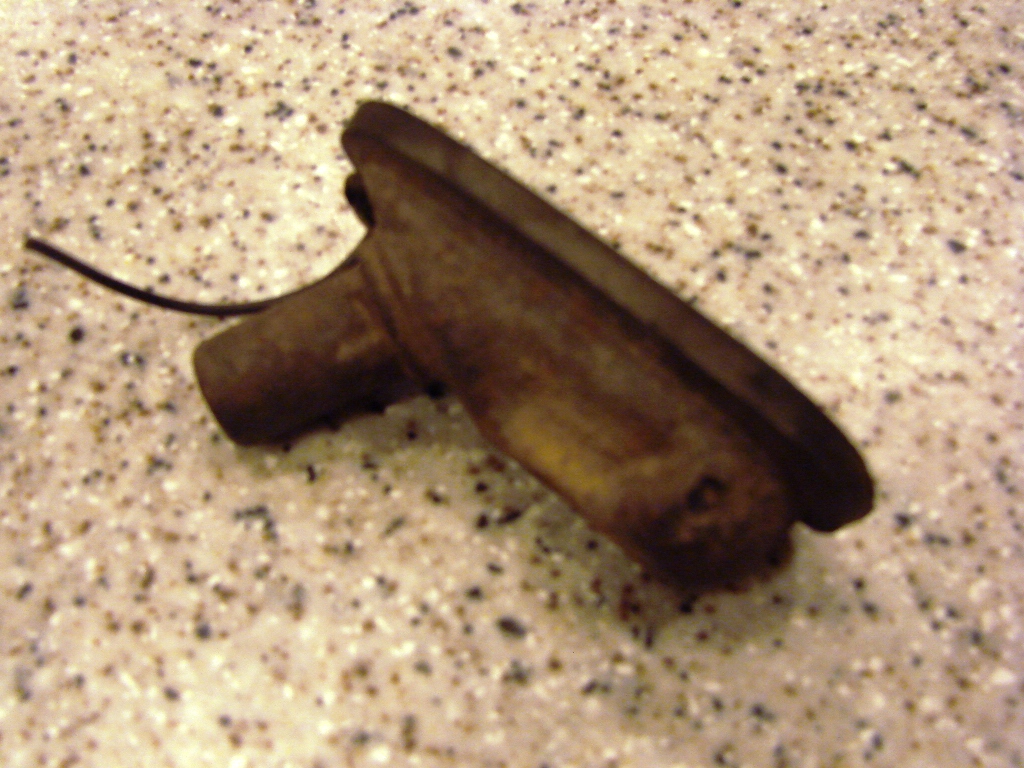
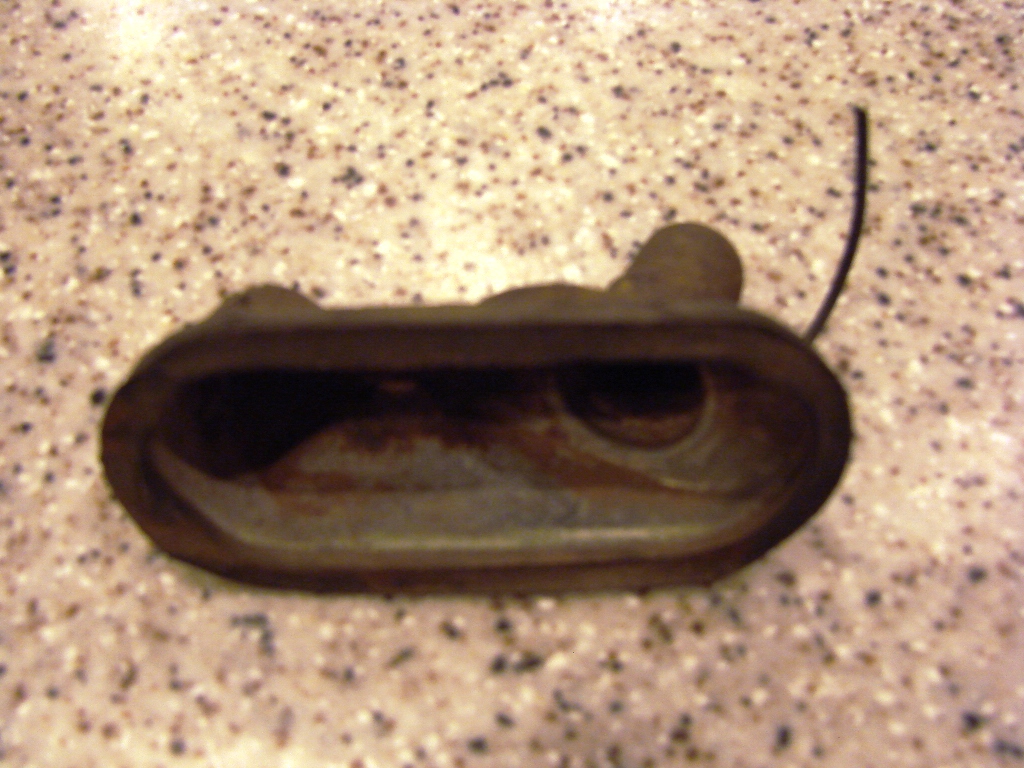
Here’s the part I’ve been excited about: The one-year-only side markers. The 1968 510 had small, arrow-shaped corner lights on the fenders, with a flat side and a curved side that blends nicely with the indentation in the body lines. They’re virtually unobtainable, unfortunately. You can purchase a “knock-off” set on ebay, but they’re quite a bit larger, they require cutting a bigger hole in the fender, and once installed, just don’t look right at all. Since buying the 510, I’ve been scouring forums, ebay and other Datsun sites, buying bits and pieces wherever I could find them. They all went in a box, awaiting today. Scrounging through the box, I selected the best bits and started refurbishing. The amber lenses were polished, the stainless trim as well, and I took a beadblaster to the metal housings.
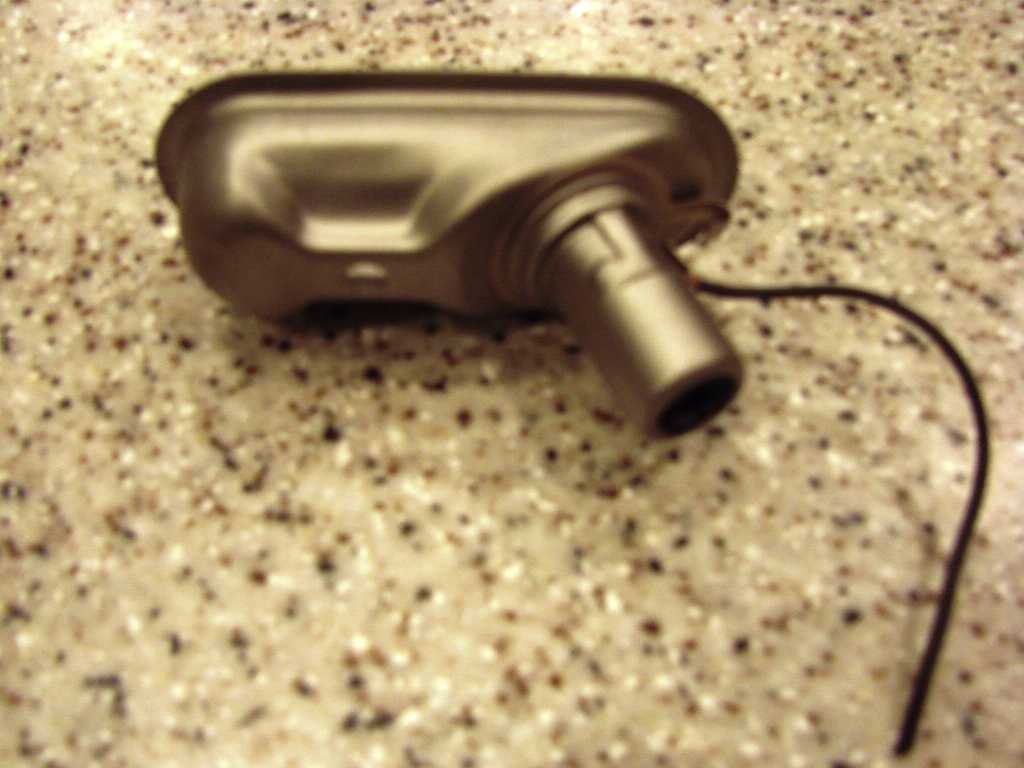
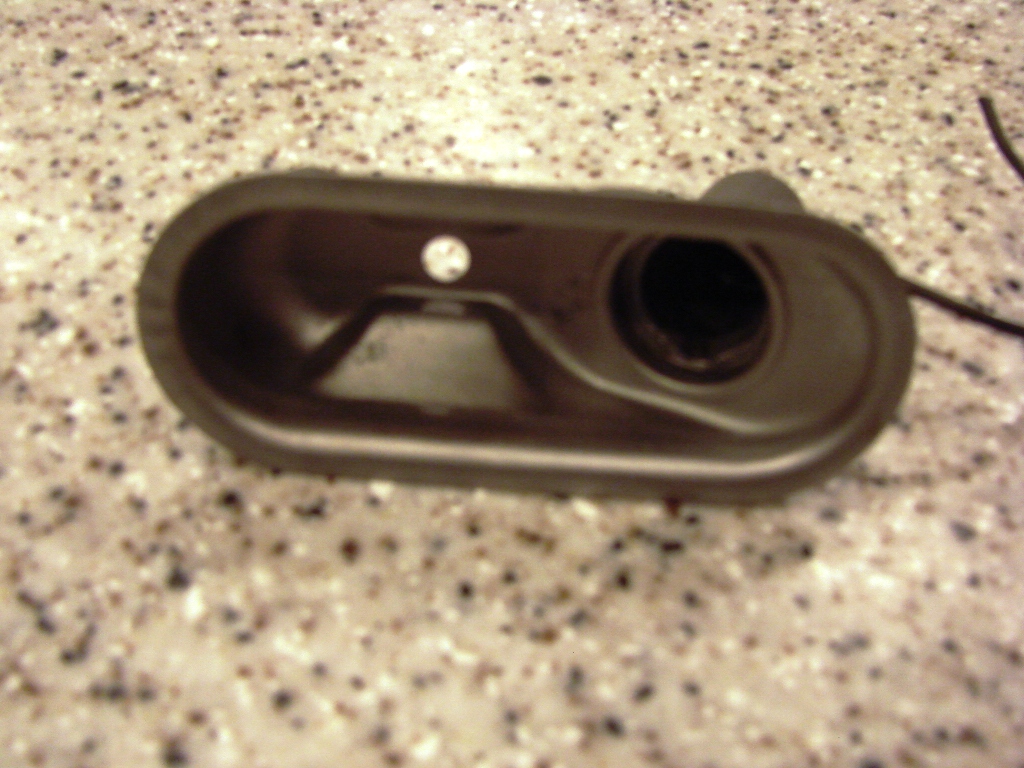
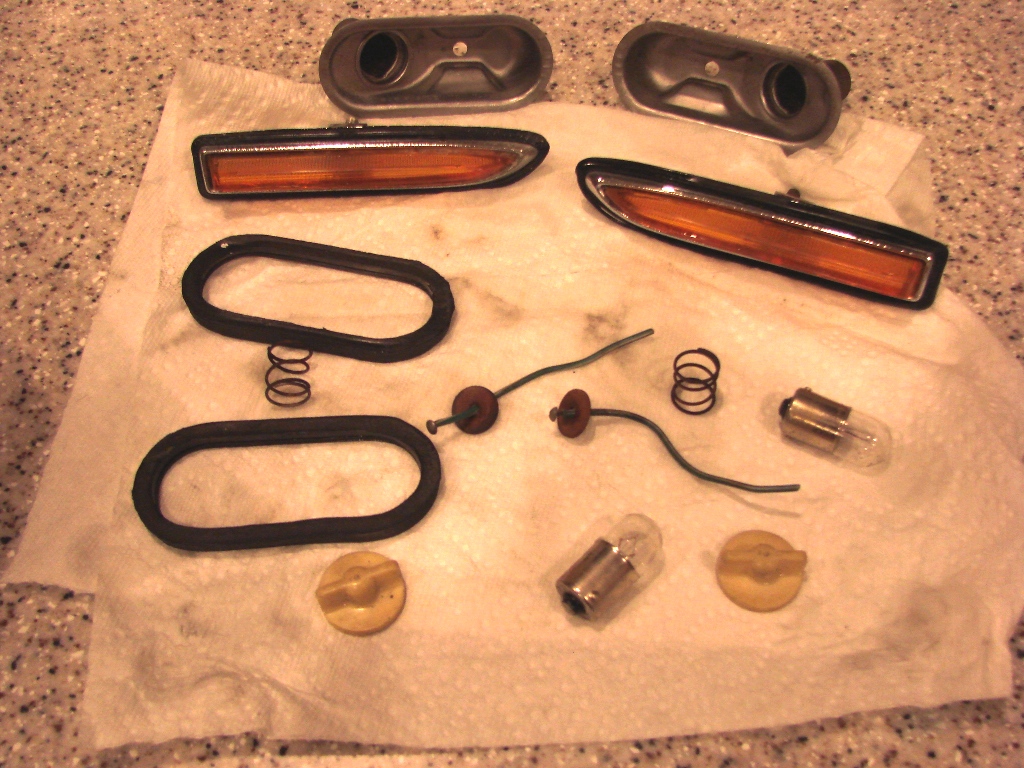
After a coat of clear, the housings looked presentable. New bulbs, fresh wires, and VOILA! A pretty clean set of ’68 corner markers:
![]()
One more weekend in the books, but a lot closer to wrapping this project up. We’ll get the radiator, thermostat housing and fan installed in the next episode, get an alternator installed, and who knows what else. The list is getting shorter!
Click here for Part 10 of the 510 build, where we’ll install the cooling system!