Article Series
- 1972 Datsun 240Z RB25DET swap and restoration series
- Datsun 240Z restoration and modification - Part 2
- Datsun 240Z restoration and modification - Part 3
- Datsun 240Z restoration and modification - Part 4
- Datsun 240Z restoration and modification - Part 5
- Datsun 240Z restoration and modification - Part 6
- Datsun 240Z restoration and modification - Part 7
- Datsun 240Z restoration and modification - Part 8
- Datsun 240Z restoration and modification - Part 9
- Datsun 240Z restoration and modification - Part 10
- Datsun 240Z restoration and modification - Part 11
- Datsun 240Z restoration and modification - Part 12
- Datsun 240Z restoration and modification - Part 13
- Datsun 240Z restoration and modification - Part 14
- Datsun 240Z restoration and modification - Part 14

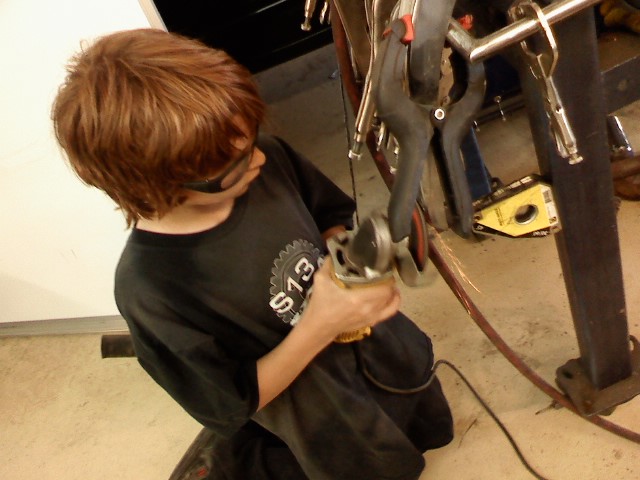
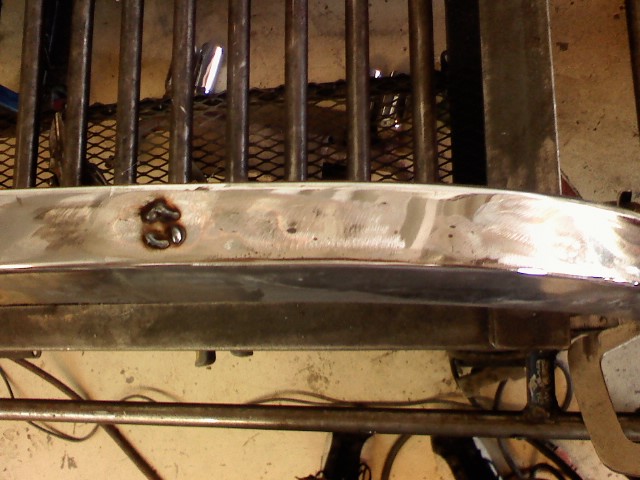
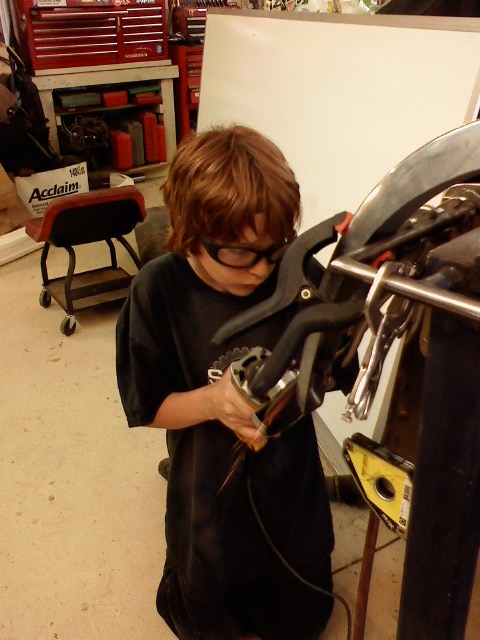
While Jason was busy designing, cutting, welding, and assembling, I got to work on the bumpers. The rubber had some cracks and nicks in it, and I just couldn’t see replacing rubber strips that I never liked in the first place. So, I removed the bump strips and overriders and began welding in all the holes. Now, this was my first real lesson in welding (aside from some gas welding back in high school shop class), and it turns out that this was a good project to start with. As the holes were filled, the clean lines of the naked bumpers told me I’d made a good choice. I still wasn’t sure whether they’d be powercoated or rechromed, so we made sure to fill and smooth each weld thoroughly. Darian (our younger son) got in on the action as well – Jason showed him how to use a grinder to clean up the welds and smooth them flush with the rest of the bumper.
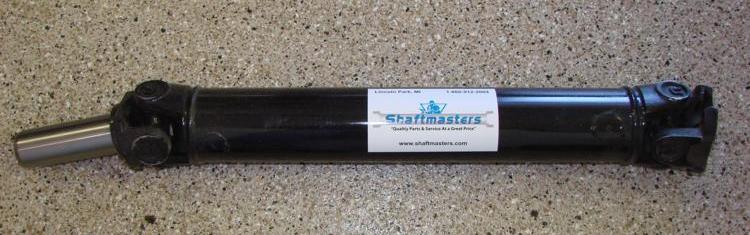
Shaftmasters has always been my “go to” shop for any driveshaft work, and David hooked us up right. We sent him the measurements for the new shaft, and it arrived within the week. It’s a beautiful piece, and with the length of the RB transmission and the length of the differential, it makes for a pretty short shaft.
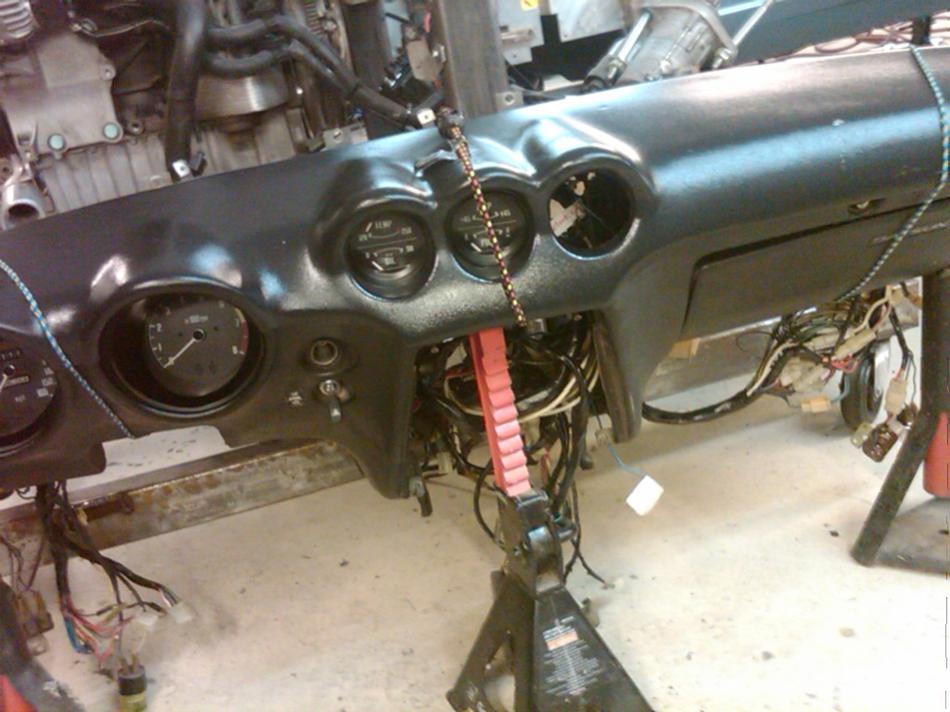
Wiring an RB into an S30 isn’t an easy task, but again, Jason wanted to tackle this one without any outside help. Each wire pinout was labeled as to its function, and a lot of effort went into retaining as much of the original functionality of the S30 wiring as possible. A lot of people will ditch all the original Datsun gauges and replace them with AutoMeter units, but that wasn’t the case here. Everything was modified to function as intended. The clock was removed to make room for a boost gauge, but other than that, the temp sensor, ammeter, fuel gauge, and oil gauge all function with the original gauges. At the time of this writing, we’re researching a way to convert the tach signal and speedometer signal to retain those gauges.
While the dash was out, we took that opportunity to install a dash cap to cover the unsightly cracks. Here, you can see how we held the whole thing together while the adhesive set up. It’s not a perfect solution, but it fits nicely, it’s a hell of a lot cheaper than a new dash, and unless you look closely, it’s hard to tell it from original.
A Walbro 255 fuel pump feeds the refurbished RB injectors, which Deatschwerks cleaned and flow-tested to make sure the RB always gets perfect fuel flow and atomization. A pair of 300ZX fuel filters provide cheap insurance – one at the tank and one after the pump.
Once the engine was mounted up and wired, we couldn’t resist the temptation to fire it up and hear it run. A clean RB25 running through a 3″ open downpipe is a gorgeous sound, and the decision was made to forestall construction of an exhaust until the end of the project… we’ll talk more about that later.
Now that the running gear was installed, it was time to get rid of the 4×4 stance and make sure she’d handle well enough to make use of all that newfound power!
Part 11 – Completing the suspension and rolling stock!
Questions? Comments? Just want to discuss the build? Here’s where: Building an RB25DET-powered 240Z